Die meisten Webseites beinhalten eine MySQL (MariaDB) Datenbank, hierbei ist es wichtig ein Backup der Datenbank zu erstellen. Dieses Tutorial zeigt, wie mit phpMyAdmin und in der Kommandozeile ein Datenbank Backup erstellt wird, und als Kopie auf dem Computer zu speichern.
Schritt 1 – Anmelden in phpMyAdmin
Shared Hoster stellen webbasierte Oberflächen wie das cPanel zur Verfügung. Nach Login zum Steuerungs-Dashboard findet man unter Tools – Databases den Link zu phpMyAdmin.
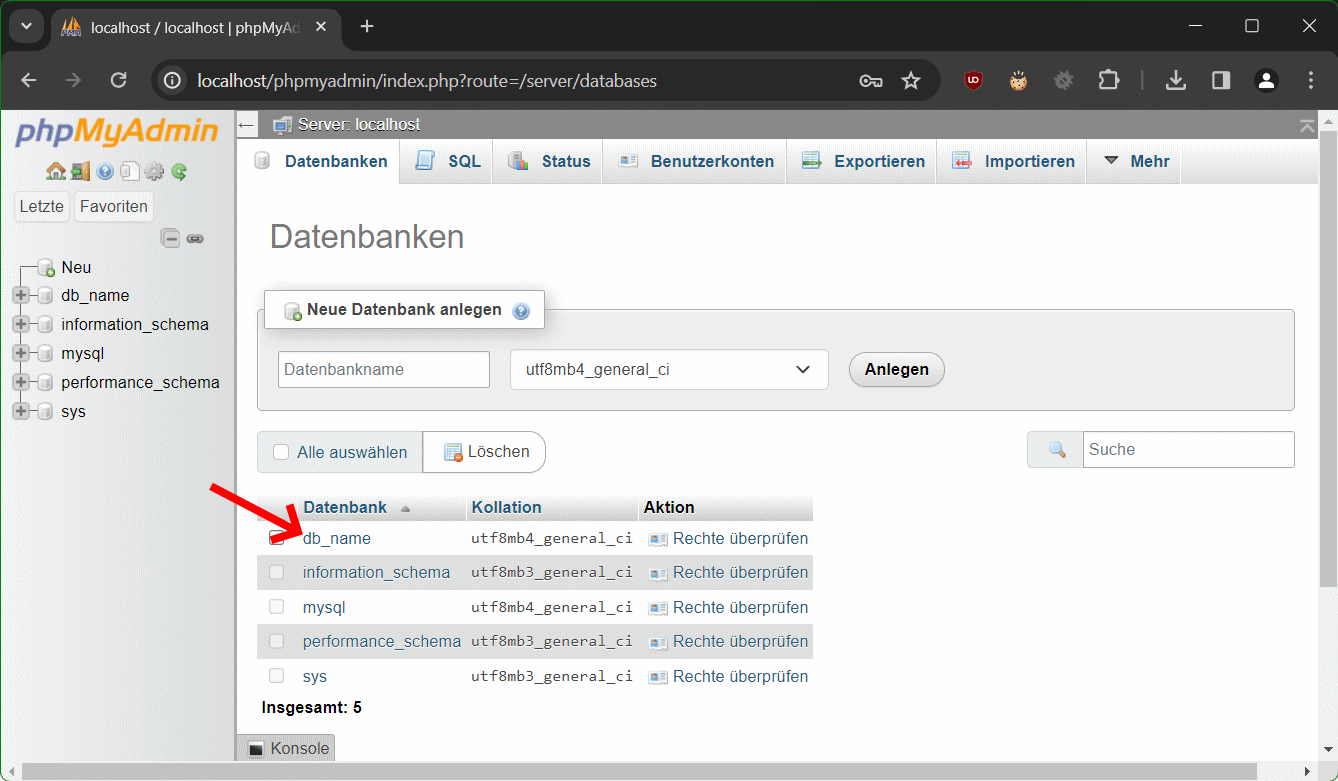
Schritt 2 – Klicke auf Datenbanken oben im Menü

Bei Schritt 3 – Klicke auf den Namen der Datenbank
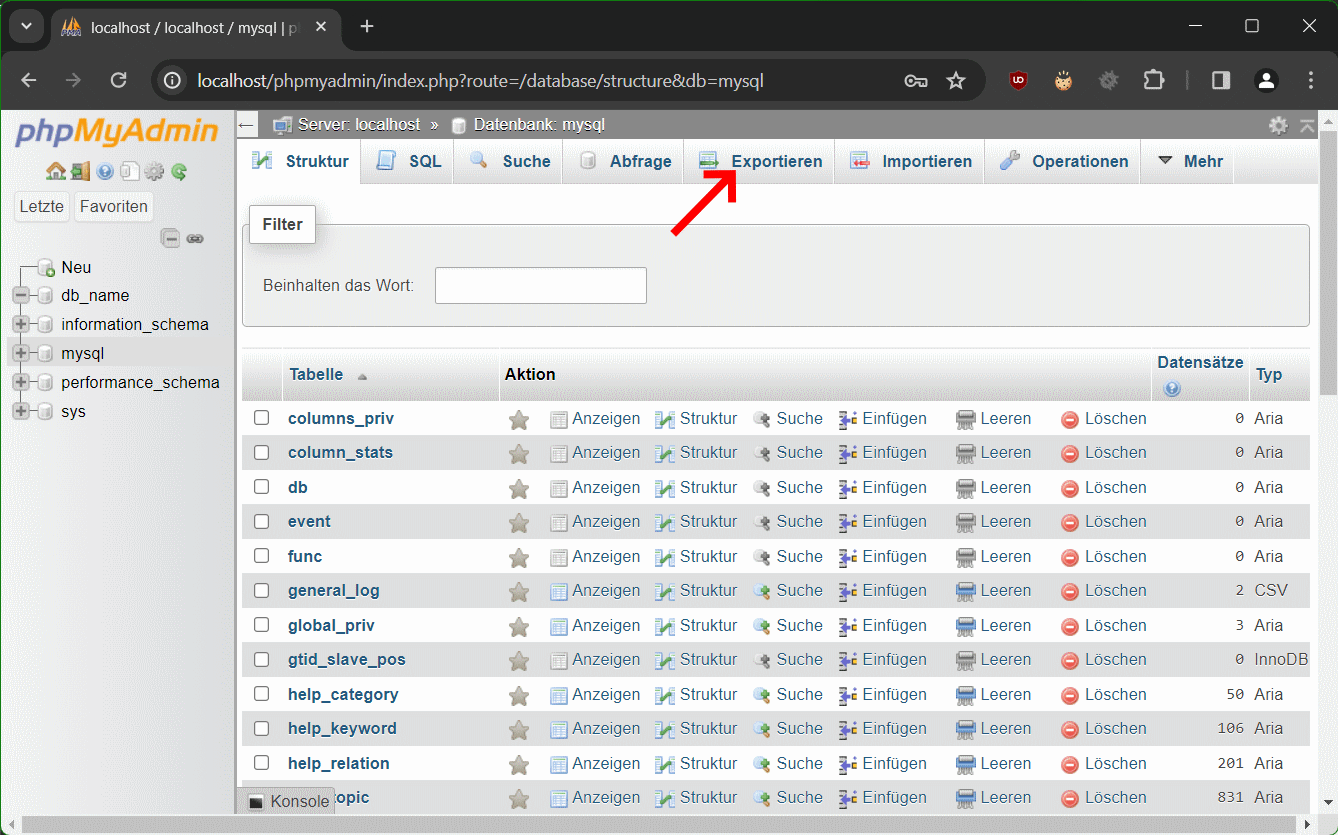
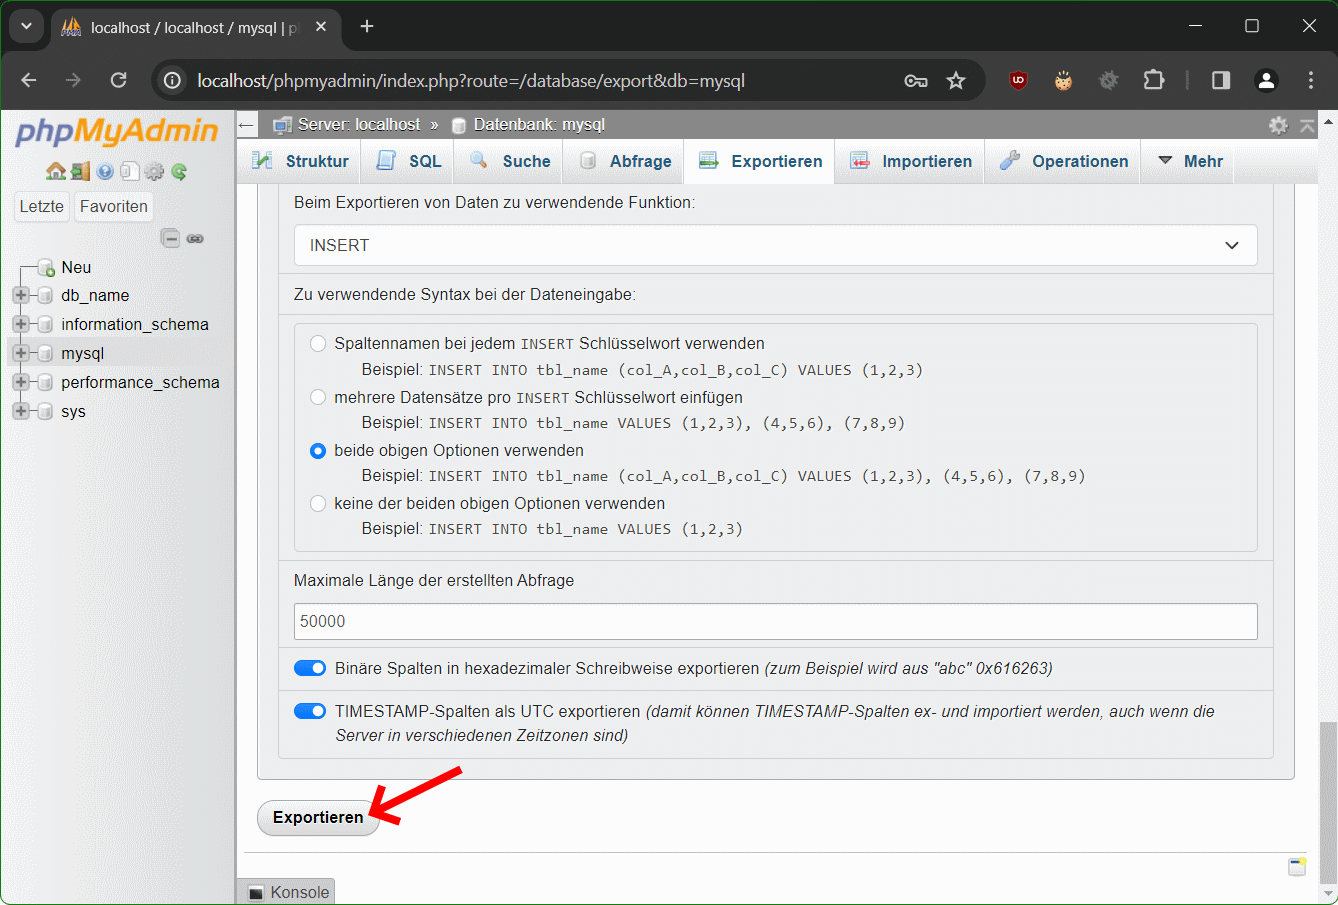
Schritt 4 – mit Exportieren ein Backup erstellen
Bei Schritt 5 – Wähle „Angepasst – zeige alle möglichen Optionen an“

Beim Exportieren sind Standardmässig alle Tabellen ausgewählt. Wir empfehlen das so zu belassen.
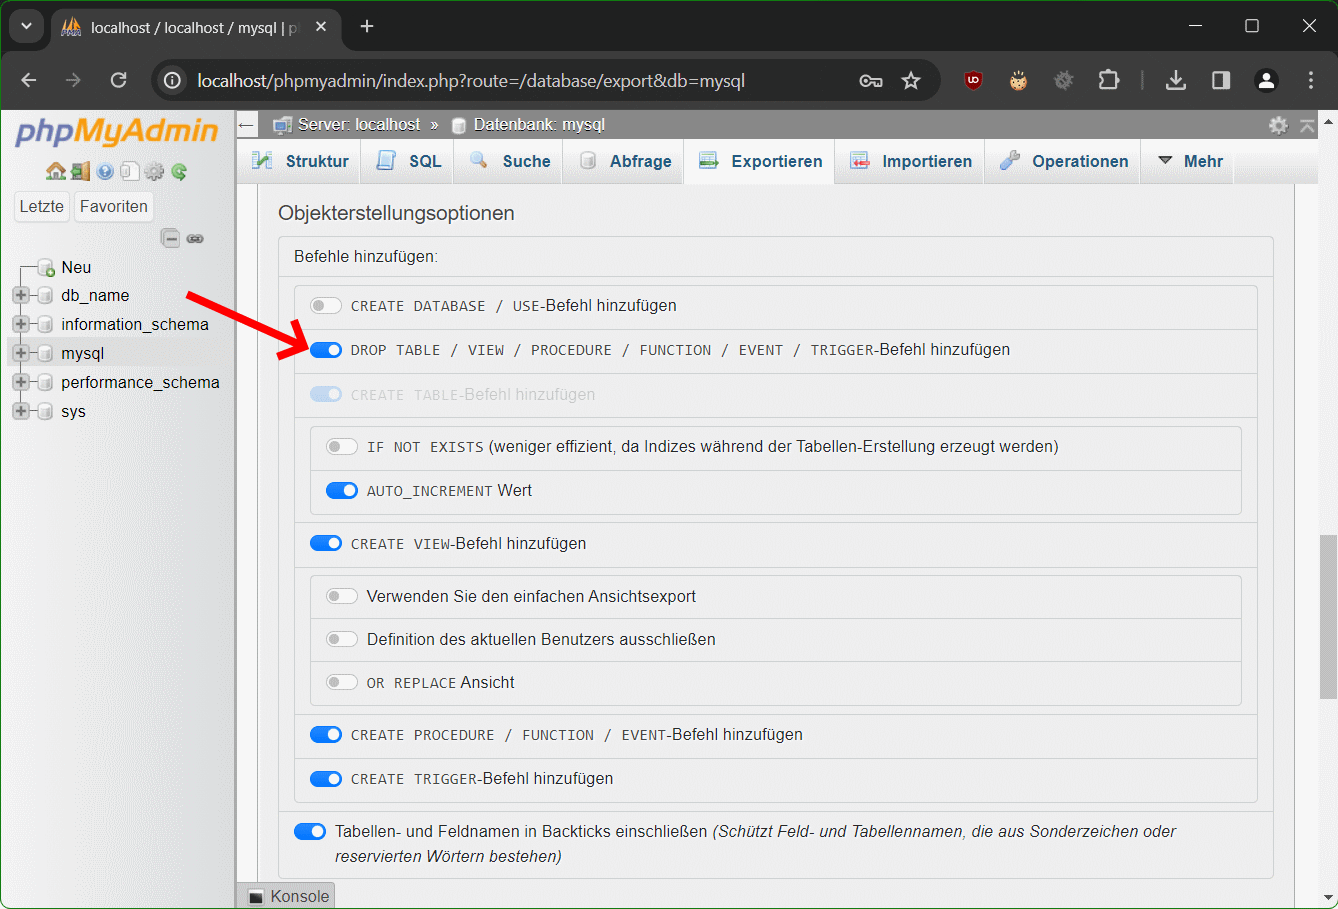
Schritt 6 – Scrolle zu Objekterstellungsoptionen
Im Bereich Objekterstellungsoptionen aktiviere den Schieberegler für DROP TABLE / VIEW / PROCEDURE / FUNCTION / EVENT / TRIGGER-Befehl hinzufügen, die zweite Option unter Befehle hinzufügen.
Schritt 7 – Scrolle runter und klicke auf Exportieren
Die exportierten Tabellen werden jetzt in einer Datei gespeichert, zum Beispiel in die Datei db_name.sql. Falls nötig, kann man den MySQL Datenbank Export wieder importieren.
Der MySQL Datenbank Backup wird als Dump in einer sql-Datei gespeichert, standardmässig im Downloads Ordner auf dem Computer.
Was ist phpMyAdmin?
Das WebUI phpMyAdmin ist eine freie Webanwendung zur Administration von MySQL-Datenbanken und deren Fork MariaDB. Die Webanwendung ist in PHP implementiert, daher kommt der Name phpMyAdmin, sie ist unter der GNU General Public License lizenziert und ist in vielen Linux-Distributionen enthalten.
Mit phpMyAdmin können die meisten Funktionen ausgeführt werden, ohne selbst SQL-Anweisungen zu schreiben, wie MySQL Datenbanken als Backup zu Exportieren, Datensätze auflisten, Tabellen anlegen/löschen, Spalten hinzufügen, Datenbanken erstellen/löschen und Benutzer verwalten.
MySQL Datenbank Backup in der Kommandozeile
Wenn die Webanwendung phpMyAdmin auf dem Server nicht installiert ist, kann ein MySQL Datenbank Backup in der Kommandozeile erstellt werden, mit dem MariaDB Backup Programm mysqldump.
$ sudo mysqldump -u root db_name > db_name.sql
mysqldump ist jetzt ein symbolischer Link zu mariadb-dump.
MySQL Datenbank Restore in der Kommandozeile
Die Wiederherstellung ermöglicht ein Restore mit dem Befehl mysql und der sql-Datei, diese als MySQL Datenbank Backup zuvor mit dem Befehl mysqldump erstellt wurde.
$ sudo mysql -u root db_name < db_name.sqlDer Beitrag hier könnte dich auch interessieren.