lebt in der Schweiz, ist System Engineer MCP bei A-Enterprise GmbH. Mitglied des UNBLOG Knowledge Network. Author und Blogger zu den Themen, Tutorials für Linux und Open Source.
How to Install VNCSERVER, VNC on Linux Server bring virtual desktop to Windows RDS Clients
Virtual Network Computing – This tutorial describes how to deploy vncserver on Fedora, CentOS and RHEL. VNC or Virtual Network Computing is a graphical desktop that allows to control a host computer (Terminalserver) remotely from a client computer. A VNC server redirects the keyboard and mouse entry from the client computer (VNC viewer) to the host computer, like known from Windows Remote Desktop Protocol RDP also known as Remote Desktop Services RDS.
This guide explain on how to set up a VNC server on CentOS 7 prepare with minimal installation and running as virtual machine. The server installation are based on Linux Mate workspace, however setup and configure VNC server using TigerVNC.
Contents
System Prepare
Install Mate Desktop and TigerVNC
Initial VNC Configuration
Configure TigerVNC
Run TigerVNC as a Service
Connect VNC Server Through SSH Tunnel
Download and using VNC clients
Appendix & Troubleshooting
Prerequisites
CentOS 7 or Fedora 29
Root access privileges
1. System Prepare
Before deploing the VNC server, update your CentOS using the Yellowdog Updater Modified – yum:
yum update -y
The VNC desktop will be available for a non-root user, thus we create a new user and add it to the wheel group for root access.
Add a new user using the following command. Belong we choose the username vncuser he will get this job:
useradd -m -s /bin/bash vncuser
passwd vncuser
Enter a new password for vncuser.
Now add the user to wheel group able to gain root access.
usermod -a -G wheel vncuser
After all done, login as vncuser and then run sudo su:
su - vncuser
sudo su
Enter the password for vncuser and make sure you elevated root:
2 . Install Mate Desktop and TigerVNC
Linux provide several desktop environments such as Gnome, KDE, LXDE, XFCE and many more. In this guide, we will be using the Mate desktop as VNC desktop workspace. Mate desktop is a lightweight and a continuation of Gnome desktop that is well suited for a server environment.
Note. you can have more than just one desktop environment on your system.
Before installing the Mate desktop, add the EPEL repository. Now we are ready to deploy the Mate desktop workspace and TigerVNC server by running yum below:
That takes a while, wait until the installation is complete. The Mate desktop workspace with TigerVNC has been deployed.
3. Initial VNC Configuration
This step will generate the vnc configuration for the vncuser. Login as the vncuser:
su - vncuser
Now initiate the vnc configuration for vncuser using the following command:
vncserver
You’ll be asked for the vnc server password – enter your password, this can by the same or any other.
You will require a password to access your desktops.

Password:
Verify:
Would you like to enter a view-only password (y/n)? n

New 'vm068.local:1 (vncuser)' desktop is vm068.ae.local:1

Creating default startup script /home/vncuser/.vnc/xstartup
Creating default config /home/vncuser/.vnc/config
Starting applications specified in /home/vncuser/.vnc/xstartup
Log file is /home/vncuser/.vnc/vm068.local:1.log
For view-only password, you can enable or disable it do hit y or n. The user who logs in to the server using a view-only password will not be able to control the mouse and keyboard.
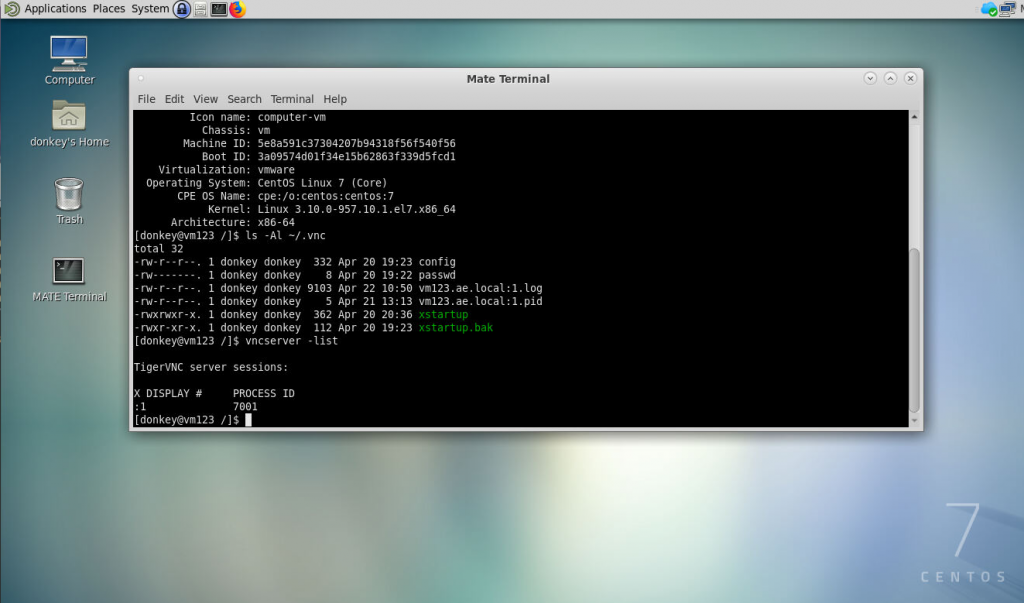
The first time we run the vncserver, it will automatically create a new configuration directory .vnc during the first vnc startup.
ls -Al ~/.vnc
vncserver -list
Now you’ll get the first vnc session waked up as shown below:
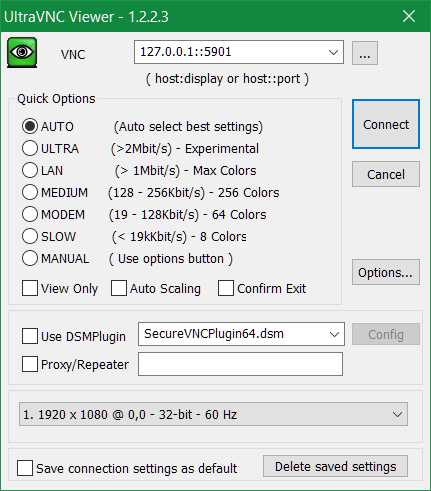
The command open up a tunnel between your localhost and the VNC server. The port 5901 on localhost will be forwarded to the VNC server 192.168.69.68 on port 5901.
Now open vnc viewer application and start a new connection, type the VNC server address with the 127.0.0.1 localhost IP and port 5901 as shown below. Please remember, the password is what we have previously entered with vncpasswd
7. Download and using VNC clients
VNC viewer are available even as several free pakages for Linux, Windows and macOS clients.
Using vncviewer on Linux Gnome Desktop, the following command open a VNC session.
gvncviewer 192.168.69.68:1
Congratulations you made your first VNC session.
Mate desktop on VNC session
VNC clients are collected here and can be visited and downloaded via the links below:
If appears a black screen after successful connect from vncviewer, this cause often at the X11 cache, solve this by shutdown all vncserver instances and reset the X11 server cache, like use the command below:
If the vncserver couldn’t start in case of failed state, cause can be if SELinux is set to enforced, but SELinux blocks the access to such systemd pid file. Modify SELinux to permissive that prints warnings instead of enforcing.