Nextcloud installation and deployment on Synology DiskStation.
Synology Diskstation comes with many packages pre-installed, more additional packages can be installed from the DSM Package Manager. If you want to have Nextcloud on the Synology NAS, you still have to proceed manually. Here it is described how to deploy Nextcloud on a Disksation in a few steps. This should be possible with any Synology DS or RS series.
How it’s done
Pre-Installation
Installation
CalDAV Integration
Protection and Configuration
To prepare, some service packages must be installed as usual from the DSM Package Center.
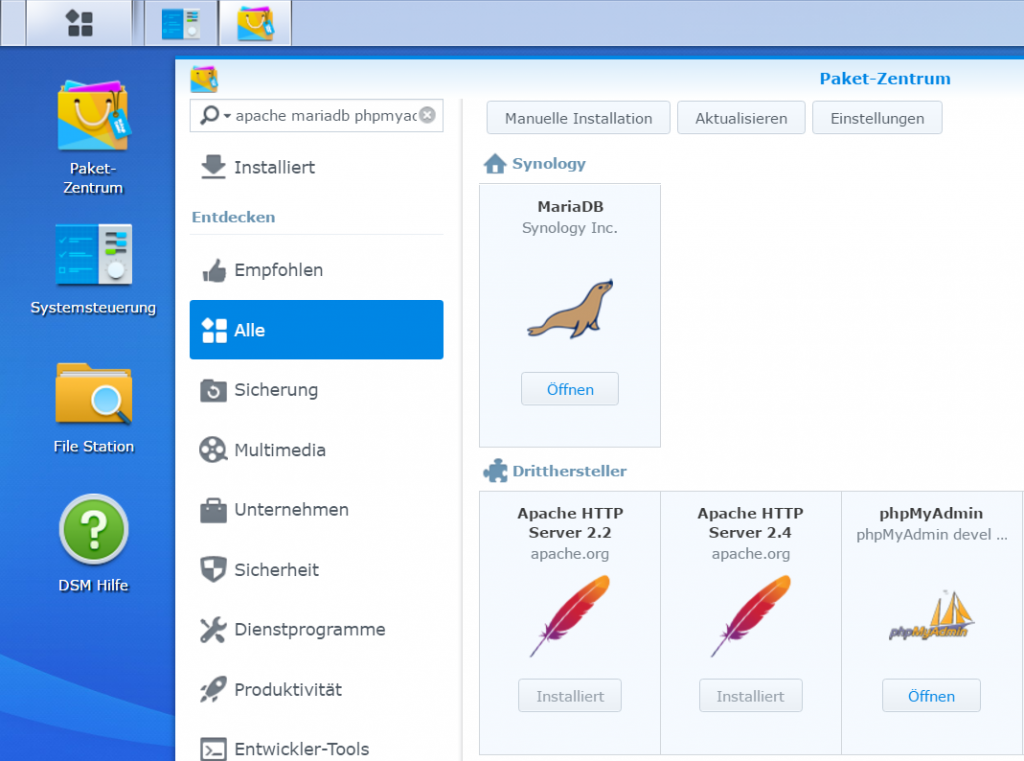
Pre-installation

The php 5.6 and PHP 7.0, Apache 2.4, phpMyAdmin, MariaDB and Web Station packages are installed.
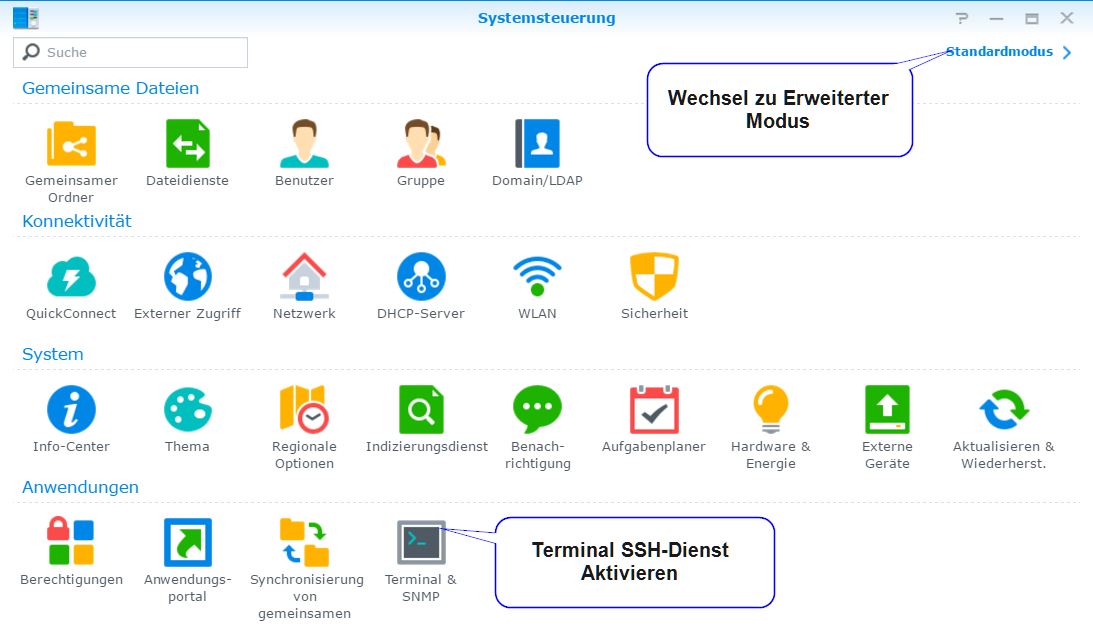
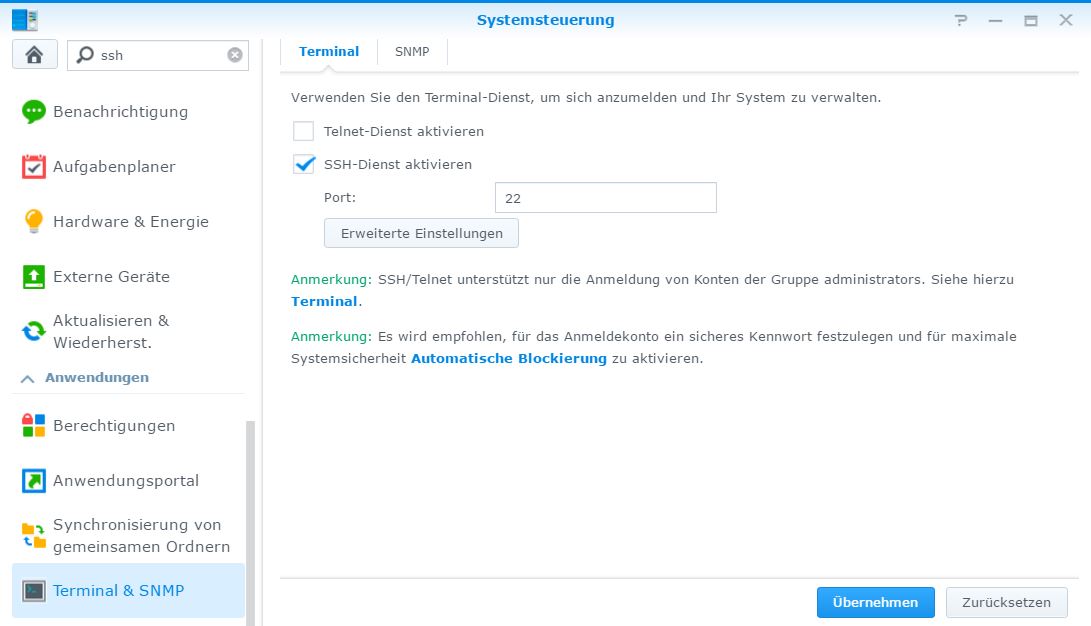
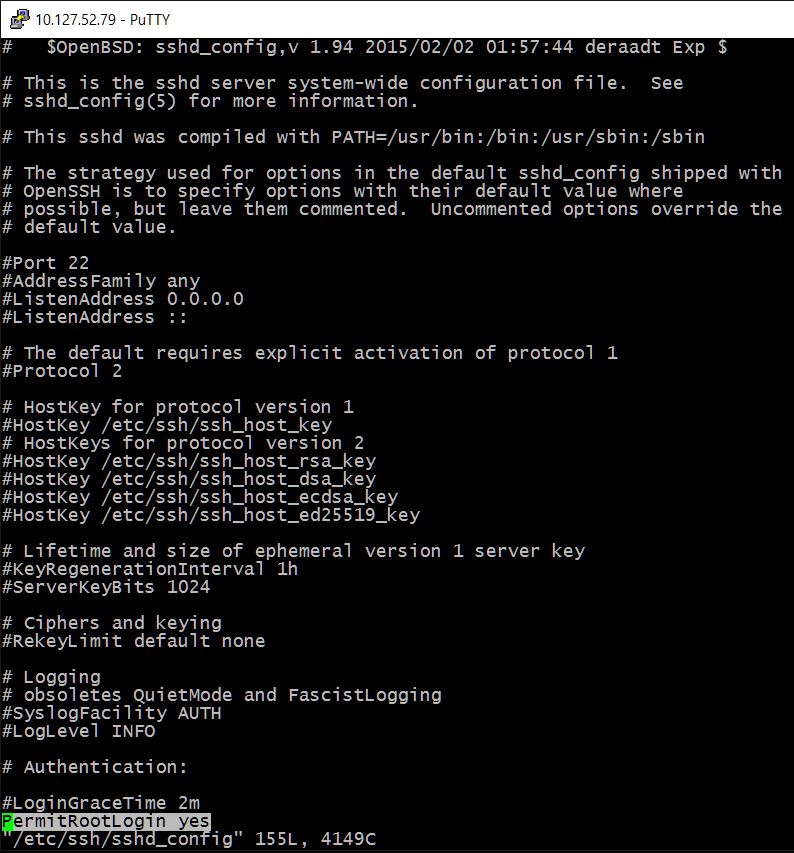
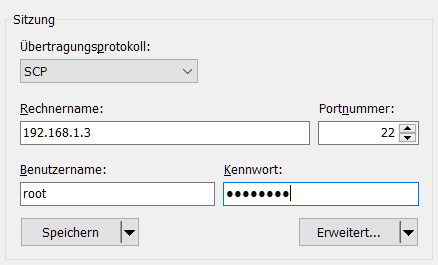
The terminal access to Synology DS is required, how to activate the SSH daemon, is in the post here.
In order to be able to log in to diskstation as root with PuTTY, you need the following command to activate root access. Or you can run sudo in each case.
$ sudo synouser -setpw root passwordDownload from Nextcloud and unzip the ZIP archive with subsequent owner and rights assignment. The Document_Root here is /volume1/web/nextcloud.
$ cd /volume1/web
$ curl -O https://download.nextcloud.com/server/releases/latest.zip
7z x latest.zip
$ chown -R http:http nextcloud
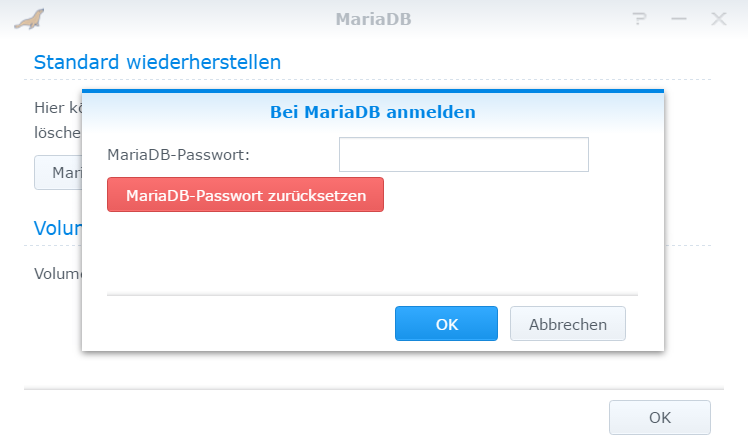
$ chmod -R 0777 nextcloudA MySQL root password must be assigned.
$ mysql -u root -ppassword
ALTER USER 'root'@'localhost' IDENTIFIED BY 'newpassword';
The MySQL-root password can of course also be changed from the DSM.
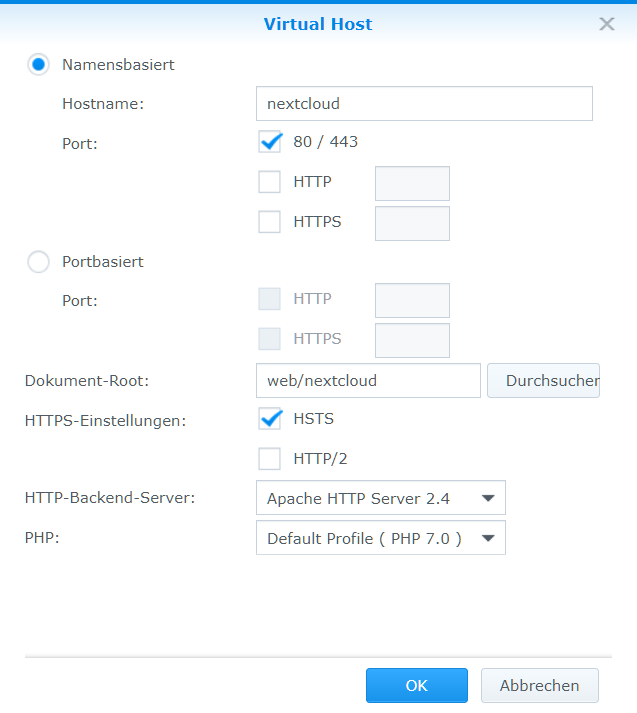
Now the DSM Web Station is opened to create the web server configuration and a virtual host.
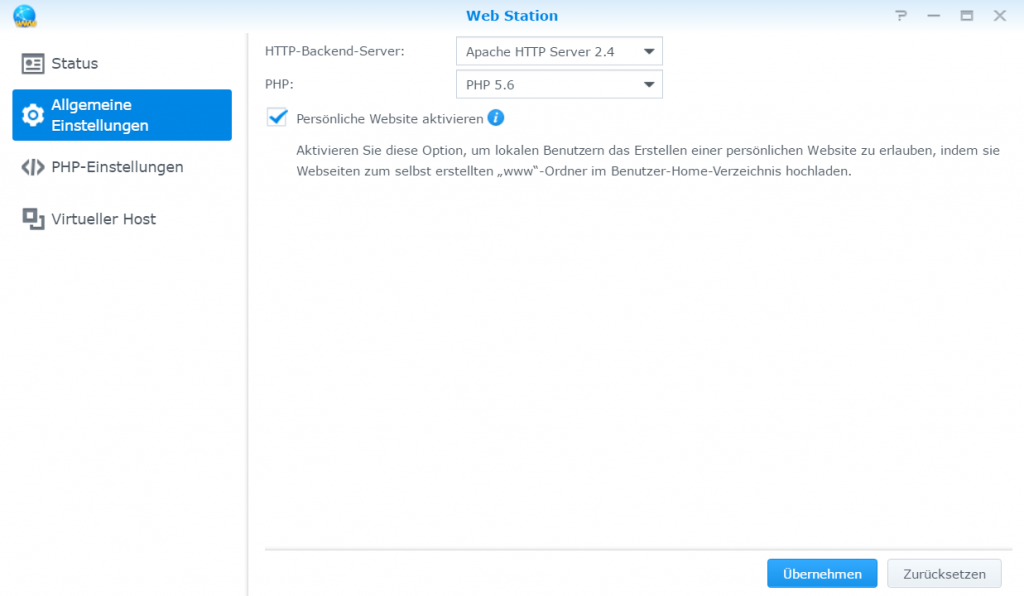
Web Station General Settings
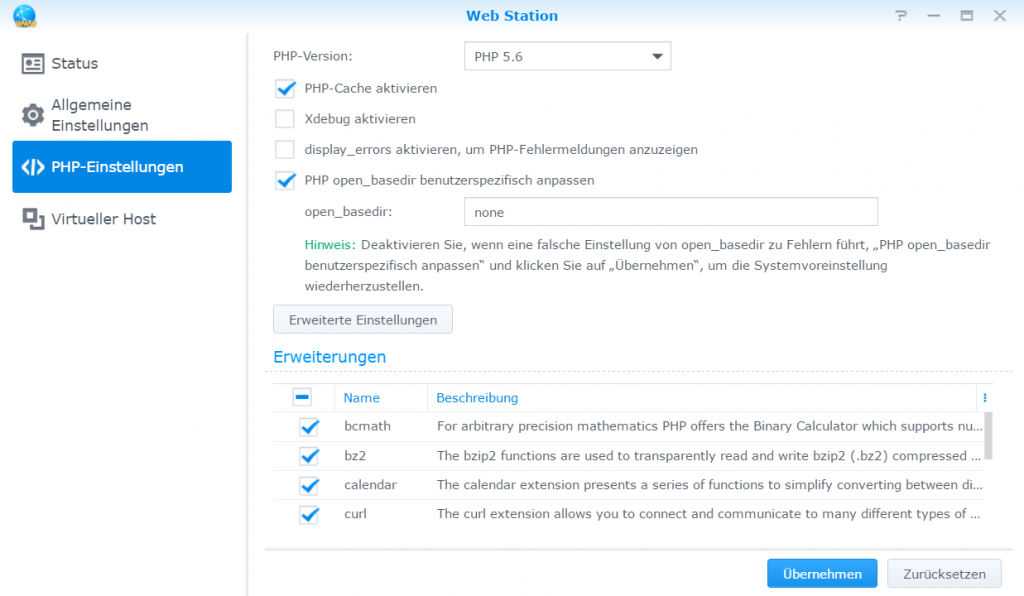
Web Station PHP settings. The PHP open_basedir field must be none.
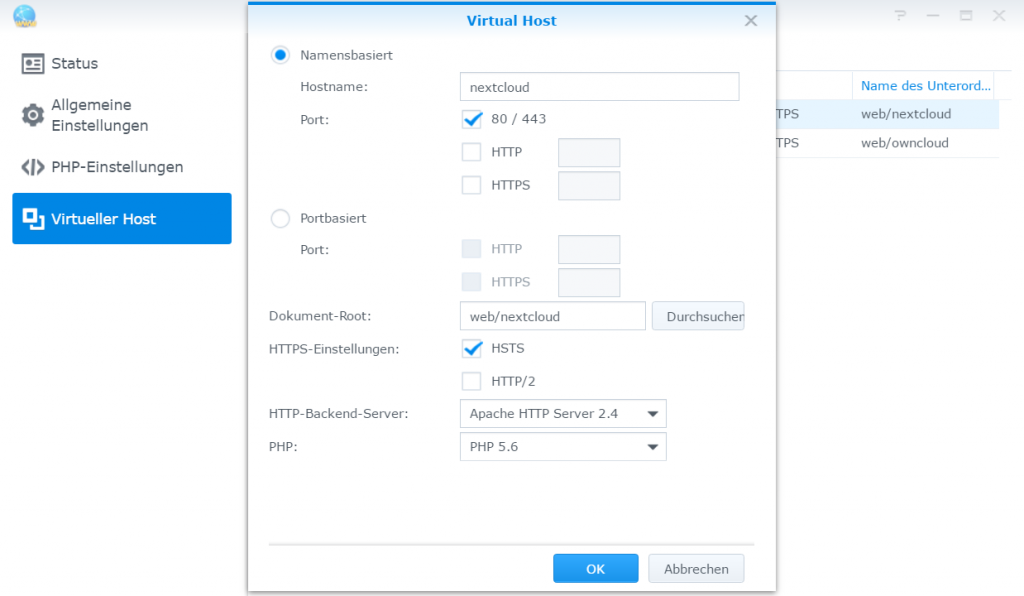
Web Station Create Virtual Host.
Installation
Now the URL can be opened in the Bowser https://ip_adresse_od_hostname/nextcloud
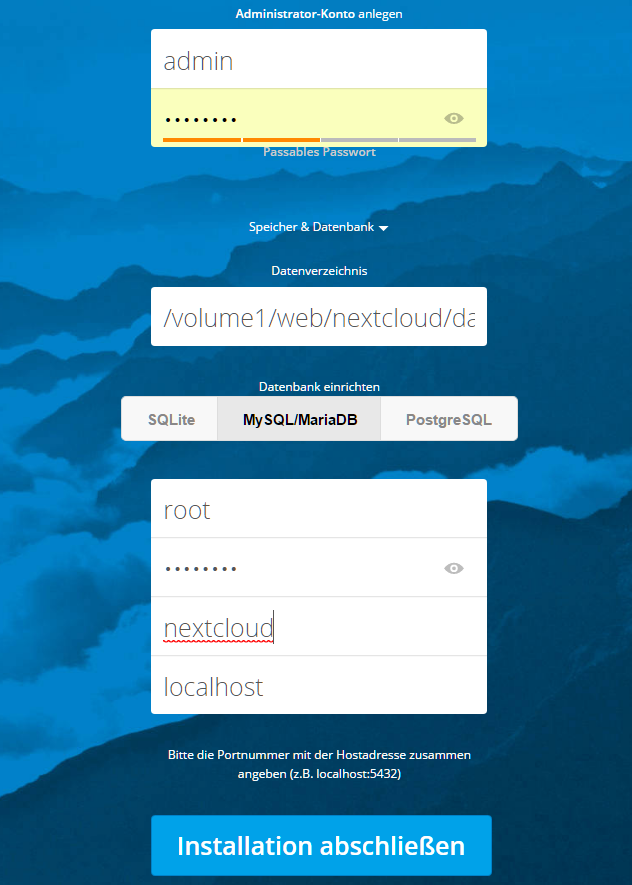
The administrator account can be any name, it is not related to the Synology users. MySQL/MariaDB is selected, the MySQL-root password is the previously assigned password.
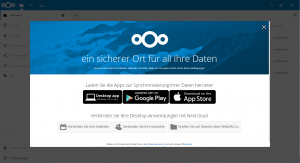
After about 2 min. the installation is completed and the intro page appears.
If our own Nextcloud is to be accessible from the Internet, a static NAT port forwarding to the internal Synology Diskstation on the firewall must be made. Furthermore, the file config.php located under nextcloud/config must be adapted. In the array, another line is added with our FQDN, which was previously entered in the DNS zone foo.io.
<?php
$CONFIG = array (
'instanceid' => 'lckfp7we8ddv',
'passwordsalt' => '&9p40M+uM3cZBPrWKwV)EEwSoPtvJ',
'secret' => 'klkajd8&DF3A.$=o?pqHAR4@+LXD6n-LaQhbfgt&/H',
'trusted_domains' =>
array (
0 => '123.123.123.123',
1 => 'nextcloud.foo.io',
),
'datadirectory' => '/volume1/web/nextcloud/data',
'overwrite.cli.url' => 'https://123.123.123.123/nextcloud',
'dbtype' => 'mysql',
'version' => '13.0.0.14',
'dbname' => 'nextcloud',
'dbhost' => 'localhost',
'dbport' => '',
'dbtableprefix' => 'oc_',
'dbuser' => 'oc_admin',
'dbpassword' => 'LeG2iRzcvc1XT8mpoGntS18GeYXGi3',
'installed' => true,
'mail_smtpmode' => 'smtp',
'mail_smtpauthtype' => 'LOGIN',
'mail_from_address' => 'noreply',
'mail_domain' => 'foo.io',
'mail_smtphost' => 'smtp.mailer.io',
'mail_smtpport' => '25',
'maintenance' => false,
);
CalDAV Integration
With CalDAV Synchronizer for Outlook it is possible to easily synchronize the Outlook calendar, the address book and the tasks, so that every desktop and mobile client is integrated via the private Nextcloud.
The free Outlook plugin from the University of Applied Sciences Technikum Wien, which synchronizes between Outlook and CalDAV Server, supports the Outlook versions 2019, 2016, 2013, 2010 and 2007. The download is available on Github and at Sourceforge.
Protection and configuration
To secure synology DS accessible from the Internet, access rights should be restricted with the following chmod command:
$ cd /volume1/web
$ chmod -R o-w nextcloud
Furthermore, HTTPS should be used, Nextcloud recommends making the following setting on the Apache web server configuration:
$ vi /usr/local/etc/apache24/sites-enabled/httpd-vhost.confThis redirects the call to the web page from http to https (SSL), in the Virtual Host Configuration under Add ServerName:
<VirtualHost *:80 *:443>
   ServerName nextcloud.foo.io
   Redirect permanent / https://nextcloud.foo.io/
</VirtualHost>
In order for an HTTP connection to be rejected when trying to establish an HTTP connection, the module can be added mod_headers.c.
<VirtualHost *:80 *:443>
    ServerName nextcloud
    SetEnv HOST nextcloud
    DocumentRoot "/volume1/web/nextcloud"
    <IfModule dir_module>
        DirectoryIndex  index.html index.htm index.cgi index.php index.php5
    </IfModule>
    <IfModule mod_headers.c>
        Header always set Strict-Transport-Security "max-age=15552000; includeSubDomains"
    </IfModule>
    <Directory "/volume1/web/nextcloud">
        Options MultiViews FollowSymLinks ExecCGI
        AllowOverride All
        <IfModule authz_core_module>
            Require all granted
        </IfModule>
    </Directory>
</VirtualHost>
The search engine crawlers should be informed that our Nextcloud website should not be indexed. The text file robots.txt is located in the document root, in the directory /volume1/web/nextcloud.
cat << EOF > robots.txt
User-agent: *
Disallow: /
EOF
Use Copy Paste to create the robots.txt text file.
For performance optimization, the PHP opcache can be configured. Add the values to the PHP configuration user-settungs.ini as follows:
cat << EOF >> /volume1/@appstore/PHP5.6/usr/local/etc/php56/conf.d/user-settings.ini
opcache.enable=1
opcache.enable_cli=1
opcache.interned_strings_buffer=8
opcache.max_accelerated_files=10000
opcache.memory_consumption=128
opcache.save_comments=1
opcache.revalidate_freq=1
EOF
By copy pasting in the user-settings.ini file.
Now the Synology DS only needs to be restarted for the configuration to be active.
Annex
With Apache 2.4 and PHP 7, Nextcloud runs a lot more performantly, so it is recommended to run the Web Station for the Virtual Host of Nextcloud with the current Web Services.