All posts by Don Matteo

lebt in der Schweiz, ist System Engineer MCP bei A-Enterprise GmbH. Mitglied des UNBLOG Knowledge Network. Author und Blogger zu den Themen, Tutorials für Linux und Open Source.

Enable Synology SSH root Login

Synology from DSM 6 offers the possibility like for Linux experts to use the SSH terminal, able to login as root. NAS are mostly behind firewalls and cannot be reached from Internet side via SSH, login as a user with subsequent “sudo su root” is considered as an additional effort. However, there is the option of logging in as root, as shown below.

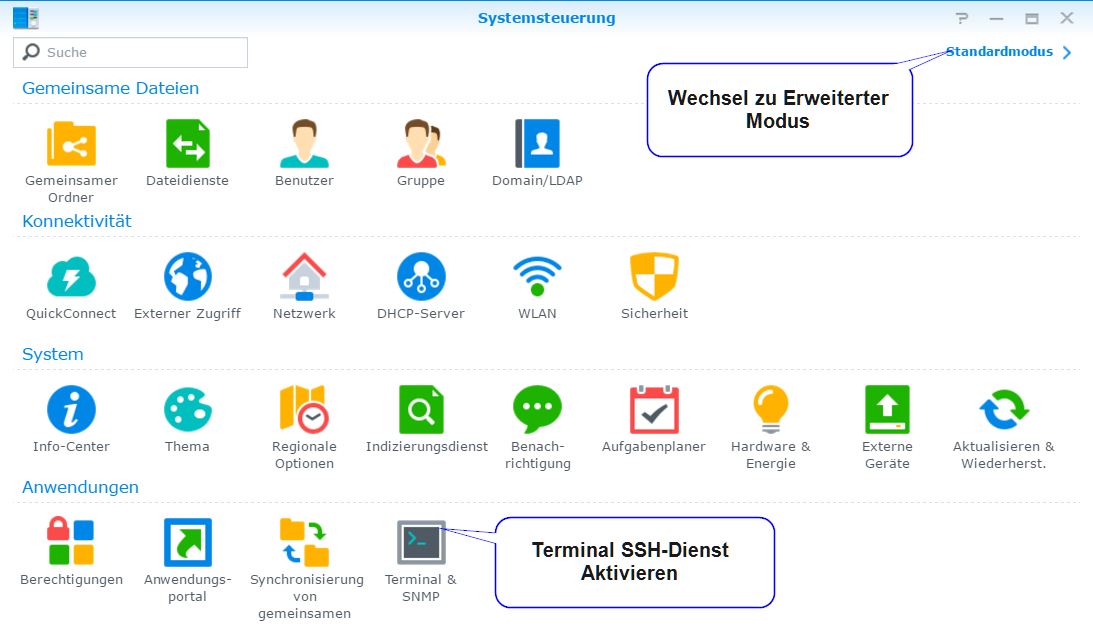
First, the DSM Control Panel is called up, Extended mode must be activated so that the required icon Terminal & SNMP appears.

Control panel

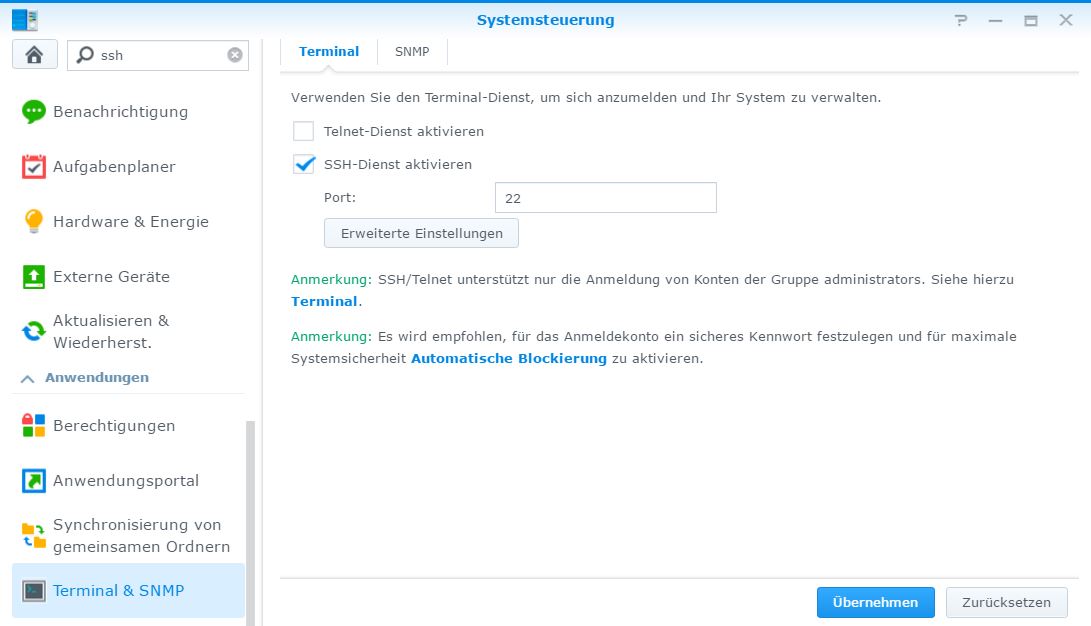
Under Terminal & SNMP the SSH-Service just can enable.

SSH-Service enabled

Now establish an SSH connection to the Synology Diskstation using PuTTY or KiTTY and log in as admin, then change the root password.

sudo synouser -setpw root admin_passwort

Instead of admin_password, enter the same admin password that is used when logging in to Synology DSM.

A message appears that you should respect privacy and be careful when typing. With great power comes great responsibility.

We trust you have received the usual lecture from the local System
Administrator. It usually boils down to these three things:

    #1) Respect the privacy of others.
    #2) Think before you type.
    #3) With great power comes great responsibility.

Password:

  The password must be confirmed a second time for security.

Configure Synology SSH service to enable root login.

sudo vi /etc/ssh/sshd_config

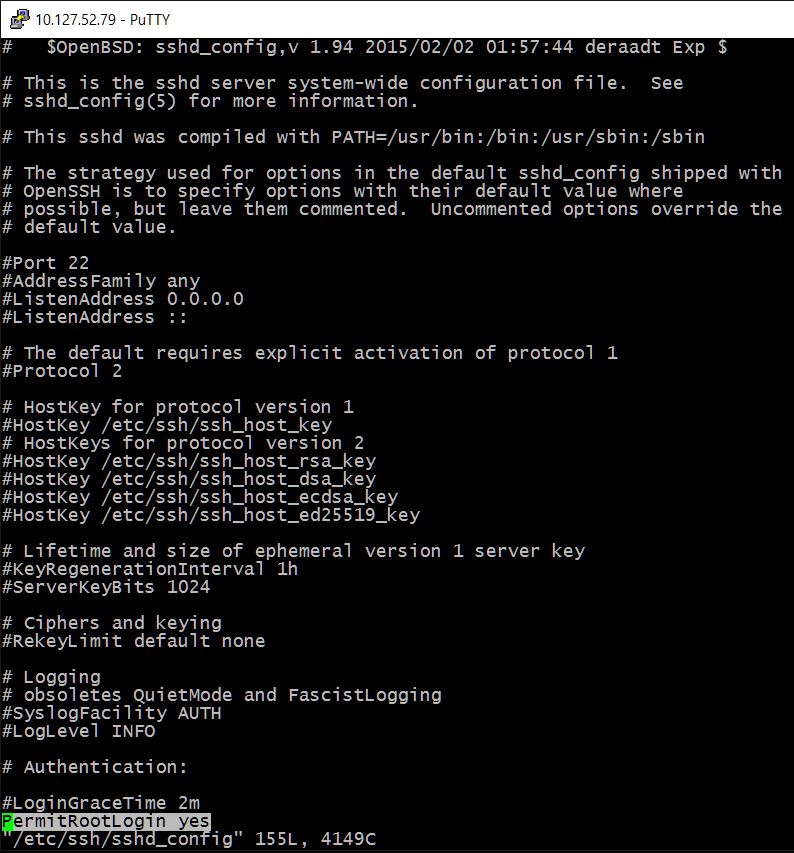
Modify by press the i key the option #PermitRootLogin prohibit-password marked as a comment line by removing the # beforehand and set to yes.

PermitRootLogin yes

Save in vim with press the ESC key and hit ZZ (uppercase).

Now restart the DiskStation, or deactivate and reactivate the SSH service in the Control Panel, the change will take effect, now root@diskstation can log in directly to the Synology NAS.

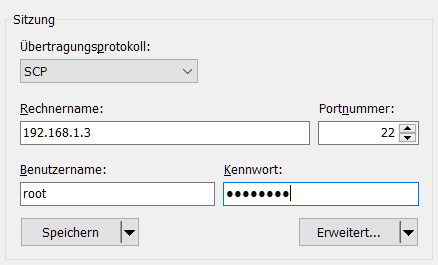
  If you want to log in as root with WinSCP, the transmission protocol SCP (not SFTP) must be selected.

w32tm NTP Windows Time Server Configuration

w32tm Windows Server NTP Network Time

Correct time synchronization in an AD domain environment is a prerequisite for stable operation. This article describes how NTP (w32tm) is configured on a Windows Server (FSMO). As a rule, the PDC operations master is the NTP service server in a forest. A PDC emulator in a domain is synchronized with an external time source. In order for a domain controller to be regarded as a reliable time source, this must be specified explicitly.

w32tm time server

In order to make the PDC emulator a reliable time source that regularly synchronizes with time servers on the Internet, the following commands from PowerShell are executed as administrator:

net stop w32time
w32tm /config /syncfromflags:manual /manualpeerlist:"0.ch.pool.ntp.org 1.ch.pool.ntp.org"
w32tm /config /reliable:yes
net start w32time

Show which time server is currently in use.

w32tm /query /source

Execute the time synchronization immediately.

w32tm.exe /resync /rediscover /nowait

Any clients and servers in domain forest as well as shared storages can now synchronize the time with the PDC emulator.

The firewall permit UDP port 123 inbound, e.g. allow outgoing.

The NTP configuration can also be done via GPO by calling gpmc.msc.

Computerkonfiguration/Administrative Templates/System/Windows-Timeservice/Timeserver
Group Policy Management Console

Following Test Displays a graph of the offset between synchronizing computers.

w32tm /stripchart /computer:pdc.domain.local /samples:1 /dataonly
W32tm stripchart

The configuration can also be checked in the registry.

HKLM\SYSTEM\CurrentControlSet\Services\W32Time\Parameters

What is w32tm

In computing, w32tm is a command-line tool of Microsoft Windows operating systems used to diagnose problems occurring with time setting or to troubleshoot any problems that might occur during or after the configuration of the Windows Time service. It was introduced as a standard feature of Windows XP.

The command can be used to convert an NTTE or NTP formatted date into a readable format.