Run the SYSTEM and Trusted Installer service account with AdvancedRun
One would think that as an administrator authenticated to Windows, you have all the permissions to make changes in the registry, also under HKLM/SECURITY, to install software, or to change, overwrite or delete files and directories.
Windows service account SYSTEM and Trusted Installer are owner of system files and registry keys
Trusted Installer is a service account used by the Windows Modules Installer Service. The Trusted Installer service running under the Trusted Installer user has exclusive permissions to everything related to Windows updates and optional Windows components.
Windows uses the SYSTEM account at logon for internal tasks and processes, it manages the rights of the SYSTEM account itself. If you look in the user management, you will notice that this account does not appear there, and it can not be added to the group.
Administrators may be required to run programs in the context of the SYSTEM or Trusted Installer accounts if they own files and registry keys. Since the Windows on-board resources do not provide an adequate procedure for this task, free tools can take over this task.
Administrators could take ownership of files and folders owned by SYSTEM or Trusted Installer. However, this would potentially affect system services and processes if the owner is not undone.
It is better to run programs such as regedit.exe or Explorer under these accounts to modify files or registry entries that belong to these particular service accounts.
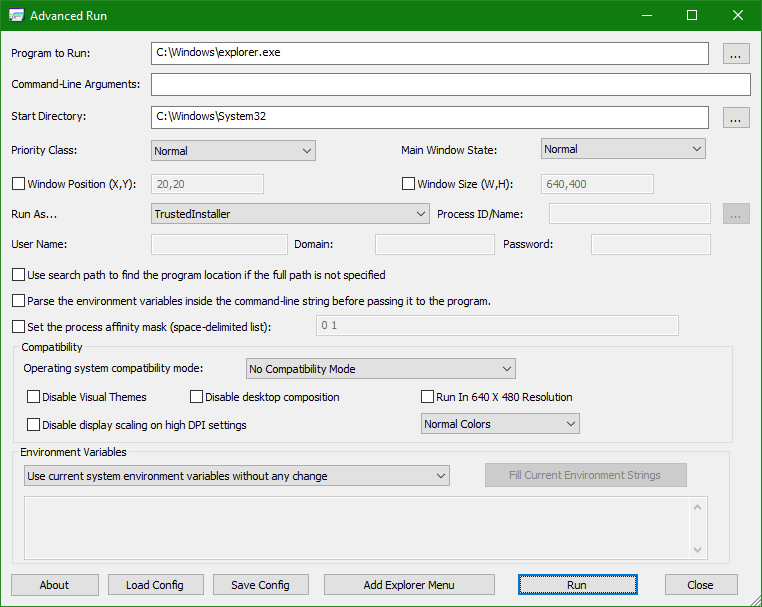
Run Program with AdvancedRun as SYSTEM und Trusted Installer
Nirsoft’s AdvancedRun utility makes it easy to run programs with many options as special users in Windows.
AdvancedRun has many useful features beyond running as a SYSTEM or Trusted Installer. It is also allowed to run as NetworkService or LocalService.
AdvancedRun Features:
Run program with user of another running process
Run a program as another logged-in user without knowing and having to enter their password.
Run RegEdit as a SYSTEM user. In this mode you can access the key HKEY_LOCAL_MACHINE\SECURITY.
Run high-priority programs
Use other PATH environment variables without changing the actual PATH
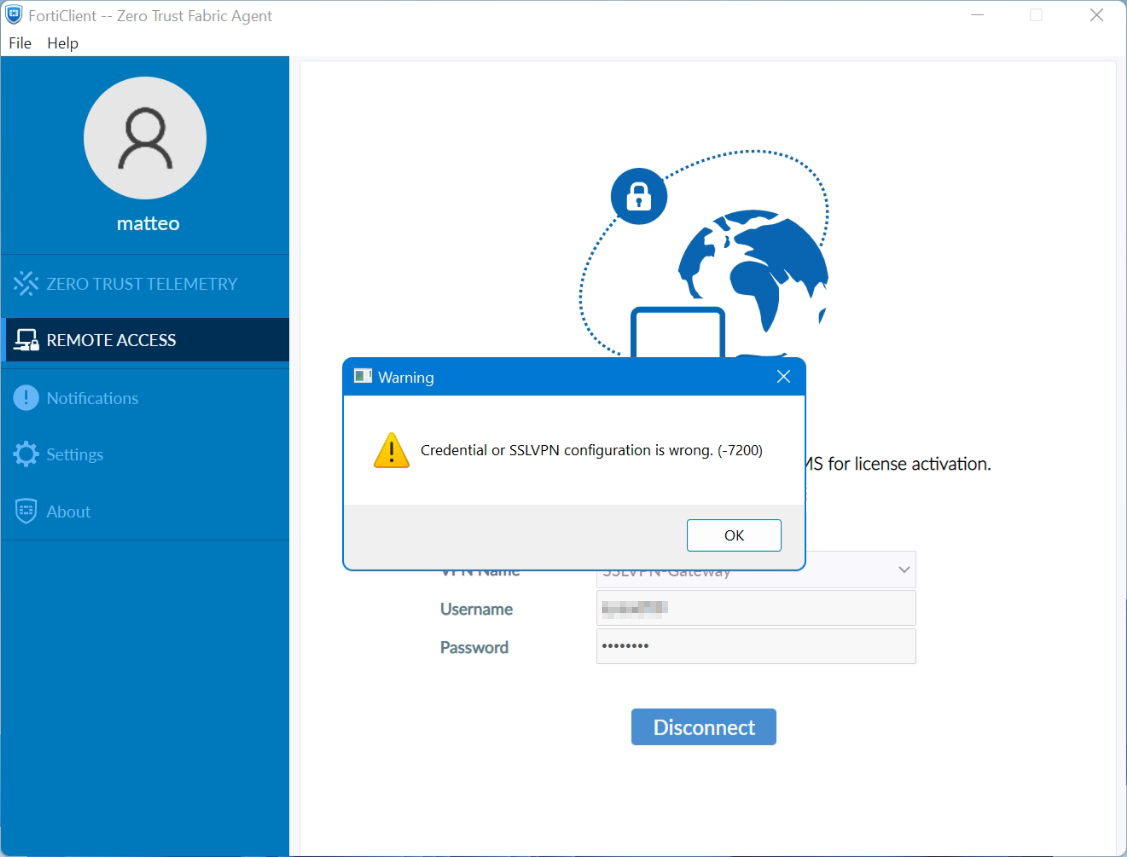
FortiClient Error: Credential or ssl vpn configuration is wrong (-7200)
When trying to start an SSL VPN connection on a Windows 10, Windows Server 2016 or 2019 with the FortiClient, it may be that the error message “Credential or ssl vpn configuration is wrong (-7200)” appears. The reason to drop connection to the endpoint during initializing caused by the encryption, which can be found in the settings of the Internet options.
Another symptom can be determined, the SSL-VPN connection and authentication are successfully established, but remote devices cannot be reached, and ICMP replies are also missing and result in a timeout.
How to solve ssl vpn failure
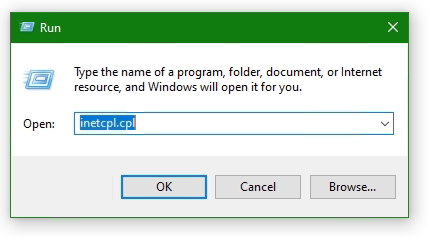
According to Fortinet support, the settings are taken from the Internet options. The Internet Options of the Control Panel can be opened via Internet Explorer (IE), or by calling inetcpl.cpl directly.
Press the Win+R keys enter inetcpl.cpl and click OK.
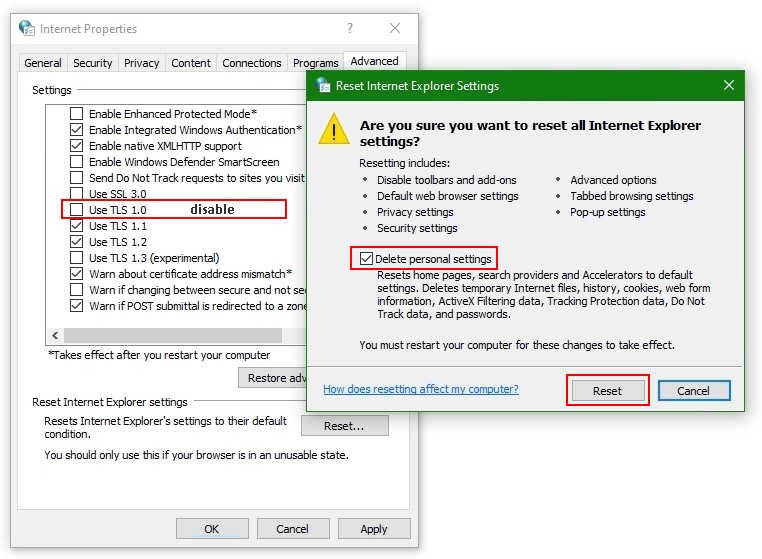
Select the Advanced tab
Click the Reset… button. If the Reset Internet Explorer settings button does not appear, go to the next step.
Click the Delete personal settings option
Click Reset
Open Internet Options again.
Go back to Advanced tab
Disable use TLS 1.0 (no longer supported)
Add website to Trusted sites
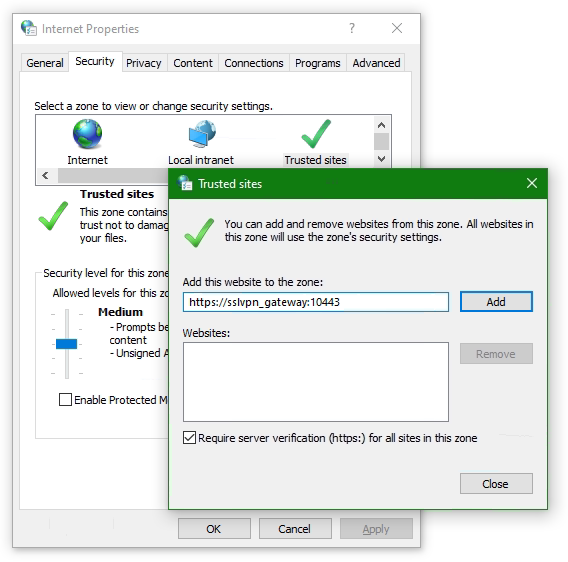
Add the SSL-VPN gateway URL to the Trusted sites. Usually, the SSL VPN gateway is the FortiGate on the endpoint side.
Go to the Security tab in Internet Options and choose Trusted sites then click the button Sites. Insert the SSL-VPN gateway URL into Add this website to the zone and click Add, here like https://sslvpn_gateway:10443 as placeholder.
Note: The default Fortinet certificate for SSL VPN was used here, but using a validated certificate won’t make a difference.
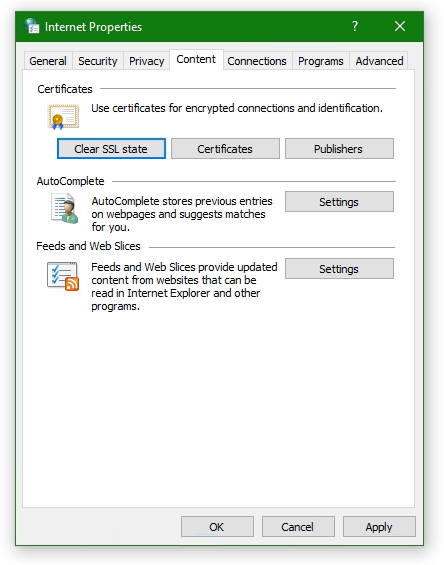
Furthermore, the SSL state must be reset, go to tab Content under Certificates. Click the Clear SSL state button.
The SSL VPN connection should now be possible with the FortiClient version 6 or later, on Windows Server 2016 or later, also on Windows 10.
Don’t get success yet ?
If you haven’t had any success up to this point, don’t despair now, there is more help available, may the following is the case!
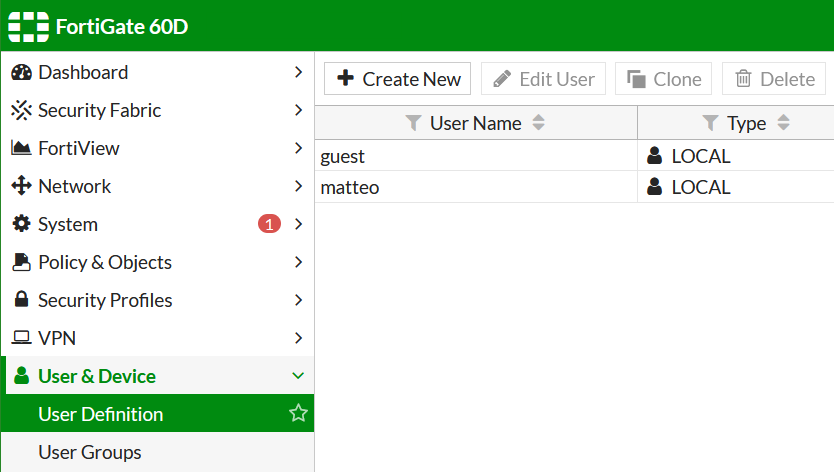
If you may use an FortiClient 7 on Windows 10 or Windows 11, then create a new local user on the FortiGate and add it to the SSL-VPN group.
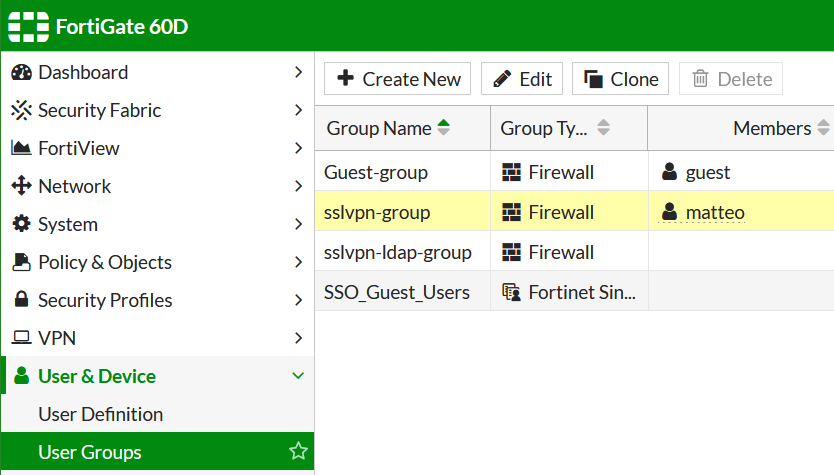
Add the user to the SSLVPN group assigned in the SSL VPN settings.
Try to verify the credentails using the web mode, for this in SSL-VPN Portals the Web Mode must my enabled.
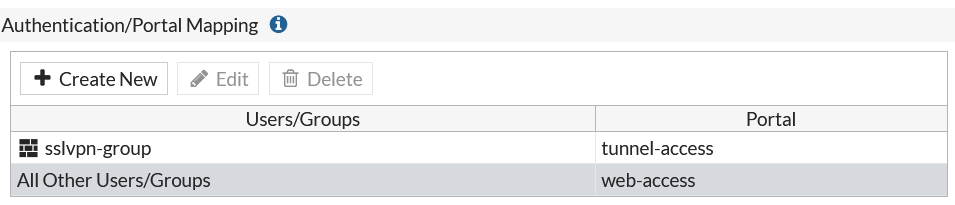
Note that the group with the affected user is assigned under SSL-VPN Settings at Authentication/Portal Mapping.
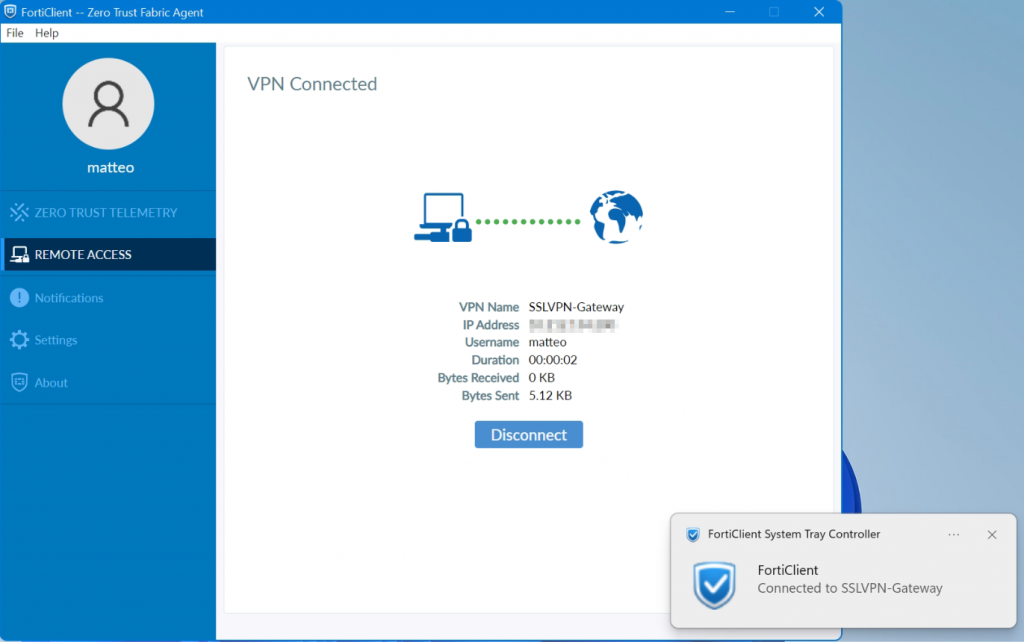
Try to authenticate the vpn connection with this user.
It worked here with this attempt, but I haven’t yet been able to successfully carry out the authentication via LDAP server,
If your attempt was more successful and you know more ? please let us know and post your comment!
Issue using FortiClient on Windows 11
FortiClient SSL-VPN connects successfully on Windows 10 but not on Windows 11. An article by the staff was posted in the fortinet community they describes a potential cause for why SSL-VPN connections may fail on Windows 11 yet work correctly on Windows 10.
SSL-VPN tunnel-mode connections via FortiClient fail at 48% on Windows 11, it appears: Credential or SSLVPN configuration is wrong (-7200). We remember, tunnel-mode connections was working fine on Windows 10.
Users are unable to authenticate if they are in a User Group that is configured in an SSL-VPN Authentication/Portal Mapping (also known authentication-rule in the CLI), but they can successfully authenticate when using the All Other Users/Groups catch-all authentication rule.
Windows 11 is uses TLS 1.3 by default for outbound TLS connections, whereas Windows 10 appears to use TLS 1.2 by default.
If TLS-AES-256-GCM-SHA384 is removed from the list, Windows 11/FortiClient will still be able to establish a TLS 1.3 connection using one of the alternative TLS Cipher Suites available. This will appear as a successful TLS connection in a packet capture tool such as Wireshark.
Windows 11 may be unable to connect to the SSL-VPN if the ciphersuite setting on the FortiGate has been modified to remove TLS-AES-256-GCM-SHA384, and an SSL-VPN authentication-rule has been created for a given User Group that has the cipher setting set to high (which it is by default).
The solution can be found with the following command using in the FortiGate CLI should solve the issue:
config vpn ssl settings
  unset ciphersuite
end
or possibly with the next command:
config vpn ssl settings
  append ciphersuite TLS-AES-256-GCM-SHA384
end