Grandstream PBX Night Circuit

Enable Asterisk night switching on Grandstream’s UCM6202

Asterisk Software to control a switchboard (PBX), under GNU General Public License (GPL).

Asterisk enables a wide range of applications for use as a software-based switchboard. The open source software is suitable for use as an IP PBX under Linux and runs on different computer platforms. An Asterisk IP PBX with extensive CTI functionalities on the ARM processor is the UCM6202 from Grandstream Networks.

Employees in companies are used to activating the night switch at the end of a working day from their switchboard, the switching and announcement of office hours could of course also take place automatically, but if the working hours are irregular, this option is not desired.

Creating a day/night circuit via a programmable button on the phone is described here in this post. The first step is to configure it on the UCM6202.

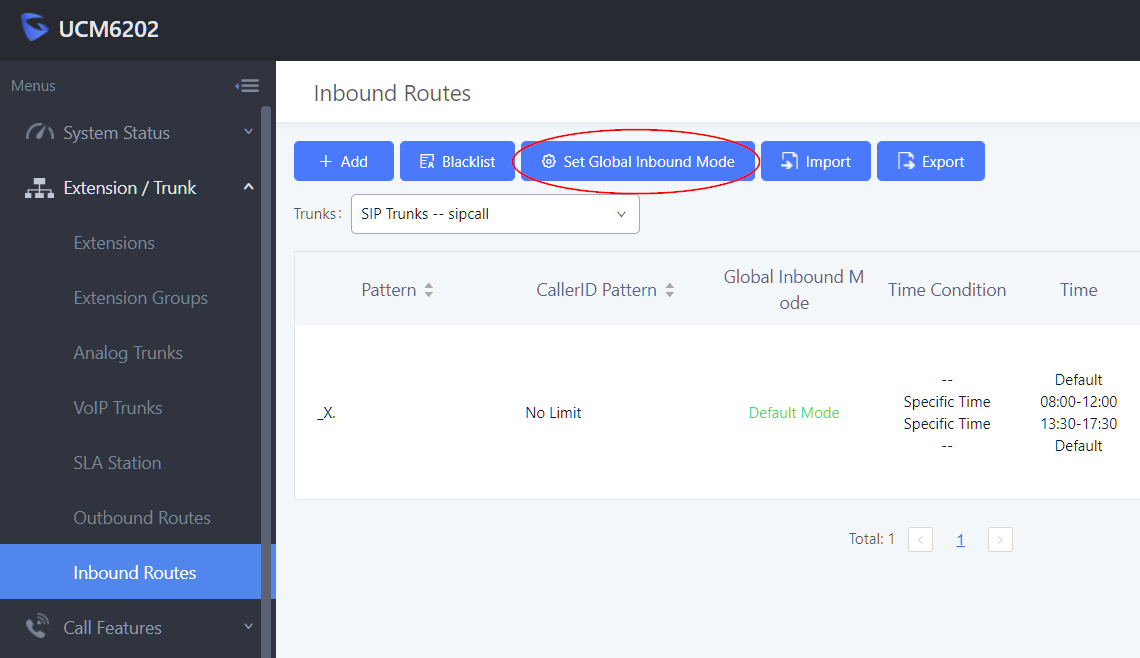
In the main navigation of the UCM6202 under Inbound RoutesSet Global Inbound Mode – Enable Inbound Multiple Mode is activated.

Content of Set Global Inbound Mode

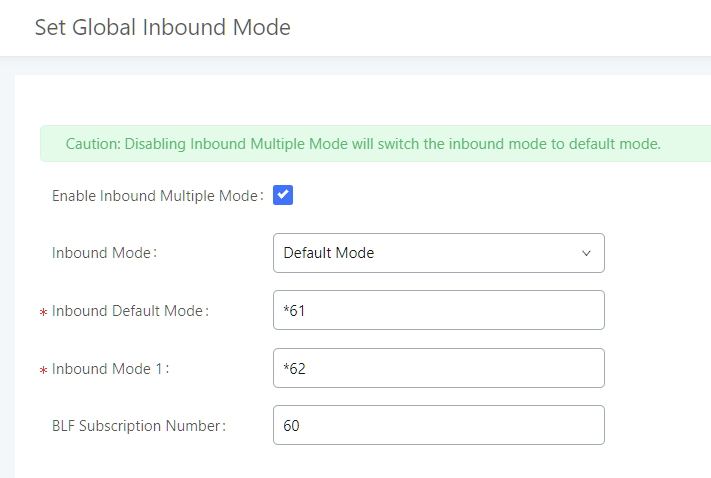
For the Inbound Route, Inbound Multiple Mode must be activated.

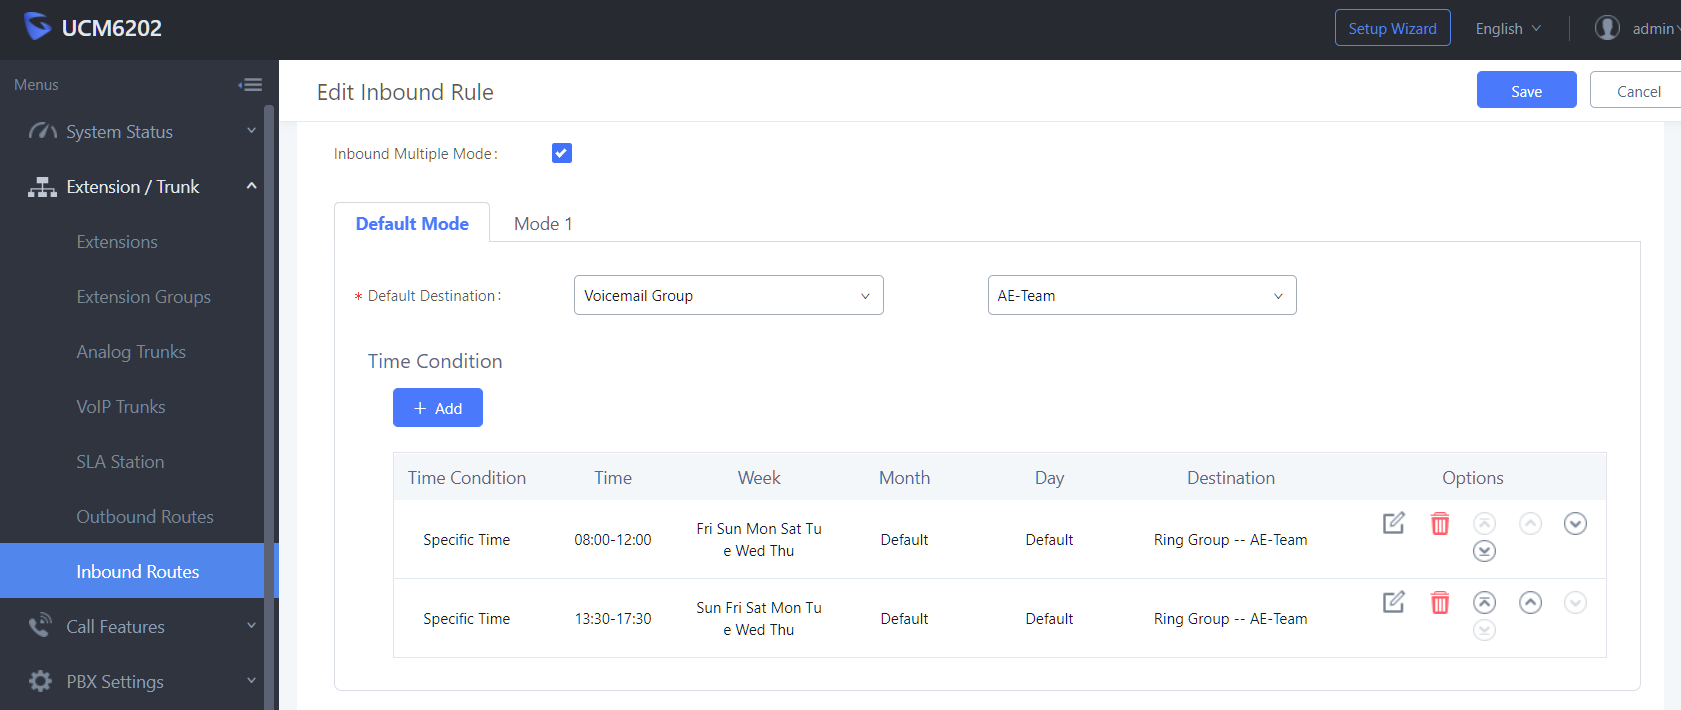
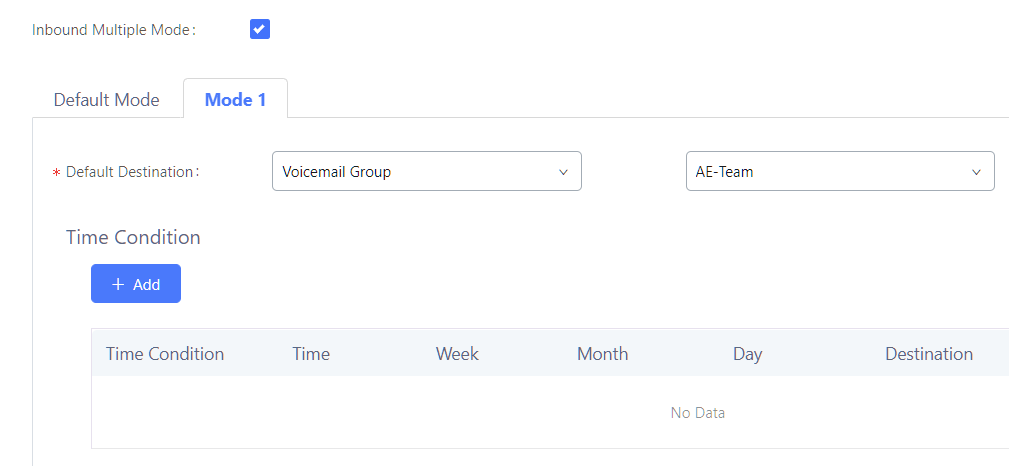
In the Mode 1 section, our Voicemail Group is selected here.

With the key pressed, incoming calls are routed directly to the answering machine (voicemail), where an announcement can be played back with office hours.

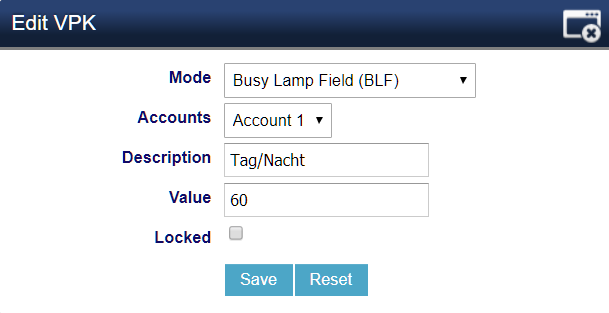
On the phone, here the GXP2135, a programmable virtual multi-purpose button is edited.

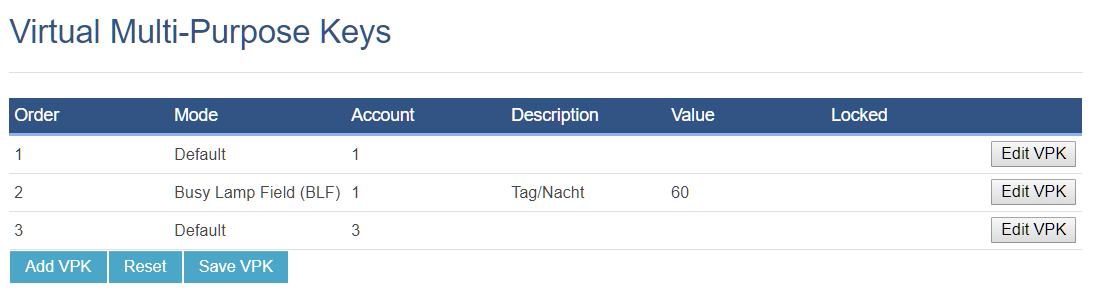
By clicking on Edit VPK the mode BLF (Busy Lamp Field) is selected, the value (Value) is the BLF Subscription Number which was previously entered in the PBX under Inbound Routes – Set Global Inbound Mode, the BLF Subscription Number 60.

Content of Virtual Multi-Purpose Keys 2

The button (top right) now lights up green when night shift is disabled, and red when night shift is activated.

Figure: GRANDSTREAM GXP2135

Secure VNC connection over SSH Tunnel

SSH Tunnel to Linux VNC Servers

VNC connections are considered unsafe because they are not encrypted. VNC sessions can be encrypted with OpenSSH, where traffic is routed through a secure SSH tunnel and is protected.

The SSH tunnel requires user login and the VNC port. The client command runs in the Linux CLI as follows:

$ ssh -L 5901:127.0.0.1:5901 -N -f -l USER 10.127.55.77

If user USER replaces it with the actual user name, a password is prompted to run the tunnel. Please note that this is the password for the SSH login, the user login to the VNC can ideally be the same UID, then the password is the same. The port that needs to be tunneled is 5901. The command runs on the computer of the VNC viewer. Registration takes place as usual:

login as: USER
USER@10.127.55.77's password:
Last login: Thu Oct 11 07:59:26 2018 from 10.127.55.70
[USER@fedora ~]$

With the VNC viewer, the virtual desktop session can now be run to the loopback address:

vncviewer 127.0.0.1:5901

Note: The options must be enabled for the OpenSSH Server in the /etc/ssh/sshd_config configuration file.

AllowTcpForwarding yes
X11Forwarding yes

SSH tunnel on Windows to vnC server

On Windows, an SSH tunnel to the VNC server can be opened using PuTTY or KiTTY, tunneling via the loopback interface and port 5901.

Under the Category, Connection – SSH – Tunnels, at Source Port 5901 is entered, Destination is 127.0.0.1:5901, then by clicking on Add the tunnel is added.

Clicking on Open starts the tunnel by logging in to the VNC host.

The secure SSH connection to the VNC server can now be initialized. Remote Host registers the loopback address 127.0.0.1 with port 5901 in the TightVNC viewer: 127.0.0.1:5901

After registration, Connection provides information about the current connection by clicking on the icon in the menu bar.

Exit mobile version