Das Windows Terminal
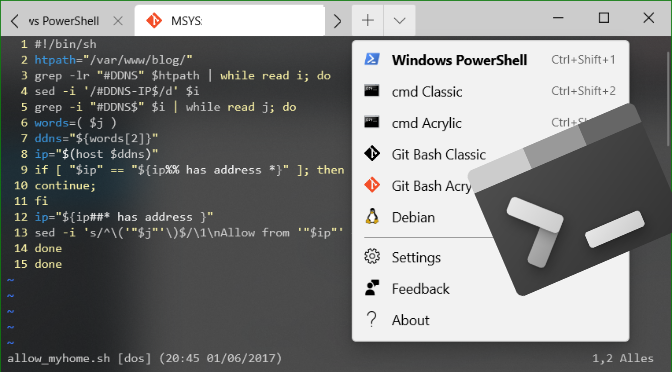
Windows-Terminal ist eine neue, moderne leistungsstarke und produktive Terminalanwendung für Befehlszeilentools wie Command Prompt, PowerShell und das Windows-Subsystem für Linux (WSL) sowie Git-Bash. Zu den Hauptfunktionen gehören, Terminal Ausführung in Taps, Unicode- und UTF-8 Zeichenunterstützung, eine GPU-Accelerated Text Rendering-Engine, sowie die Möglichkeit für benutzerdefinierte Themen und Stiles zu Konfigurieren.
Profile für eine Vielzahl von Befehlszeilenanwendungen
Alle Anwendung, die über eine Befehlszeilenschnittstelle verfügen, können in Windows Terminal ausgeführt werden. Dies umfasst alles von PowerShell und der Eingabeaufforderung und Git-Bash bis hin zu Azure Cloud Shell und beliebigen WSL-Distributionen wie Ubuntu.
Angepasste Schemas Konfigurationen
Es können Windows Terminal so konfiguriert werden, dass es über eine Vielzahl von Farbschemas und Einstellungen verfügt.
Die Konfiguration wird mittels JSON in der Konfigurationsdatei profiles.json gespeichert. Hier ein Beispiel mit Profile für PowerShell, Command Prompt, Git-Bash und das Windows Linux Subsystem (WSL).
// To view the default settings, hold "alt" while clicking on the "Settings" button.
// For documentation on these settings, see: https://aka.ms/terminal-documentation

{
    "$schema": "https://aka.ms/terminal-profiles-schema",

    "defaultProfile" : "{61c54bbd-c2c6-5271-96e7-009a87ff44bf}",
    "alwaysShowTabs" : true,
    "initialCols" : 144,
    "initialRows" : 43,
    "copyOnSelect": true,

    "profiles":
    [
        {
            // Make changes here to the powershell.exe profile
            "guid" : "{61c54bbd-c2c6-5271-96e7-009a87ff44bf}",
            "name" : "Windows PowerShell",
            "tabTitle": "Windows PowerShell",
            "commandline" : "powershell.exe",
            "colorScheme" : "Campbell Powershell",
            "fontFace" : "Consolas",
            "fontSize" : 10,
            "hidden" : false
        },
        {
            // Make changes here to the cmd.exe profile
            "guid" : "{0caa0dad-35be-5f56-a8ff-afceeeaa6101}",
            "name" : "cmd Classic",
            "commandline" : "cmd.exe",
            "fontFace" : "Consolas",
            "fontSize" : 10,
            "hidden" : false
        },
        {
            // Make changes here to the cmd.exe profile
            "guid" : "{27fc4584-088c-452d-ae31-00f041ab4d7a}",
            "name" : "cmd Acrylic",
            "tabTitle": "Command Prompt",
            "icon" : "ms-appx:///ProfileIcons/{0caa0dad-35be-5f56-a8ff-afceeeaa6101}.png",
            "commandline" : "cmd.exe",
            "colorScheme" : "One Half Dark",
            "closeOnExit" : true,
            "startingDirectory" : "%USERPROFILE%",
            "useAcrylic" : true,
            "fontFace" : "Consolas",
            "fontSize" : 10,
            "hidden" : false
        },
        {
            // Make changes here to the git-bash profile
            "guid" : "{e950864a-e41d-4268-936f-dd9e7010c86c}",
            "name" : "Git Bash Classic",
            "tabTitle": "Git Bash",
            "icon" : "ms-appdata:///local/git-logo-black.png",
            "commandline" : "\"%PROGRAMFILES%\\git\\usr\\bin\\bash.exe\" -i -l",
            "startingDirectory" : "%USERPROFILE%",
            "fontFace" : "Consolas",
            "fontSize" : 10,
            "hidden" : false
        },
        {
            // Make changes here to the git-bash profile
            "guid" : "{00000000-0000-0000-ba54-000000000002}",
            "name" : "Git Bash Acrylic",
            "tabTitle": "Git Bash",
            "icon" : "ms-appdata:///local/git-logo-red.png",
            "commandline" : "\"%PROGRAMFILES%\\git\\usr\\bin\\bash.exe\" -i -l",
            "startingDirectory" : "%USERPROFILE%",
            "closeOnExit" : true,
            "snapOnInput" : true,
            "colorScheme" : "Vintage",
            "cursorColor" : "#7ddd00",
            "cursorShape" : "vintage",
            "historySize" : 9001,
            "acrylicOpacity" : 0.75,
            "useAcrylic" : true,
            "fontFace" : "Consolas",
            "fontSize": 10,
            "padding" : "6, 0, 0, 0",
            "hidden" : false
        },
        {
            // Make changes here to the wsl profile
            "guid" : "{58ad8b0c-3ef8-5f4d-bc6f-13e4c00f2530}",
            "name" : "Debian",
            "icon" : "ms-appx:///ProfileIcons/{9acb9455-ca41-5af7-950f-6bca1bc9722f}.scale-200.png",
            "commandline" : "wsl.exe -d Debian",
            "startingDirectory" : "%USERPROFILE%\\wslhome",
            "closeOnExit" : true,
            "snapOnInput" : true,
            "colorScheme" : "Campbell",
            "cursorColor" : "#FFFFFF",
            "cursorShape" : "bar",
            "acrylicOpacity" : 0.75,
            "useAcrylic" : true,
            "fontFace" : "Consolas",
            "fontSize" : 10,
            "padding" : "6, 0, 0, 0",
            "hidden" : false
        },
        {
            "guid" : "{b453ae62-4e3d-5e58-b989-0a998ec441b8}",
            "name" : "Azure Cloud Shell",
            "source" : "Windows.Terminal.Azure",
            "hidden" : true
        }
    ],

    // Add custom color schemes to this array
    "schemes": [],

    // Add any keybinding overrides to this array.
    // To unbind a default keybinding, set the command to "unbound"
    "keybindings":
    [
    { "command": { "action": "splitPane", "split": "vertical" }, "keys": "ctrl+shift+-" },
    { "command": { "action": "splitPane", "split": "horizontal" }, "keys": "alt+shift+-" },
    { "command": { "action": "splitPane", "split": "auto" }, "keys": "alt+shift+|" },
    // Press Ctrl+Shift+F to open the search box
    { "command": "find", "keys": "ctrl+f" },
    // Open New Tab
    { "command": "newTab", "keys": "ctrl+t" }
    ]
}
Mit der Option copyOnSelect true, werden markierte Texte in die Zwischenablage kopiert, wie es in Linux Bash oder von PuTTY bekannt ist.
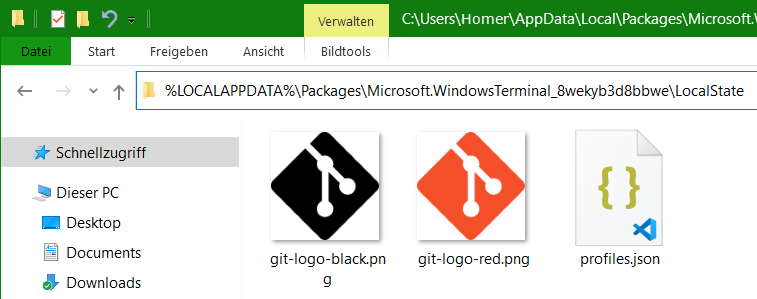
Die Datei profiles.json befindet sich in folgendem Pfad:
%LOCALAPPDATA%\Packages\Microsoft.WindowsTerminal_8wekyb3d8bbwe\LocalState
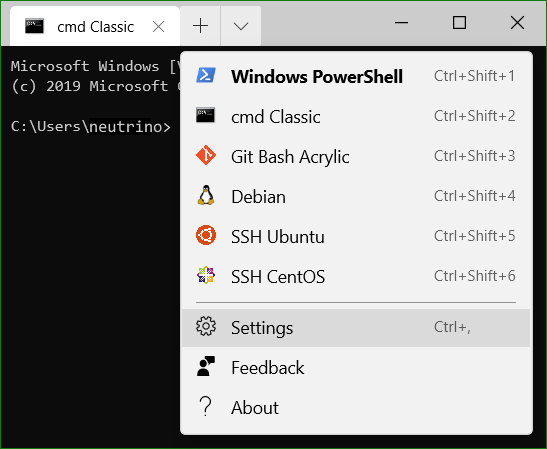
Windows Terminal Settings
Windows Terminal Settings öffnen über die Pfeilspitze nach unten, oder über den Tastatur Hotkey Ctrl+,

Ein Windows-Terminal referenziert über die GUID (Globally Unique Identifier) in seiner Sektion (guid) in profiles.json, wer eine neue GUID erzeugen möchte, kann folgendes Command in der PowerShell ausführen.
PS C:\> [guid]::NewGuid()

Guid
----
ebe11d6b-36cc-46e3-a580-459fa0c3a06c

PS C:\>
Git for Windows Arbeitsumgebung gibt es im Download
Git Icons werden in den LocalState Ordner gespeichert.


Windows Terminal Splitting
Windows Terminal erlaubt das splitting der Terminal Fenster mit Ctrl+- Horizontal, mit Crtl+. in Vertikaler Aufteilung der Fenster.

Windows Terminal OpenSSH
Secure Shell zu einem Remote Host aus dem Windows Terminal wird emöglicht, wenn unter Windows 10, Apps & Features – Optionale Features, das Paket OpenSSH Client installiert wurde.
In der Zeile commandLine wird SSH zu einem Host aufgerufen, in einer Profile Sektion in der Datei profiles.json:
"commandline" : "ssh.exe fedora",Dabei muss die Authentifizierung mittels SSH-Key angewandt werden, der mit ssh-keygen erzeugte Public Key befindet sich hier auf dem Host fedora.foo.bar unter User home neutrino ~/.ssh/authorized_keys.
Die SSH-Konfigurationsdatei hierfür auf dem lokalen Host hat folgenden Inhalt in ~/.ssh/config
Host fedora.foo.bar
    HostName fedora
    User neutrino
    IdentityFile ~/.ssh/hostkey
    ServerAliveInterval 60
IdentityFile ist der in Datei ~/.ssh/hostkey beinhaltete Privatkey dieser mit ssh-keygen generiert wurde.