All posts by Don Matteo

lebt in Zürich, ist System Engineer MCP bei A-Enterprise GmbH. Mitglied des UNBLOG Network. Author und Blogger zu den Themen, Linux und Open Source. Tutorials für Windows, VMware, Synology, Fortinet.

Exchange ActiveSync Event ID: 1053

Exchange Inbox remains empty after Add Account on Mobile

Symptom

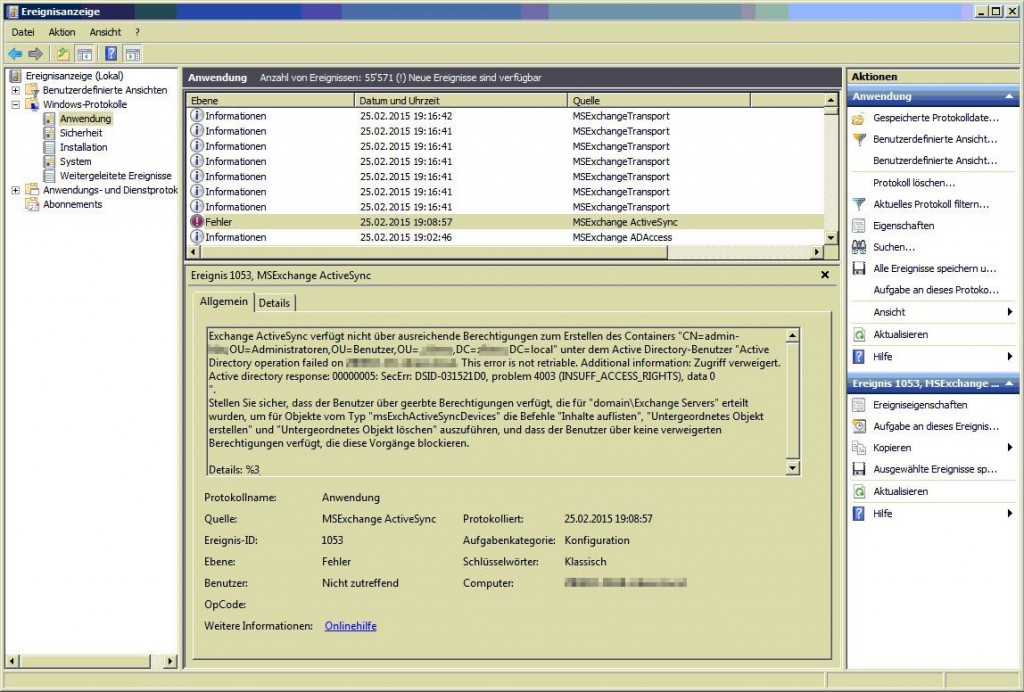
Exchange administrators experience that the inbox on the smartphone remains empty, the folders are not synchronized. The Exchange account has been successfully added, but the inbox remains empty, even new mails do not appear.

Cause

Starting with Exchange 2003 SP1, inheritable permissions of the parent object have been disabled by default for members of protected groups, such as domain admins. In fact, every hour the DACL for members of protected groups is reset and inheritable permissions are removed. This process is called AdminSDHolder to avoid improper changes to protected groups.

Event viewer

Solution

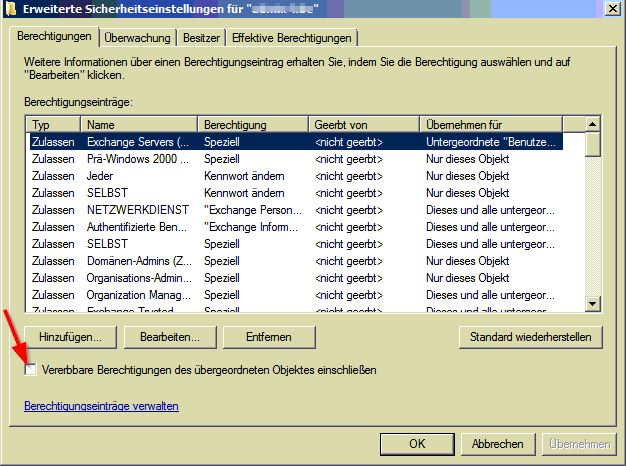
Go to Active Directory Users and Computers and go to the user in question, go to Properties and Security, select the Advanced button and set the hack for Include inheritable permissions of the parent object, click Apply and close with OK. Permission is now granted for one hour to create the MsExchActiveSync object for the mobile device.

Inheritable permission

For Windows Server 2012 R2 and 2016, Active Directory Users and Computers must have Advanced Features enabled in the menu bar under View.

Under User Properties, go to the Security and Advanced tab.

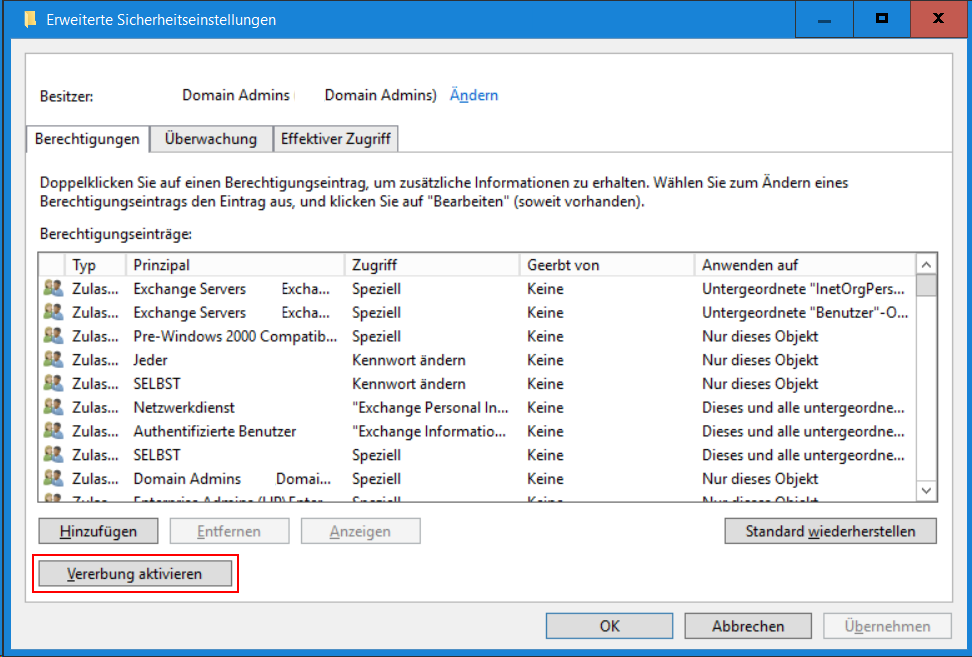
Click the button Activate inheritance, now AdminSDHolder will be active for one hour, in this time window the admin has the possibility to register the smartphone with the Exchange as a device. After that, the mailbox items are synchronized.

PuTTY SSH Port Forwarding

SSH Tunnel with PuTTY

PuTTY can produce more than just terminal sessions, with the option SSH port forwarding can be initialized in simple ways.

After PuTTY is started, you enter the IP of the target host under host name, or the server name, which is usually a firewall, a router or a host with a global IP address.

PuTTY Configuration

Here in our example, on the host 212.117.203.98, our PBX is made with the port forwarding to a SIP phone, and then configured via the web browser, the host can also be an FQDN of a DNS resolvable host.

PuTTY SSH port forwarding

In the lower part of SSH, the tunnel point is selected. After that, the starting point and the end point of the tunnel are entered:
Source port: 8888
Destination: 172.30.10.10

PuTTY SSH port forwarding

The action is completed with a click on Add. The data from the tunnel has now been adopted. The settings are saved above under Session by clicking on Save Permanent.

Clicking on Load and Open will establish the connection. The well-known terminal console opens with the prompt to log in. There you log in as a normal user, so the tunnel is established.

Now you open the web browser and enter the following localhost address https://127.0.0.1:8888/. After that, as here in our example, the login dialog of the SIP-Phone WebGUI begins, which we can now configure. Other ways to use SSH tunnels are available for Synology DS, SAN Memory, Unix/Linux Hosts, or Mac OS X.

Note. The SSH option AllowTcpForwarding yes must be enabled on the server, default is yes entered in the server configuration file /etc/ssh/sshd_config.

For the host behind a firewall, it must be accessible via port 22 Static NAT forward.

PuTTY can be used by passing numerous parameters.

PuTTY shortcut

Insert the following line as the target for the link:
“C:\Program Files (x86)\PuTTY\PUTTY. EXE” -l jolly -pw password -4 -L 8888:172.30.10.10:80 -X :0 -load PBX

Wherethe parameters mean the following:
-l the login name
-pw the password
-4 it should be used IPv4
-L of the Destination Port and the IP
-X for X11 forwarding
-load open saved session