How to Change Grub Boot Menu order on Linux Mint or Ubuntu
Grub for dual boot operations where multiple Linux distributions or Linux and Windows are installed with the Grub Boot Manager, it may be preferable to change the boot order or the default boot entry occasionally so that the most frequently used operating system is selected first by default.
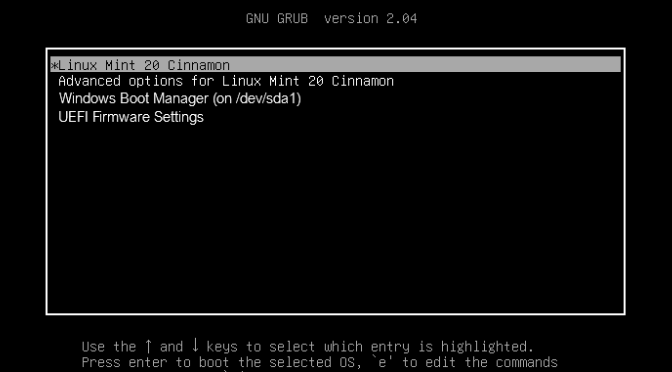
Assuming it is dual boot with Windows and Linux Mint, this boots first by default, now we would like to start Windows instead without making a selection.
To change Grub Boot Menu order, load the grub file into the editor of your choice.
$ sudo nano /etc/default/grub
Search the content.
GRUB_DEFAULT=0
Then modify the entry, to set Boot Menu order.
GRUB_DEFAULT=2
Note: The index begins at 0, consequently Windows has number 2.
Save the file and exit the editor by pressing Ctrl + O then Ctrl + x to exit nano.
Now update grub menu with this command.
$ update-grub
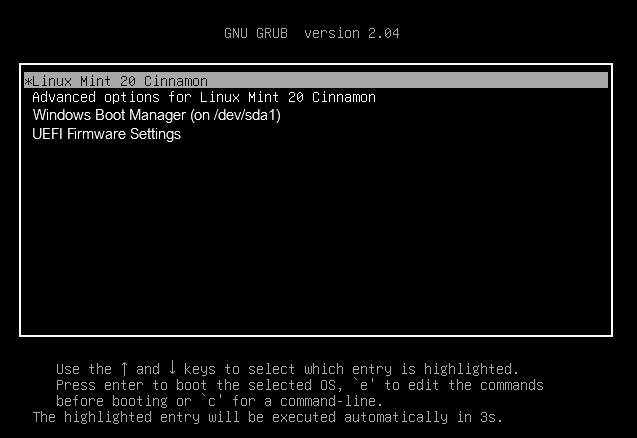
Finished! Reboot the computer and check the new boot order.
Grub Boot Manager
Linux Boot Process
The boot process on Linux is a series of activities that occur from the time you press the power button on your PC until the time the login screen appears.
There are four main stages in the boot process of your operating system and they occur in the following order:
BIOS: Basic Input/Output System
BIOS: Stands for Basic Input/Output System and is mainly responsible for loading the bootloader. When the computer starts, it runs a Power On Self Test (POST) to make sure that core hardware such as the memory and hard disk is working properly. Afterward, the BIOS will check the primary hard drives’ Master Boot Record (MBR), which is a section on your hard drive where the bootloader is located.
Bootloader
Bootloader: Loads the kernel into the RAM with a set of kernel parameters.
Linux Kernel
Kernel: The kernel’s primary function is to initialize devices and memory. Afterward, it loads the init process.
Init process
Init: Responsible for starting and stopping essential services on your system.
xrdp allows windows users graphically access to Linux systems just as easily as other Windows machines, and ideally with one and the same application, like mstsc.exe, the Windows Remote Desktop Client.
xrdp is an open source implementation of the remote desktop protocol that Windows Terminal Services (RDS) use to connect to Windows desktops. The xrdp package brings the RDP protocol to the Linux computer by providing an X server that accepts connections from the Windows terminal server clients (mstsc).
After the user has connected and authenticated, he receives a virtual X11 desktop on the Windows computer. The advantage of the xRDP solution is that it does not require an X server on the Windows computer and that no additional client is required, such as the VNC viewer.
The xrdp server can be set up with the packet manager apt-get and yum or dnf for corresponding Linux distribution. On Ubuntu lets run sudo apt-get install xrdp
These are steps to build and install xrdp from neutrinolabs Git repository. The build process described here on Ubuntu 17.10 (Artful Aardvark).
How to Install xrdp
First the Linux system is prepared, here it is Ubuntu Mate 17.10, the dependencies are installed: (all on one line)
BD=`pwd`
mkdir -p "${BD}"/git/xrdpbuild
cd "${BD}"/git/xrdpbuild
wget https://github.com/neutrinolabs/xrdp/releases/download/v0.9.5/xrdp-0.9.5.tar.gz
wget https://github.com/neutrinolabs/xorgxrdp/releases/download/v0.2.5/xorgxrdp-0.2.5.tar.gz
Create and install the xrdp server binaries:
cd "${BD}"/git/xrdpbuild
tar xvfz xrdp-0.9.5.tar.gz
cd "${BD}"/git/xrdpbuild/xrdp-0.9.5
./bootstrap
./configure --enable-fuse --enable-mp3lame --enable-pixman
make
sudo make install
sudo ln -s /usr/local/sbin/xrdp{,-sesman} /usr/sbin
Create and install from xorgxrdp:
cd "${BD}"/git/xrdpbuild
tar xvfz xorgxrdp-0.2.5.tar.gz
cd "${BD}"/git/xrdpbuild/xorgxrdp-0.2.5
./bootstrap
./configure
make
sudo make install
Start the xrdp server daemon:
sudo systemctl enable xrdp
sudo service xrdp start
Xrdp can also be installed from Github Source. Build with Git clone:
git clone --recursive https://github.com/neutrinolabs/xrdp
cd xrdp
./bootstrap
./configure
make
sudo make install
The configuration can be adjusted if necessary:
sudo vi /etc/xrdp/xrdp.ini
sudo vi /etc/xrdp/sesman.ini
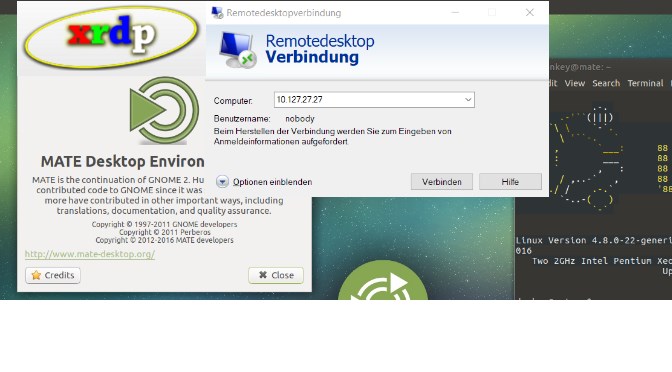
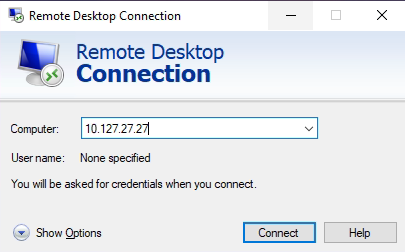
The remote desktop connection to the Linux xrdp server can now be established:
APPENDIX
Since Xorg X11 is no longer started as root, change the X11/Xwrapper from console to anybody.
sudo sed -i 's/allowed_users=console/allowed_users=anybody/' /etc/X11/Xwrapper.config
This can also be done with the use of dpkg utility.
sudo dpkg-reconfigure xserver-xorg-legacy
If you prefer a different desktop environment, the session manager can be changed. Here I join X11 configuration for the Mate desktop environment.
A black screen appears after logging in, followed by an error message:
connection to sesman ip 127.0.0.1 port 3350
sesman connect ok
sending login info to session manager, please wait...
login successful for display 11
VNC started connecting
VNC connecting to 127.0.0.1 5911
VNC error - problem connecting
some problem
It helps to create a new user, then log in with him via RDP.