phpMyAdmin is a free web application for administering MySQL databases and their fork MariaDB. The software is implemented in PHP; this is where the name phpMyAdmin comes from.
Install phpMyAdmin out-of-the-box on Apache web server
Install phpMyAdmin on your web server always with requirements quick and smooth.
Preface
I wrote pmaproving.sh for out-of-the-box installation, primarily because deploying phpmyadmin from the Apt repository proved inconvenient and incomplete mainly when used in development environments (I use Apache2 in WSL). This avoids time-consuming setup with each installation and allows you to deploy the same requests quickly and seamlessly every time.
Install phpMyAdmin on Apache Web Server
This bash script provisioning phpMyAdmin on GNU/Linux, written in GNU bash v5.1.16(1) on Debian 11 and ran also with Ubuntu 22.04.3 LTS. The script will also work on all Ubuntu based distros, provided that bash is used.
Purpose
Installation of phpMyAdmin on your Apache web server always with requirements quick and smooth. Any settings you change in phpMyAdmin are saved, the default setting in the navigation tree is set to Maximum 50 Elements in Branch, of course you can increase and decrease the values. You can change settings in the config.inc.php file, or via the small gear in the webUI, these are then saved in the database.
Usage:
git clone https://github.com/unblog/pmaproving or download from GitHub. Log in to bash as root and run the script.
Note. now is a good opportunity to make your changes in the settings section. You can keep all values as they are, but you should change the password for MYPASS, you’ll not need this later; it is only used for database access.
Requirement
No special requirements are expected; apart of course, a ready-to-use Apache web server with PHP and MariaDB, the unzip and wget packages will be provided automatically if not already exist.
Addendum
The use of phpMyAdmin with pmaproving.sh for out-of-the-box deployment was mainly due to the fact that deploying phpMyAdmin from the Apt repository proved to be impractical and incomplete, especially when used in development environments.
Feedback
Please leave a comment for suggestions, additions, deviations or troubleshooting.
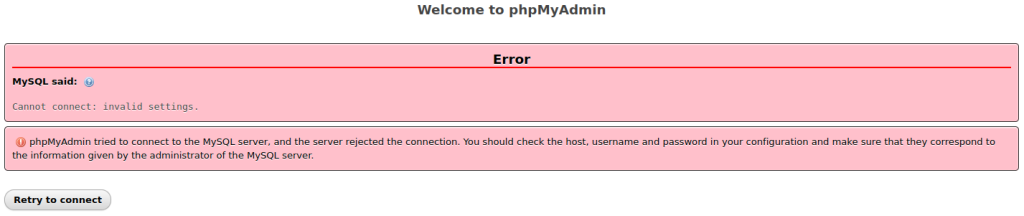
If you install phpMyAdmin on your web server, or even after an OS upgrade, the error message “PHP 7.2.5+ is required” may appear when trying to open the phpMyAdmin in your browser.
PHP 7.2.5+ is required.

Currently installed version is: ' . PHP_VERSION . '
'); } // phpcs:disable PSR1.Files.SideEffects define('PHPMYADMIN', true); // phpcs:enable require_once ROOT_PATH . 'libraries/constants.php'; /** * Activate autoloader */ if (! @is_readable(AUTOLOAD_FILE)) { die( '

File ' . AUTOLOAD_FILE . ' missing or not readable.
' . '

Most likely you did not run Composer to ' . '' . 'install library files.
' ); } require AUTOLOAD_FILE; global $route, $containerBuilder, $request; Common::run(); $dispatcher = Routing::getDispatcher(); Routing::callControllerForRoute($request, $route, $dispatcher, $containerBuilder);
First of all, if you see this error message, it says that PHP is not installed on the web server, or the required PHP version is not the supported version.
Preface
In this tutorial the Apache 2 Web Server and PHP 8.2 with the required modules is used to install phpMyAdmin on Debian 12 (bookworm).
phpMyAdmin Requirements
For phpMyAdmin you need PHP 7.2.5 or newer to solve the error, I recommend PHP 8.2 with session support, the Standard PHP Library (SPL) extension, hash, ctype, and JSON support. You need GD2 support in PHP and the PHP zip extension. The mbstring extension (php8.2-mbstring) is strongly recommended for performance reasons, for operation phpMyAdmin on a Debian 12 (bookworm).
If you are deploying PHP to the Apache Web Server on a Debian or Debian-based distribution, the command line might look like this:
These steps will fix the PHP error “PHP 7.2.5+ is required” when trying to open the phpmyadmin page.
Check PHP version
You might want to check the PHP version and all available module information by creating a file info.php with insert the content bellow. To prevent any errors during phpMyAdmin installation.
$ echo '<?php phpinfo(); ?>' | sudo tee /var/www/html/info.php
this is the apache default directory path in this tee writes, maybe you have to put the info.php file in here! /usr/share/phpmyadmin
Open the website in your browserhttp://ip_of_your_server/info.php
Last but not least, do not forget to restart the Apache webserver.
$ sudo systemctl restart apache2
phpMyAdmin installation
Install phpMyAdmin on a Debian or Ubuntu system from repository.
$ sudo apt install phpmyadmin
Then you may have already made some configurations, many of which can be found on the web. When you try to open phpMyAdmin you may get the following error message!
phpMyAdmin PHP Error Solving
To prevent or fixing PHP error during install phpMyAdmin, you should check the following settings and change them if necessary.
Edit and check the phpMyAdmin settings in the config.inc.php file with the editor of your choice, such as nano or vi /usr/share/phpmyadmin/config.inc.php.
Generate the required random blowfish secret using for cookie auth and have it ready for pasting.
$ pwgen -s 32 1
zazoLupamNc5L3o2aE0ZHtkY7f4OqUts
You may still need to install the password generator utility!
$ sudo apt install pwgen -y
Then paste the random SECRET you just generated at $cfg['blowfish_secret' = 'SECRET'<-here and activate the next lines by commenting them out in /usr/share/phpmyadmin/config.inc.php.
<?php
/**
 * phpMyAdmin sample configuration, you can use it as base for
 * manual configuration. For easier setup you can use setup/
 *
 * All directives are explained in documentation in the doc/ folder
 * or at <https://docs.phpmyadmin.net/>.
 */

declare(strict_types=1);

/**
 * This is needed for cookie based authentication to encrypt the cookie.
 * Needs to be a 32-bytes long string of random bytes. See FAQ 2.10.
 */
$cfg['blowfish_secret'] = 'zazoLupamNc5L3o2aE0ZHtkY7f4OqUts'; /* YOU MUST FILL IN THIS FOR COOKIE AUTH! */

/**
 * Servers configuration
 */
$i = 0;

/**
 * First server
 */
$i++;
/* Authentication type */
$cfg['Servers'][$i]['auth_type'] = 'cookie';
/* Server parameters */
$cfg['Servers'][$i]['host'] = 'localhost';
$cfg['Servers'][$i]['compress'] = false;
$cfg['Servers'][$i]['AllowNoPassword'] = false;

/**
 * phpMyAdmin configuration storage settings.
 */

/* User used to manipulate with storage */
// $cfg['Servers'][$i]['controlhost'] = '';
// $cfg['Servers'][$i]['controlport'] = '';
// $cfg['Servers'][$i]['controluser'] = 'pma';
// $cfg['Servers'][$i]['controlpass'] = 'pmapass';

/* Storage database and tables */
$cfg['Servers'][$i]['pmadb'] = 'phpmyadmin';
$cfg['Servers'][$i]['bookmarktable'] = 'pma__bookmark';
$cfg['Servers'][$i]['relation'] = 'pma__relation';
$cfg['Servers'][$i]['table_info'] = 'pma__table_info';
$cfg['Servers'][$i]['table_coords'] = 'pma__table_coords';
$cfg['Servers'][$i]['pdf_pages'] = 'pma__pdf_pages';
$cfg['Servers'][$i]['column_info'] = 'pma__column_info';
$cfg['Servers'][$i]['history'] = 'pma__history';
$cfg['Servers'][$i]['table_uiprefs'] = 'pma__table_uiprefs';
$cfg['Servers'][$i]['tracking'] = 'pma__tracking';
$cfg['Servers'][$i]['userconfig'] = 'pma__userconfig';
$cfg['Servers'][$i]['recent'] = 'pma__recent';
$cfg['Servers'][$i]['favorite'] = 'pma__favorite';
$cfg['Servers'][$i]['users'] = 'pma__users';
$cfg['Servers'][$i]['usergroups'] = 'pma__usergroups';
$cfg['Servers'][$i]['navigationhiding'] = 'pma__navigationhiding';
Add the next line at the end of config.inc.php.
$cfg['TempDir'] = '/var/lib/phpmyadmin/tmp';
Save the config.inc.php file and exit editor.
phpMyAdmin database
Deploying the phpmyadmin database if not already done.
$ sudo mariadb -u root -p
Create the database “phpmyadmin” and grant “myadmin” with all rights.
CREATE DATABASE phpmyadmin;
GRANT SELECT, INSERT, UPDATE, DELETE ON phpmyadmin.* TO 'myadmin'@'localhost' IDENTIFIED BY 'ChangeMe';
GRANT ALL PRIVILEGES ON phpmyadmin.* TO 'myadmin'@'localhost' IDENTIFIED BY 'ChangeMe' WITH GRANT OPTION;
EXIT;
Add the SQL tables to the “phpmyadmin” database.
$ sudo mysql -u root phpmyadmin < /usr/share/phpmyadmin/sql/create_tables.sql
Enable the phpmyadmin site using Apache helper command.
$ sudo a2ensite phpmyadmin
Finaly reload the Apache web server again.
$ sudo systemctl reload apache2
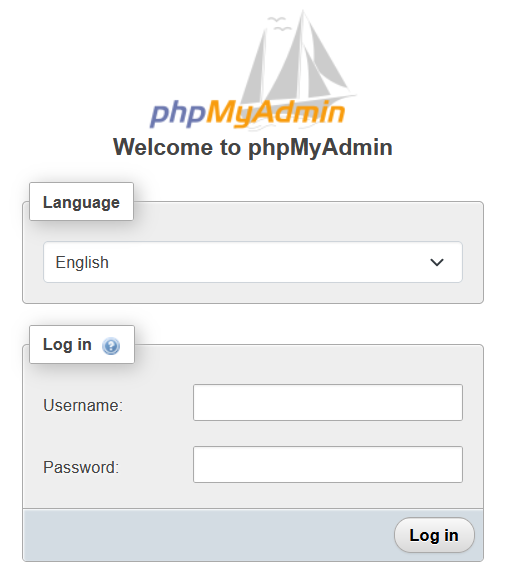
The phpMyAdmin site can now be opened http://ip_of_your_server/phpmyadmin/
Conclusion
In this tutorial you will learn how to install phpMyAdmin without errors, using the Apache 2 Web Server and PHP 8.2 with the required modules for phpMyAdmin on Debian 12 (bookworm). As assistance and troubleshooting to preventing or fixing issues with deploy phpMyAdmin in a Debian Linux. To avoid commonly known configuration errors that may occur during installation.