If you install phpMyAdmin on your web server, or even after an OS upgrade, the error message “PHP 7.2.5+ is required” may appear when trying to open the phpMyAdmin in your browser.
PHP 7.2.5+ is required.

Currently installed version is: ' . PHP_VERSION . '
'); } // phpcs:disable PSR1.Files.SideEffects define('PHPMYADMIN', true); // phpcs:enable require_once ROOT_PATH . 'libraries/constants.php'; /** * Activate autoloader */ if (! @is_readable(AUTOLOAD_FILE)) { die( '

File ' . AUTOLOAD_FILE . ' missing or not readable.
' . '

Most likely you did not run Composer to ' . '' . 'install library files.
' ); } require AUTOLOAD_FILE; global $route, $containerBuilder, $request; Common::run(); $dispatcher = Routing::getDispatcher(); Routing::callControllerForRoute($request, $route, $dispatcher, $containerBuilder);
First of all, if you see this error message, it says that PHP is not installed on the web server, or the required PHP version is not the supported version.
Preface
In this tutorial the Apache 2 Web Server and PHP 8.2 with the required modules is used to install phpMyAdmin on Debian 12 (bookworm).
phpMyAdmin Requirements
For phpMyAdmin you need PHP 7.2.5 or newer to solve the error, I recommend PHP 8.2 with session support, the Standard PHP Library (SPL) extension, hash, ctype, and JSON support. You need GD2 support in PHP and the PHP zip extension. The mbstring extension (php8.2-mbstring) is strongly recommended for performance reasons, for operation phpMyAdmin on a Debian 12 (bookworm).
If you are deploying PHP to the Apache Web Server on a Debian or Debian-based distribution, the command line might look like this:
$ sudo apt install php8.2 php8.2-{cli,mysql,imap,intl,apcu,cgi,bz2,zip,mbstring,gd,curl,xml,common,opcache,imagick} -yPHP Library libapache2
The PHP module in the appropriate version is particularly important for the Apache webserver using phpMyAdmin without errors.
$ sudo apt install libapache2-mod-php libapache2-mod-php8.2 -yEnable the installed PHP module using the Apachea2enmodhelper.
$ sudo a2enmod php8.2May you want to check the installed Apache 2 modules.
$ apt list libapache2-mod-php*
libapache2-mod-php8.2/stable,stable-security,now 8.2.7-1~deb12u1 amd64 [installed]
libapache2-mod-php/stable,now 2:8.2+93 all [installed]
The next command also provides detailed information about the installed Apache 2 modules.
$ apt info libapache2-mod-php*May you need to disable an previous Apache 2 PHP module.
$ sudo a2dismod php7.1Then you should check the enabled Apache 2 PHP module.
$ sudo a2query -m | grep php
php8.2 (enabled by maintainer script)
These steps will fix the PHP error “PHP 7.2.5+ is required” when trying to open the phpmyadmin page.
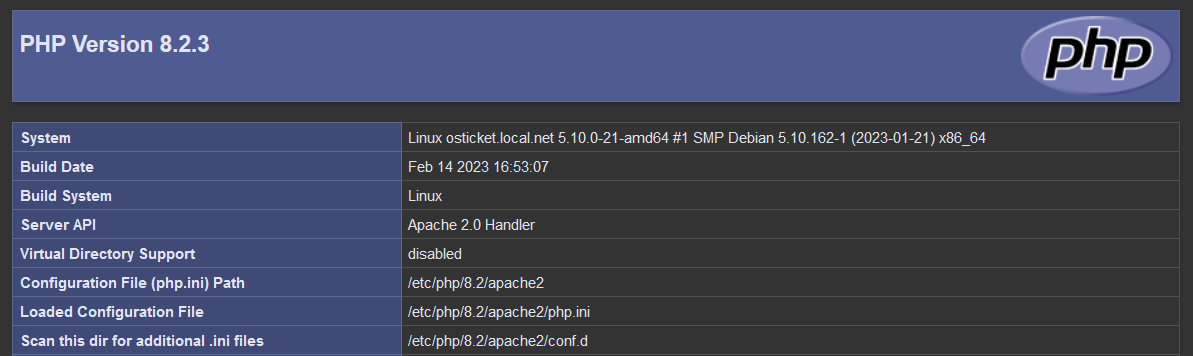
Check PHP version
You might want to check the PHP version and all available module information by creating a file info.php with insert the content bellow. To prevent any errors during phpMyAdmin installation.
$ echo '<?php phpinfo(); ?>' | sudo tee /var/www/html/info.php
this is the apache default directory path in this tee writes, maybe you have to put the info.php file in here! /usr/share/phpmyadmin
Open the website in your browserhttp://ip_of_your_server/info.php
Last but not least, do not forget to restart the Apache webserver.
$ sudo systemctl restart apache2phpMyAdmin installation
Install phpMyAdmin on a Debian or Ubuntu system from repository.
$ sudo apt install phpmyadminThen you may have already made some configurations, many of which can be found on the web. When you try to open phpMyAdmin you may get the following error message!
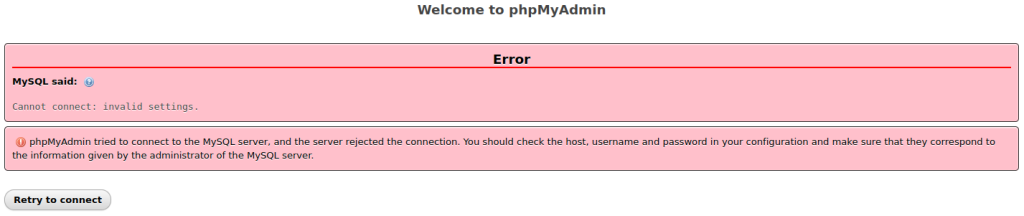
phpMyAdmin PHP Error Solving
To prevent or fixing PHP error during install phpMyAdmin, you should check the following settings and change them if necessary.
Edit and check the phpMyAdmin settings in the config.inc.php file with the editor of your choice, such as nano or vi /usr/share/phpmyadmin/config.inc.php.
Generate the required random blowfish secret using for cookie auth and have it ready for pasting.
$ pwgen -s 32 1
zazoLupamNc5L3o2aE0ZHtkY7f4OqUts
You may still need to install the password generator utility!
$ sudo apt install pwgen -yThen paste the random SECRET you just generated at $cfg['blowfish_secret' = 'SECRET'<-here and activate the next lines by commenting them out in /usr/share/phpmyadmin/config.inc.php.
<?php
/**
 * phpMyAdmin sample configuration, you can use it as base for
 * manual configuration. For easier setup you can use setup/
 *
 * All directives are explained in documentation in the doc/ folder
 * or at <https://docs.phpmyadmin.net/>.
 */

declare(strict_types=1);

/**
 * This is needed for cookie based authentication to encrypt the cookie.
 * Needs to be a 32-bytes long string of random bytes. See FAQ 2.10.
 */
$cfg['blowfish_secret'] = 'zazoLupamNc5L3o2aE0ZHtkY7f4OqUts'; /* YOU MUST FILL IN THIS FOR COOKIE AUTH! */

/**
 * Servers configuration
 */
$i = 0;

/**
 * First server
 */
$i++;
/* Authentication type */
$cfg['Servers'][$i]['auth_type'] = 'cookie';
/* Server parameters */
$cfg['Servers'][$i]['host'] = 'localhost';
$cfg['Servers'][$i]['compress'] = false;
$cfg['Servers'][$i]['AllowNoPassword'] = false;

/**
 * phpMyAdmin configuration storage settings.
 */

/* User used to manipulate with storage */
// $cfg['Servers'][$i]['controlhost'] = '';
// $cfg['Servers'][$i]['controlport'] = '';
// $cfg['Servers'][$i]['controluser'] = 'pma';
// $cfg['Servers'][$i]['controlpass'] = 'pmapass';

/* Storage database and tables */
$cfg['Servers'][$i]['pmadb'] = 'phpmyadmin';
$cfg['Servers'][$i]['bookmarktable'] = 'pma__bookmark';
$cfg['Servers'][$i]['relation'] = 'pma__relation';
$cfg['Servers'][$i]['table_info'] = 'pma__table_info';
$cfg['Servers'][$i]['table_coords'] = 'pma__table_coords';
$cfg['Servers'][$i]['pdf_pages'] = 'pma__pdf_pages';
$cfg['Servers'][$i]['column_info'] = 'pma__column_info';
$cfg['Servers'][$i]['history'] = 'pma__history';
$cfg['Servers'][$i]['table_uiprefs'] = 'pma__table_uiprefs';
$cfg['Servers'][$i]['tracking'] = 'pma__tracking';
$cfg['Servers'][$i]['userconfig'] = 'pma__userconfig';
$cfg['Servers'][$i]['recent'] = 'pma__recent';
$cfg['Servers'][$i]['favorite'] = 'pma__favorite';
$cfg['Servers'][$i]['users'] = 'pma__users';
$cfg['Servers'][$i]['usergroups'] = 'pma__usergroups';
$cfg['Servers'][$i]['navigationhiding'] = 'pma__navigationhiding';
Add the next line at the end of config.inc.php.
$cfg['TempDir'] = '/var/lib/phpmyadmin/tmp';Save the config.inc.php file and exit editor.
phpMyAdmin database
Deploying the phpmyadmin database if not already done.
$ sudo mariadb -u root -pCreate the database “phpmyadmin” and grant “myadmin” with all rights.
CREATE DATABASE phpmyadmin;
GRANT SELECT, INSERT, UPDATE, DELETE ON phpmyadmin.* TO 'myadmin'@'localhost' IDENTIFIED BY 'ChangeMe';
GRANT ALL PRIVILEGES ON phpmyadmin.* TO 'myadmin'@'localhost' IDENTIFIED BY 'ChangeMe' WITH GRANT OPTION;
EXIT;
Add the SQL tables to the “phpmyadmin” database.
$ sudo mysql -u root phpmyadmin < /usr/share/phpmyadmin/sql/create_tables.sqlphpMyAdmin Apache configuration
/etc/apache2/conf-available/phpmyadmin.confThe Apache site configuration for phpMyAdmin.
Alias /phpmyadmin /usr/share/phpmyadmin

<Directory /usr/share/phpmyadmin>
    Options SymLinksIfOwnerMatch
    DirectoryIndex index.php

    <IfModule mod_php5.c>
        <IfModule mod_mime.c>
            AddType application/x-httpd-php .php
        </IfModule>
        <FilesMatch ".+\.php$">
            SetHandler application/x-httpd-php
        </FilesMatch>

        php_value include_path .
        php_admin_value upload_tmp_dir /var/lib/phpmyadmin/tmp
        php_admin_value open_basedir /usr/share/phpmyadmin/:/etc/phpmyadmin/:/var/lib/phpmyadmin/:/usr/share/php/php-gettext/:/usr/share/php/php-php-gettext/:/usr/share/javascript/:/usr/share/php/tcpdf/:/usr/share/doc/phpmyadmin/:/usr/share/php/phpseclib/
        php_admin_value mbstring.func_overload 0
    </IfModule>
    <IfModule mod_php.c>
        <IfModule mod_mime.c>
            AddType application/x-httpd-php .php
        </IfModule>
        <FilesMatch ".+\.php$">
            SetHandler application/x-httpd-php
        </FilesMatch>

        php_value include_path .
        php_admin_value upload_tmp_dir /var/lib/phpmyadmin/tmp
        php_admin_value open_basedir /usr/share/phpmyadmin/:/etc/phpmyadmin/:/var/lib/phpmyadmin/:/usr/share/php/php-gettext/:/usr/share/php/php-php-gettext/:/usr/share/javascript/:/usr/share/php/tcpdf/:/usr/share/doc/phpmyadmin/:/usr/share/php/phpseclib/
        php_admin_value mbstring.func_overload 0
    </IfModule>

</Directory>

# Authorize for setup
<Directory /usr/share/phpmyadmin/setup>
    <IfModule mod_authz_core.c>
        <IfModule mod_authn_file.c>
            AuthType Basic
            AuthName "phpMyAdmin Setup"
            AuthUserFile /etc/phpmyadmin/htpasswd.setup
        </IfModule>
        Require valid-user
    </IfModule>
</Directory>

# Disallow web access to directories that don't need it
<Directory /usr/share/phpmyadmin/templates>
    Require all denied
</Directory>
<Directory /usr/share/phpmyadmin/libraries>
    Require all denied
</Directory>
<Directory /usr/share/phpmyadmin/setup/lib>
    Require all denied
</Directory>
Enable the phpmyadmin site using Apache helper command.
$ sudo a2ensite phpmyadminFinaly reload the Apache web server again.
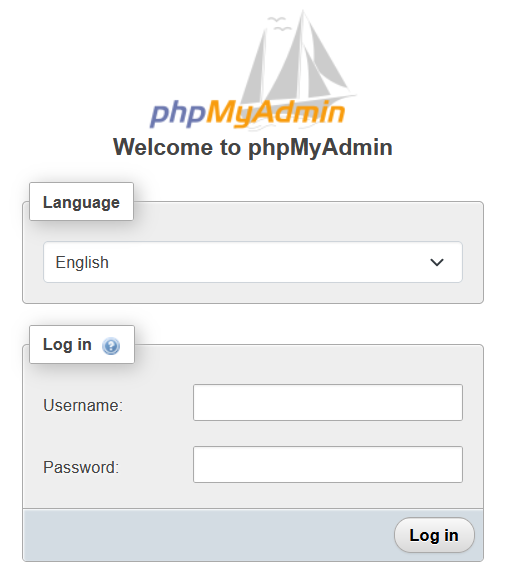
$ sudo systemctl reload apache2The phpMyAdmin site can now be opened http://ip_of_your_server/phpmyadmin/
Conclusion
In this tutorial you will learn how to install phpMyAdmin without errors, using the Apache 2 Web Server and PHP 8.2 with the required modules for phpMyAdmin on Debian 12 (bookworm). As assistance and troubleshooting to preventing or fixing issues with deploy phpMyAdmin in a Debian Linux. To avoid commonly known configuration errors that may occur during installation.