How To use xrdp on Ubuntu
XRDP on Linux for Windows Remote Desktop Clients
xrdp allows windows users graphically access to Linux systems just as easily as other Windows machines, and ideally with one and the same application, like mstsc.exe, the Windows Remote Desktop Client.
xrdp is an open source implementation of the remote desktop protocol that Windows Terminal Services (RDS) use to connect to Windows desktops. The xrdp package brings the RDP protocol to the Linux computer by providing an X server that accepts connections from the Windows terminal server clients (mstsc).
After the user has connected and authenticated, he receives a virtual X11 desktop on the Windows computer. The advantage of the xRDP solution is that it does not require an X server on the Windows computer and that no additional client is required, such as the VNC viewer.
The xrdp server can be set up with the packet manager apt-get and yum or dnf for corresponding Linux distribution. On Ubuntu lets run sudo apt-get install xrdp
These are steps to build and install xrdp from neutrinolabs Git repository. The build process described here on Ubuntu 17.10 (Artful Aardvark).
How to Install xrdp
First the Linux system is prepared, here it is Ubuntu Mate 17.10, the dependencies are installed: (all on one line)
sudo apt-get install -y git autoconf libtool pkg-config gcc g++ make libssl-dev libpam0g-dev libjpeg-dev libx11-dev libxfixes-dev libxrandr-dev flex bison libxml2-dev intltool xsltproc xutils-dev python-libxml2 g++ xutils libfuse-dev libmp3lame-dev nasm libpixman-1-dev xserver-xorg-devGet the source packages from Github sources:
BD=`pwd`
mkdir -p "${BD}"/git/xrdpbuild
cd "${BD}"/git/xrdpbuild
wget https://github.com/neutrinolabs/xrdp/releases/download/v0.9.5/xrdp-0.9.5.tar.gz
wget https://github.com/neutrinolabs/xorgxrdp/releases/download/v0.2.5/xorgxrdp-0.2.5.tar.gz
Create and install the xrdp server binaries:
cd "${BD}"/git/xrdpbuild
tar xvfz xrdp-0.9.5.tar.gz
cd "${BD}"/git/xrdpbuild/xrdp-0.9.5
./bootstrap
./configure --enable-fuse --enable-mp3lame --enable-pixman
make
sudo make install
sudo ln -s /usr/local/sbin/xrdp{,-sesman} /usr/sbin
Create and install from xorgxrdp:
cd "${BD}"/git/xrdpbuild
tar xvfz xorgxrdp-0.2.5.tar.gz
cd "${BD}"/git/xrdpbuild/xorgxrdp-0.2.5
./bootstrap
./configure
make
sudo make install
Start the xrdp server daemon:
sudo systemctl enable xrdp
sudo service xrdp start
Xrdp can also be installed from Github Source. Build with Git clone:
git clone --recursive https://github.com/neutrinolabs/xrdp
cd xrdp
./bootstrap
./configure
make
sudo make install
The configuration can be adjusted if necessary:
sudo vi /etc/xrdp/xrdp.ini
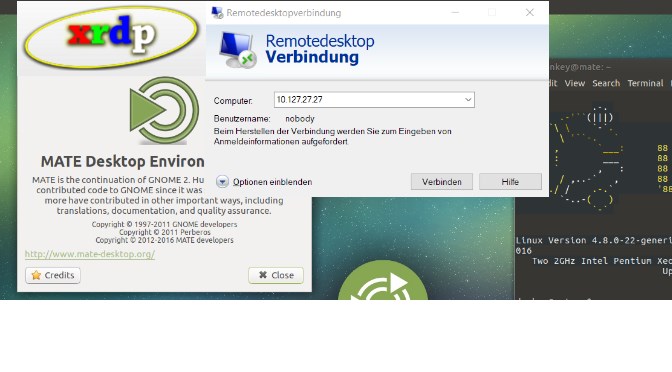
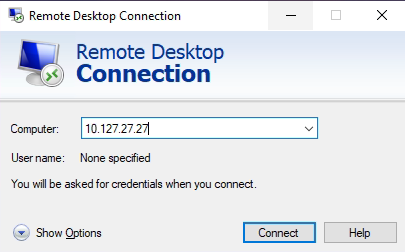
sudo vi /etc/xrdp/sesman.iniThe remote desktop connection to the Linux xrdp server can now be established:

APPENDIX
Since Xorg X11 is no longer started as root, change the X11/Xwrapper from console to anybody.
sudo sed -i 's/allowed_users=console/allowed_users=anybody/' /etc/X11/Xwrapper.configThis can also be done with the use of dpkg utility.
sudo dpkg-reconfigure xserver-xorg-legacyIf you prefer a different desktop environment, the session manager can be changed. Here I join X11 configuration for the Mate desktop environment.
echo mate-session> ~/.Xclients
chmod +x ~/.Xclients
systemctl restart xrdp.service
The alternative desktop environment must first be installed, here at fedora.
dnf install @mate-desktopTROUBLESHOOTING
Log protocols can be opened during troubleshooting:
sudo tail -f /var/log/xrdp.log -f /var/log/xrdp-sesman.log
systemctl status xrdp.service -l
journalctl -xe
If RDP session is aborted or frozen, allow_channels = true can be set to false.
sudo sed -i 's/allow_channels=true/allow_channels=false/' /etc/xrdp/xrdp.ini
service xrdp restart
SELinux can be deactivated for test purposes.
sudo sed -i 's/SELINUX=enforcing/SELINUX=disabled/' /etc/selinux/config
/usr/sbin/getenforce
If the firewall rejects the RDP port, the port must be allowed for RDP.
firewall-cmd --permanent --zone=public --add-port=3389/tcp
firewall-cmd --reload
Firewall should permit RDP ports.
sudo ufw allow 3398
sudo ufw allow 5901
A black screen appears after logging in, followed by an error message:
connection to sesman ip 127.0.0.1 port 3350
sesman connect ok
sending login info to session manager, please wait...
login successful for display 11
VNC started connecting
VNC connecting to 127.0.0.1 5911
VNC error - problem connecting
some problem
It helps to create a new user, then log in with him via RDP.
useradd newuser
passwd secret
Generating a new certificate can also be useful.
cd /etc/xrdp
openssl req -x509 -newkey rsa:2048 -nodes -keyout key.pem -out cert.pem -days 365
Hint. Use the currently valid host name as (CN) common name.
Activate the certificate in the xrdp configuration /etc/xrdp/xrdp.ini.
security_layer=negotiate
crypt_level=high
certificate=cert.pem
key_file=key.pem
ssl_protocols=TLSv1, TLSv1.1, TLSv1.2
Source URL: github.com/neutrinolabs/xrdp/