Category Archives: Howto Tutorials (EN)

Knowledge Network for Tutorials, Howto’s, Workaround, DevOps Code for Professionals.

OPNsense 2FA TOTP with Google Authenticator How to

This guide shows how to provide One-time Password (OTP) for 2FA 2-factor authentication with OPNsense TOTP and Google Authenticator. All OPNsense services can be used with the 2FA solution.

Step 1 – Add authentication server

To add a TOTP server, go to System ‣ Access ‣ Servers and click the plus (+) for Add server in the top right.

OPNsense 2FA System Access TOTP Server

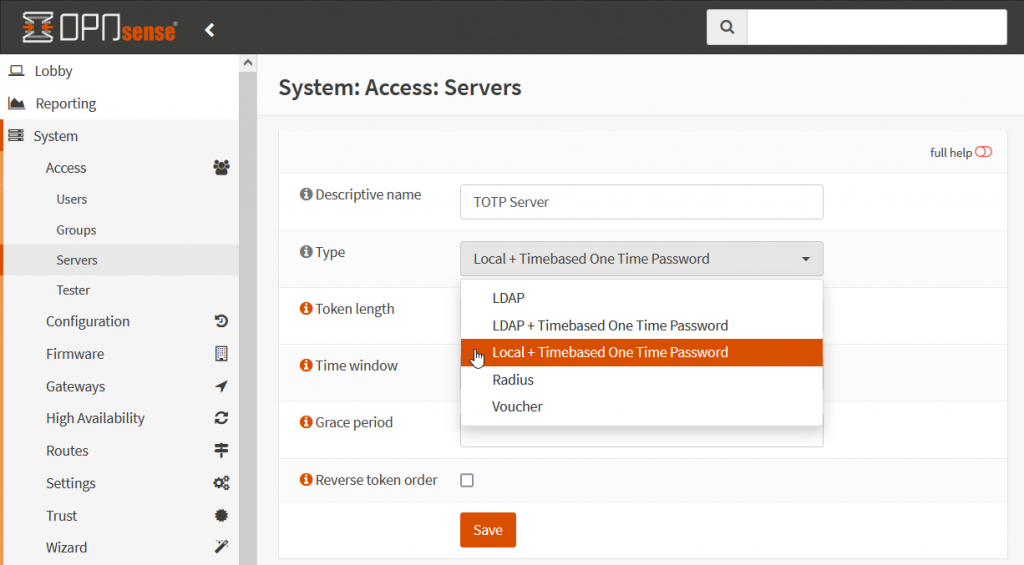
Select Type Local+Timebased One Time Password from drop-down list.

Step 2 – Add or change users

For this example, we’ll create a new OPNsense user for 2FA, go to System ‣ Access ‣ Users and click the plus (+) in the right corner.

Add or change OPNsense users

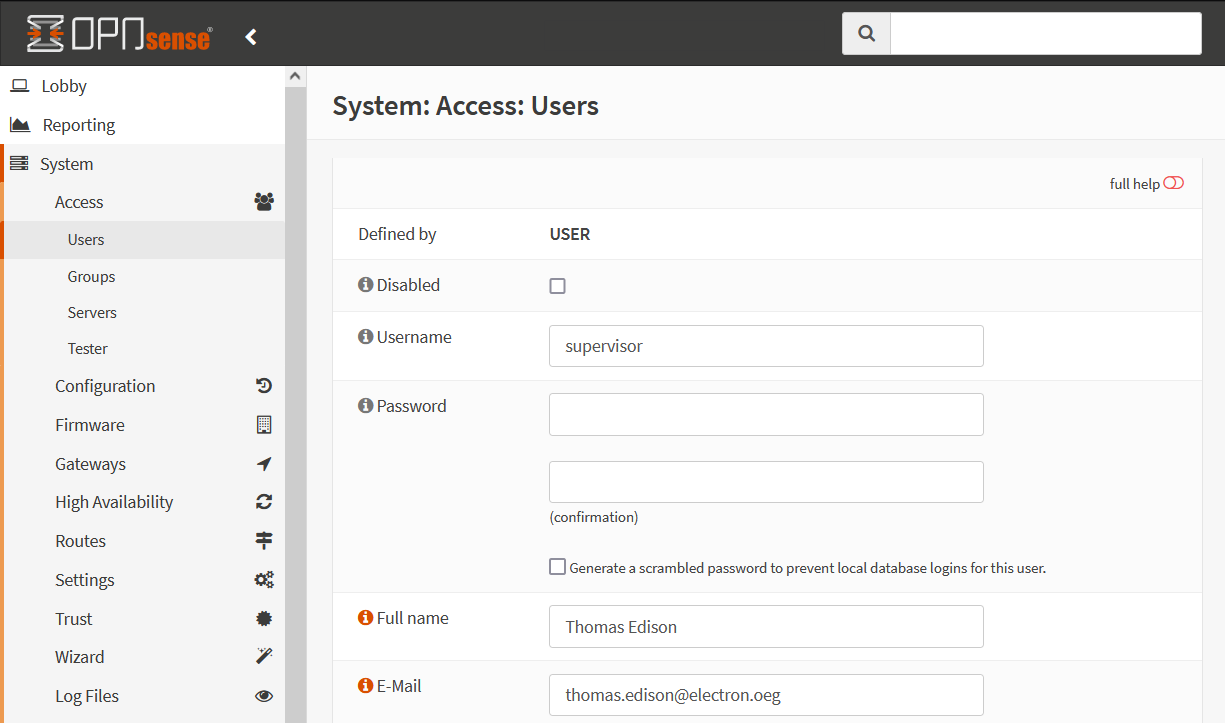
Enter a username and password and fill in the other fields, just like for any other user. Then left at OTP-seed click the checkbox at Generate new secret (160bit).

Generate new secret OPNsense System Access Users OTP-seed

Then click the Save button.

Step 3 – Enable the authenticator for OTP seed

To activate the new OTP seed on the Google Authenticator, first open the user you just created again, click on the pencil icon, then on the Click to unhide button.

Enable the authenticator for the 2FA OTP seed

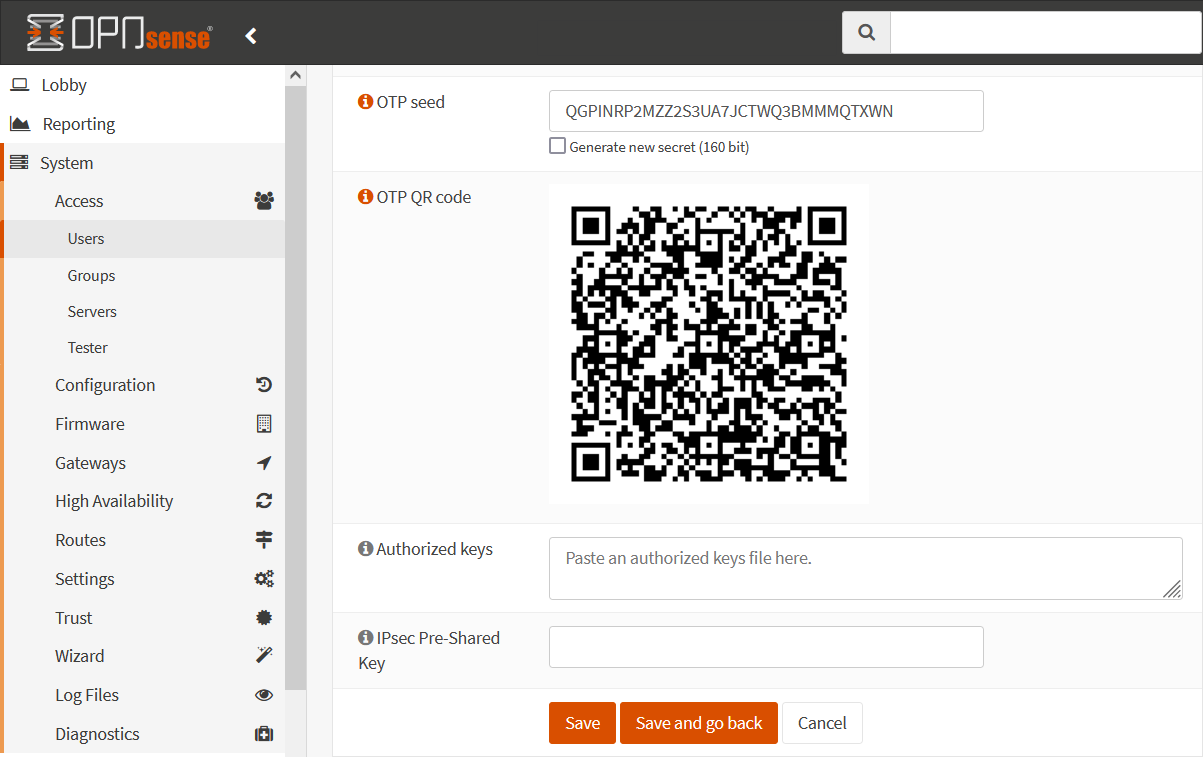
Be very careful with the seed or QR code as this is the only thing you need to calculate the token. KEEP YOUR SEED/QR CODE SAFE !

Step 4 – Activate authentication server

Now activate the authentication server and deactivate the local database, under System ‣ Settings ‣ Administration on Authentication – Server: click on TOTP Server.

OPNsense Activate TOTP authentication server using 2FA Google Authenticator

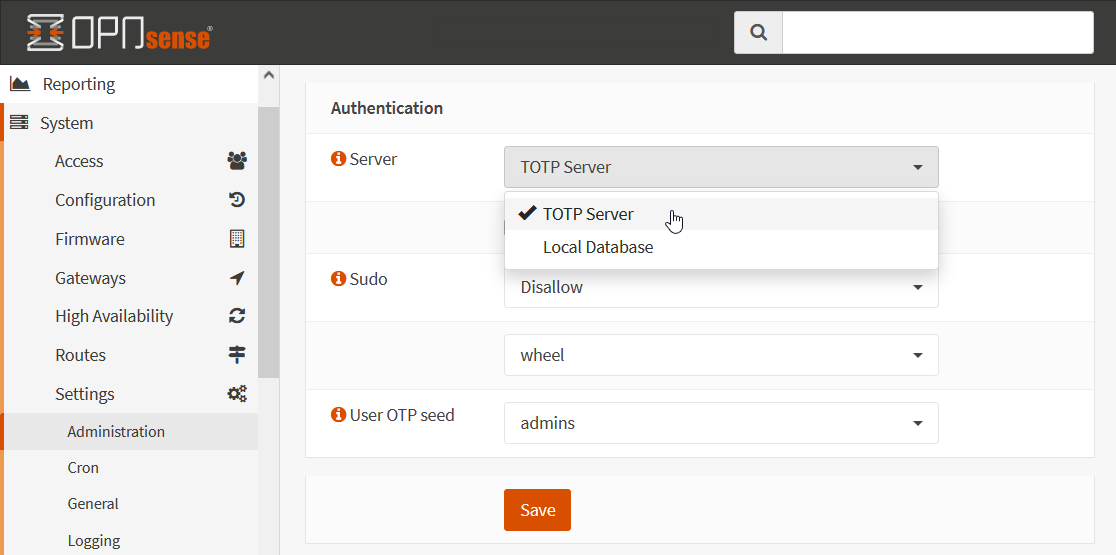
Do deactivate the Local Database and click the Save button.

Step 5 – Google Authenticator Installation

Open your platform’s App Store, such as iOS or Android, and search for Google Authenticator. Install the app on your device as usual.

Step 6 – Scan QR code

Now open the Google Authenticator app on your smartphone or tablet PC and select the option to scan the QR code, may with the + icon, alternatively the seed can be entered directly.

Testing OPNsense 2FA TOTP with Google

To test user OPNsense 2FA authentication, OPNsense offers a simple tester. This under System ‣ Access ‣ Tester.

Select the previously configured authentication server and enter the user name. The entry must be made in the form of token + password together in the password field.

  The password field is used to enter both the token and password, ie. Password: 123456PASSWORD when using the default configuration. The OTP authentication server can also be configured to be used in reverse order like PASSWORD123456.

The next relevant post might also be helpful, see OpenVPN Connect using on iPhone and Android shows how to connect with OPNsense.

Access to OPNsense Web GUI via WAN after installation

After initializing an OPNsense as a virtual machine, access to Web GUI via WAN is denied. With a newly deployed OPNsense virtual machine on a hypervisor. Such as a VMware ESXi host, the Web GUI cannot yet be reached directly from the internet.

Assign interfaces and Set interface IP address

In order to be able to access the OPNsense GUI via WAN, as with every new installation. You have to call up and follow the wizard with the option 1) Assign interfaces and 2) Set interface IP address. This to lay the basis for the OPNsense. With the interfaces and the IP configuration for the WAN and LAN interface.

Access to OPNsense Web GUI via WAN, OPNsense VMware ESXi Console

Next step, the firewall packet filter (pf) must be disabled in the vSphere console of the virtual machine.

Disable packet filter

With option 8) Shell execute the command pfctl -d:

root@OPNsense:~ # pfctl -d
pf disabled

Now the Web GUI can be opened via the WAN IP address in a browser.

Permanent access to OPNsense GUI via WAN

In order to enable permanent access to OPNsense GUI via WAN. A new rule must be created under Firewall – Rules – WAN with pass in to this firewall.

Access to OPNsense Web GUI via WAN, OPNsense Firewall Rules WAN
OPNsense – Firewall – Rules – WAN. Click for Zoom.

IMPORTANT! Do not explicitly select a gateway, the gateway must be default. The gateway previously created in the console with Set interface IP address is only required for the WAN interface configuration.

OPNsense Firewall Rules WAN Advanced features

After the default gateway has been selected, the OPNsense must be restarted. With the command reboot, or with option 6 from the OPNsense console menu.

Note! after each restart, the packet-filter (pf) firewall is enabled, the command pfctl -e to enable the pf-firewall is not required. At the beginning, when setting up the OPNsense do not add a second gateway.

  It should not go unmentioned here that the OPNsense is adequately protected against misuse and brute force attacks. It is recommended to only allow the WAN rule for access to the OPNsense web GUI from known sources. Also a user-defined port number for the web GUI can be defined under System – Settings – Administration for TCP Port in order to override the default setting (80 for HTTP, 443 for HTTPS). For this purpose, 2FA TOTP authentication with Google Authenticator is also possible, this in the post here.

The next relevant post might also be helpful How to Setup OPNsense as a Virtual Machine.