The ability to create multiple directories using mkdir at once is always useful when you need numbered directories, for example when working with archives or for testing purposes. However, creating the directories manually would be very boring and time-consuming if there were a large number of directories.
for i in {1..10} do mkdir “$i” done
But thanks to the versatile options in the command line, this task can be solved quickly and easily using for loops.
mkdir multiple directories at once in Linux
Here I’ll show you usefull examples how to create multiple directories at once using mkdir here in the Linux bash with just one command.
$ for i in {1..10}; do mkdir dir"$i" ;done
The number of sequenses between the curly braces can be increased as desired, for example start at 1 and go to 100.
Listing the current directory shows the following output after mkdir.
user@linux:~$ ls -al
total 314452
drwxr-xr-x 18 user user      4096 Jan  7 16:46 .
drwxr-xr-x  4 user user      4096 Oct 11 15:56 ..
drwxr-xr-x  2 user user      4096 Jan  7 16:46 dir1
drwxr-xr-x  2 user user      4096 Jan  7 16:46 dir10
drwxr-xr-x  2 user user      4096 Jan  7 16:46 dir2
drwxr-xr-x  2 user user      4096 Jan  7 16:46 dir3
drwxr-xr-x  2 user user      4096 Jan  7 16:46 dir4
drwxr-xr-x  2 user user      4096 Jan  7 16:46 dir5
drwxr-xr-x  2 user user      4096 Jan  7 16:46 dir6
drwxr-xr-x  2 user user      4096 Jan  7 16:46 dir7
drwxr-xr-x  2 user user      4096 Jan  7 16:46 dir8
drwxr-xr-x  2 user user      4096 Jan  7 16:46 dir9
In Linux bash and zsh it’s even easier, as the mkdir sequenses shown.
$ mkdir dir{1..10}
If there should now be a file in each directory, you can do this with the next command.
$ for i in {1..10}; do echo -e "This is the message" > dir"$i"/readme.txt ;done
This command create a file in multiple directories at once using for loop .
If you want to set the owners and permission to multiple directories at once then this command is used.
$ for i in {1..10}; do chown -R user:user dir"$i" ;done
$ for i in {1..10}; do chmod -R 755 dir"$i" ;done
If you do not need the directories anymore and can to be deleted again, this command can do it just as quickly at once in the Linux shell.
$ for i in {1..10}; do rm -rf dir"$i" ;done
Create multiple directories in Windows at once
In Windows you can open notepad and insert the following line and save it as a batch file (.bat). Then open a command prompt and simply run the batch file.
@echo off
for /L %%n in (1,1,10) do mkdir c:\temp\dir%%n
Alternatively, this line also works and create multiple directories at once using mkdir in command prompt.
for /L %%n in (1,1,10) do md dir%%n
This command create multiple directories at once using in batch file.
Create multiple directories using PowerShell
In Windows PowerShell this can be done with this command.
for ($i=1;$i -le 10;$i++){MD "dir$i"}
This PowerShell commnad create multiple directories at once in a loop.
With a less neasty PowerShell command can do the same.
The Apache web server provides virtual hosts using different PHP versions to support multiple domains on a single Ubuntu server. You can manage multiple PHP versions on the same web server.
Together, with Apache and PHP-FPM to hosting multiple PHP web-applications, each using a different version of PHP, all on the same server, and all at the same time. This because different applications may require different versions of PHP, but some server stacks, like a regularly configured LAMP stack, can only manage one. Using Apache with PHP-FPM FastCGI Process Manager is also a more cost-efficient solution than hosting each application on its own instance.
In this tutorial you’ll learn how to deploy two PHP sites on a single Ubuntu 20.04 or 22.04 server. Each site will use its own domain, and each domain use its own version of PHP. The first, site1.example.com will use PHP 8.2. The second, site2.example.com use PHP 7.4.
Step 1 – Installing PHP Version 8.2 with PHP-FPM
After the requirements are met, install PHP versions 7.4 and 8.2 as well as PHP-FPM and several additional extensions. To achieve this, we first add the ondrej/php PPA to the Ubuntu server.
Install PHP with the Apache module. Below you will find installations for both PHP 7.4 and PHP 8.2. First of all, bring the system up to date.
$ sudo apt update && sudo apt upgrade -y
Next, the required service packages are installed.
With installing two PHP versions, start the php8.2-fpm service.
$ sudo systemctl start php8.2-fpm
Repeating this process, now start the php7.4-fpm service.
$ sudo systemctl start php7.4-fpm
Now check the status of the php-fpm services.
$ sudo systemctl status php*
Step 3 – Configure Apache for Multiple PHP-FPM versions
Finaly, enable several modules using the Apache helper command so that your Apache2 service work with multiple PHP versions.
$ sudo a2enmod actions fcgid alias proxy_fcgi setenvif
Now restart the Apache service to apply your changes.
$ sudo systemctl restart apache2
With this steps you have installed two PHP versions on your server. Next, you’ll create a docroot for each website you want to deploy.
Step 4 – Creating Docroot for 2 Apache Websites
In this step, you will create a document root directory and an index page for each of your two websites.
First, create document root directories for site1.example.com and site2.example.com. This you can do with copy & paste the following for loop command in the bash.
$ sudo for i in {1..2}; do mkdir /var/www/site"$i".example.com ;done
These for loop should work in all common shells, bash and zsh offer an abbreviated version by perform mkdir site{1..2}.example.com
By default, the Apache webserver runs as a www-data user and www-data group. To ensure that you have the correct ownership and permissions of your website root directories. This can be performed with the following for loop commands in the bash.
$ sudo for i in {1..2}; do chown -R www-data:www-data /var/www/site"$i".example.com ;done
$ sudo for i in {1..2}; do chmod -R 755 /var/www/site"$i".example.com ;done
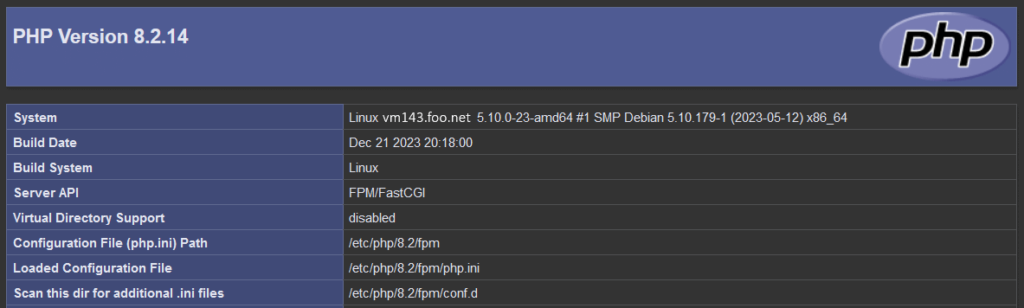
Next you’ll create an phpinfo.php file inside each website document root. This will display each website’s PHP version information. Now let’s begin with site1.
Create the phpinfo.php file with copy & paste the following command.
$ sudo for i in {1..2}; do echo -e "<?php phpinfo(); ?>" > /var/www/site"$i".example.com/phpinfo.php ;done
The web server should now have the document root directories that each site requires to serve data to visitors. Next, you will configure the Apache web server to work with two different PHP versions.
Step 5 – Configuring Apache for Both Websites
In this step, you’ll create two Apache virtual host configuration files. This will enable your two websites to work simultaneously with two different PHP versions.
In order for Apache to serve this content, it is necessary to create a virtual host file that contains the needed directives. Instead of modifying the default configuration file located at /etc/apache2/sites-available/000-default.conf, you’ll create two new ones inside the directory /etc/apache2/sites-available/.
First create a new Apache virtual host configuration file for the website site1.mydomain. Here you will direct Apache to render content using php8.2.
$ sudo vi /etc/apache2/sites-available/site1.example.com.conf
Use the editor of your choice, maybe it’s nano, it’s possible for old dudes who can’t replace the heavy rock with anything!
Add the following content. Make sure the website DocumentRoot path, ServerName, and PHP version match your setup.
<VirtualHost *:80>
     ServerAdmin admin@site1.example.com
     ServerName site1.example.com
     DocumentRoot /var/www/site1.example.com
     DirectoryIndex phpinfo.php

     <Directory /var/www/site1.example.com>
        Options Indexes FollowSymLinks MultiViews
        AllowOverride All
        Require all granted
     </Directory>

    <FilesMatch \.php$>
      # For Apache version 2.4.10 and above, use SetHandler to run PHP as a fastCGI process server
      SetHandler "proxy:unix:/run/php/php8.2-fpm.sock|fcgi://localhost"
    </FilesMatch>

     ErrorLog ${APACHE_LOG_DIR}/site1.example_error.log
     CustomLog ${APACHE_LOG_DIR}/site1.example_access.log combined
</VirtualHost>
In this file you updated the DocumentRoot to your new directory and ServerAdmin to an email that the mydomain site administrator can access. You’ve also updated ServerName, which establishes the base domain for this virtual host configuration, and you’ve added a SetHandler directive to run PHP as a FastCGI Process Manager.
Save and close the file.
Next, create a new virtual host configuration file for the website site2.mydomain. You will specify this subdomain to deploy php7.4.
$ sudo vi /etc/apache2/sites-available/site2.example.com.conf
Add the following content. Again, make sure the website directory path, ServerName, and PHP version match your unique information.
<VirtualHost *:80>
     ServerAdmin admin@site2.example.com
     ServerName site2.example.com
     DocumentRoot /var/www/site2.example.com
     DirectoryIndex phpinfo.php

     <Directory /var/www/site2.example.com>
        Options Indexes FollowSymLinks MultiViews
        Require all granted
     </Directory>

    <FilesMatch \.php$>
      # For Apache version 2.4.10 and above, use SetHandler to run PHP as a fastCGI process server
      SetHandler "proxy:unix:/run/php/php7.4-fpm.sock|fcgi://localhost"
    </FilesMatch>

     ErrorLog ${APACHE_LOG_DIR}/site2.example_error.log
     CustomLog ${APACHE_LOG_DIR}/site2.example_access.log combined
</VirtualHost>
Save and close the file when you are finished. Then check the Apache configuration file for any syntax errors.
$ sudo apachectl configtest
You’ll see the following output.
Syntax OK
Next, enable both virtual host configuration files.
The default configuration works for most of the installation, however it could be improved in various ways. To re-enable it’s recommended to enable access to the files only in specific virtual host or directory.
Find further examples at https://wiki.apache.org/httpd/PHP-FPM
Step 7 – Finally, clean up no needed files
Now that you’ve tested your sites, remove the phpinfo.php files. Because they contain sensitive information about your server and are accessible to unauthorized users, they pose a security threat. To remove both files and directory perform the following command.
$ sudo for i in {1..2}; do rm -rf /var/www/site"$i".example.com ;done
You now learn how to deploy a single Ubuntu 20.04 or 22.04 server handling two websites with two different PHP versions. PHP-FPM, however, is not limited to two PHP versions only.
Conclusion
You have now combined Apache virtual hosts and PHP-FPM to serve multiple websites and multiple versions of PHP on a single Ubuntu server. The only practical limit on the number of PHP sites and PHP versions that your Apache service can handle is the processing power of your instance.
From here you might consider exploring PHP-FPM’s more advanced FastCGI Process Manager features, like its adaptive spawning process or how it can log sdtout and stderr. Alternatively, you could now secure your websites.
UNBLOG verwendet Cookies, um Dein Online-Erlebnis zu verbessern. Mit "ACCEPT" gibst Du Deine Zustimmung zur Nutzung dieser Website und unseren Datenschutzbestimmungen, oder wähle Cookie settings.
Diese Website verwendet Cookies, um Ihre Erfahrung zu verbessern, während Sie durch die Website navigieren. Von diesen werden die Cookies, die nach Bedarf kategorisiert werden, in Ihrem Browser gespeichert, da sie für das Funktionieren der grundlegenden Funktionen der Website wesentlich sind. Wir verwenden auch Cookies von Drittanbietern, mit denen wir analysieren und verstehen können, wie Sie diese Website nutzen. Diese Cookies werden nur mit Ihrer Zustimmung in Ihrem Browser gespeichert. Sie haben auch die Möglichkeit, diese Cookies zu deaktivieren. Das Deaktivieren einiger dieser Cookies kann sich jedoch auf Ihre Browser-Erfahrung auswirken.
Notwendige Cookies sind unbedingt erforderlich, damit die Website ordnungsgemäß funktioniert. Diese Kategorie enthält nur Cookies, die grundlegende Funktionen und Sicherheitsmerkmale der Website gewährleisten. Diese Cookies speichern keine persönlichen Informationen.
Alle Cookies, die für die Funktion der Website möglicherweise nicht besonders erforderlich sind und speziell zur Erfassung personenbezogener Daten des Benutzers über Analysen, Anzeigen und andere eingebettete Inhalte verwendet werden, werden als nicht erforderliche Cookies bezeichnet. Es ist obligatorisch, die Zustimmung des Benutzers einzuholen, bevor diese Cookies auf Ihrer Website ausgeführt werden.


The number of sequenses between the curly braces can be increased as desired, for example start at 1 and go to 100.