SMTP Console Tool for Easy Tast and Troubleshooting SMTP connections
The free SMTP-Console Tool help for diagnostc and makes it easy to troubleshoot and test SMTP connections without having to enter Telnet commands. It supports both open and secure (SSL/TLS) SMTP server connections.
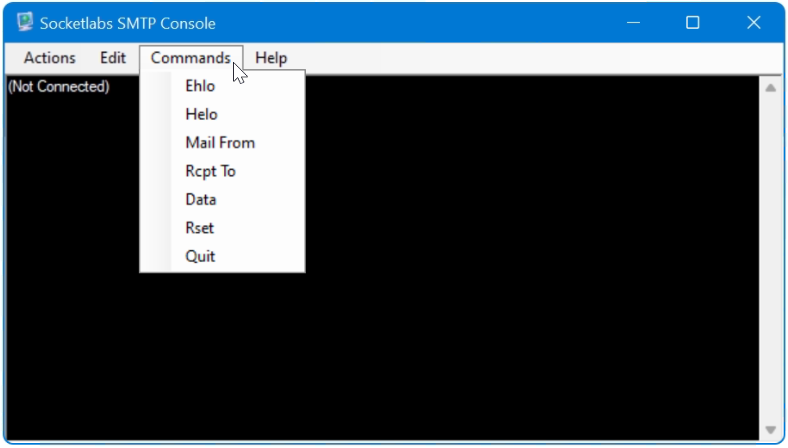
The SMTP tool includes a built-in library of commands such as EHLO, MAIL FROM, RCPT TO, DATA. The free software SMTP-Console from SocketLabs for Windows can be downloaded here.
If there are problems establishing a connection or sending e-mails with an SMTP server, the error can be quickly diagnosed, the connection to the SMTP relay server can be checked and tested as follows.
SMTP errors with a mail server can be!
- The SMTP server does not send ?
- Communication to the SMTP server is blocked, firewall ?
- Why did the connection to the SMTP server fail?
- SMTP server with SMTP-Auth authentication ?
- How to set up SSL/TLS or STARTTLS encryption ?
- Does the server respond with the correct hostname ?
- The SMTP server responds with an error ?
SMTP Console is a test troubleshooting tool
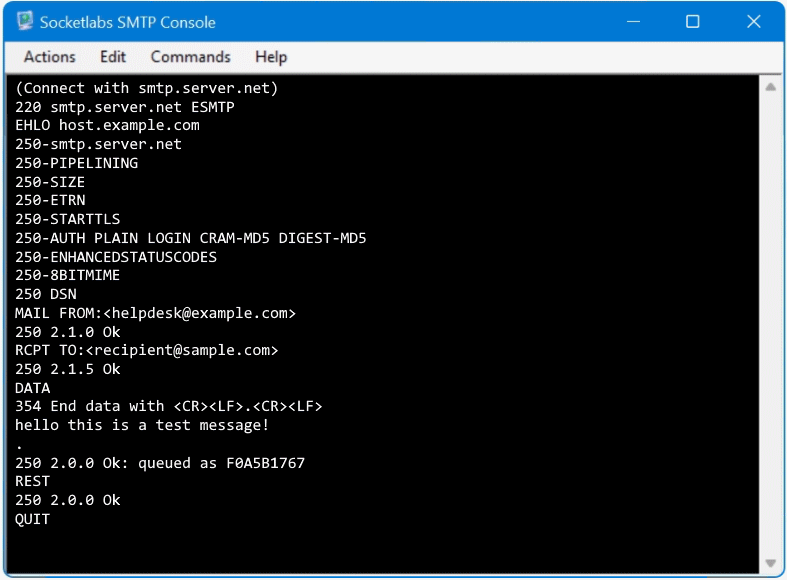

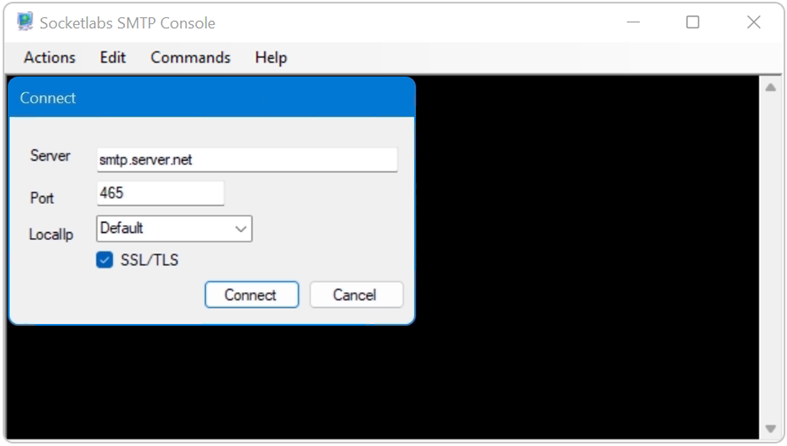
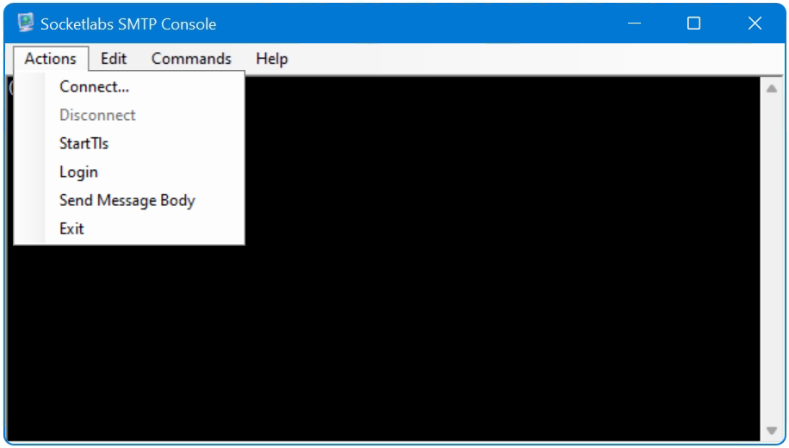
First you go to Actions – Connect in the menu to establish the connection to the SMTP server.
After the connection to the SMTP server has been established, a dialog can be launched by choose the EHLO or HELO command.
The SMTP server commands in the following order:
EHLO example.com
MAIL FROM:<hostmaster@example.com>
RCPT TO:<recipient@domain.net>
DATA
Body Message i.e. hello this is s test message!
.
RSET
QUIT
After DATA enter the body message, by ending with dot (.) on a line by itself, the email proceed to sent.
Use SMTP Test and troubleshooting Tool
If the SMTP server requires authentication via STARTTLS, first open a connection to the server then go to Actions – Connect, then select StartTls and choose Commands – Helo with enter eg. HELO domain.com, now go to Actions – Login wille enter a valid user account in the User field and the password into the Password field, select AUTH-LOGIN as type. A test message can now send with run first Mail From then Rcpt To followed with Data. Enter the message and ending with dot “.” on a line by itself, finaly it appers the SMTP status code 200 Ok queued as <queue id>.
You’ll notice that the email doesn’t have sender’s email address in it.
How to Test SMTP Server using Telnet on Port 25
The Telnet client is available in Windows, but not activated by default from Windows 10 (not installed as a feature). The Telnet Client feature is easy installed from PowerShell.
Install-WindowsFeature "Telnet-Client"Open PowerShell as administrator to add features.
Add-WindowsFeature -Name Telnet-ClientThe earlier PowerShell command may be required.
Alternatively, the Windows CPL module can be used, this is done via the keys Win+R and enter control appwiz.cpl,,2
Telnet will use port 23 by default, you need enter a port number at the end of the open command. SMTP Server uses commonly the ports 25, 465, and 587.
Once you are connected to the SMTP server, Backspace and Delete do not work, which is unfortunate because getting the SMTP server to accept your instructions requires you to type in those Base64 values. If you make a mistake, press Return and start again.
C:\> telnet
Microsoft Telnet> set localecho
Microsoft Telnet> set logfile c:\temp\telnetlog.txt
Microsoft Telnet> OPEN smtp.server.net 25
220 smtp.server.net ESMTP
EHLO example.com
250-smtp.server.net
250-PIPELINING
250-SIZE
250-ETRN
250-STARTTLS
250-AUTH PLAIN LOGIN CRAM-MD5 DIGEST-MD5
250-ENHANCEDSTATUSCODES
250-8BITMIME
250 DSN
MAIL FROM:<hostmaster@example.com>
250 2.1.0 Ok
RCPT TO:<recipient@domain.net> NOTIFY=success,failure
250 2.1.5 Ok
DATA
354 End data with <CR><LF>.<CR><LF>
Subject: test message from console

hello this is a test message!
.
250 2.0.0 Ok: queued as 98FCE1766
QUIT
221 2.0.0 Bye
You will see the message OK followed by an ID code. Your email has been sent. Check the Inbox of the email account that you sent the email to in order to confirm that the process worked.
A blank line is needed between the Subject and the message body. Enter the message and ending with dot (.) on a line by itself, finaly it appers the SMTP status code 200 Ok queued as
The optional NOTIFY command specifies the particular delivery status notification (DSN) messages (also known as bounce messages, nondelivery reports, or NDRs) that the SMTP is required to provide. In this example, you’re requesting a DSN message for successful or failed message delivery.