Category Archives: Howto Tutorials (EN)

Knowledge Network for Tutorials, Howto’s, Workaround, DevOps Code for Professionals.

Wake On Lan (WOL)

Wake on LAN (WOL) using on Linux, Windows, and Synology

Wake On Lan

To start remote devices – Wake on LAN (WOL) is a standard released by AMD in collaboration with HPE in 1995 to boot off computers from the NIC that support these ACPI. A general requirement for WOL is that the network card continues to be powered by the power supply’s standby power, even when the computer is turned off.

The network card is waiting for a magic packet to be received. The data packet is either addressed directly to the network card or is sent as broadcast. It contains the hexadecimal value FF six times in a row; Immediately afterwards, the continuous repetition of the MAC address of the network card of the respective target system appears 16 times.

WOL on Linux

Under GNU/Linux there is the package etherwake with the “wakeonlan” tool, which is provided as follows if it is not already installed.

$ sudo apt install etherwake

The Linux command to start a computer with WOL is wakeonlan.

$ wakeonlan -i 10.10.10.1 00:11:22:33:44:55
Sending magic packet to 10.10.10.1 with 00:11:22:33:44:55

Ubuntu and Debian awaken computers with wakeonlan.

$ wakeonlan 00:00:33:44:55:66
Sending magic packet to 255.255.255.255:9 with 00:22:33:44:55:66

quote For help with options, use the command: etherwake -u

Fedora and RHEL on the other hand awakens with ether-wake.

$ sudo ether-wake -i eno1 00:11:22:33:44:55

quote it -i eno1 means the Ethernet interface here.

The MAC address can be obtained using the arp command as follows.

$ ping -c 4 10.10.10.1 && arp -n

WOL on Synology

Synology has its own tool with synonet in the Busybox Shell.

$ synonet --wake xx:xx:xx:xx:xx:xx ethX

where -i eno1 means the Ethernet interface.

WOL for Windows

Microsoft Windows does not have a Wake on LAN onboard, a reliable WOL offers WakeMeOnLan from Nirsoft here.
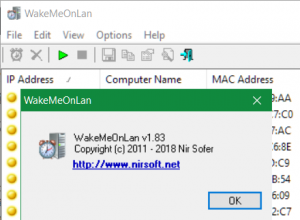
Microsoft Windows does not have a WOL onboard, a reliable WOL offers WakeMeOnLan from Nirsoft here.
Wakemeonlan

WOL on macOS

Since macOS also comes with Python by default, you can get a script, the following lines allow a Wake On LAN on the Mac.

#!/usr/bin/env python

import socket
import sys

if len(sys.argv) < 3:
    print "Usage: wake.py <IP> <MAC>   (example: 192.168.1.255 00:11:22:33:44:55)"
    sys.exit(1)

mac = sys.argv[2]
data = ''.join(['FF' * 6, mac.replace(':', '') * 16])
sock = socket.socket(socket.AF_INET, socket.SOCK_DGRAM)
sock.setsockopt(socket.SOL_SOCKET, socket.SO_BROADCAST, 1)
sock.sendto(data.decode("hex"), (sys.argv[1], 9))

Save the script and run it from the OSX terminal.

python wake.py 192.168.1.255 00:11:22:33:44:55

How it works!

The magic packet is sent on the data link layer (layer 2 in the OSI model). When sent, is broadcast to all attached devices on a given network, using the network broadcast address. The IP address (which relates to the internet layer) is not used. Because Wake-on-LAN is built upon broadcast messaging, it can generally only be used within a subnet. Wake-on-LAN can, however, operate across any network in practice, given appropriate configuration and hardware, including remote wake-up across the Internet.

In order for Wake-on-LAN to work, parts of the network interface need to stay on. This consumes a small amount of standby power. To further reduce power consumption, the link speed is usually reduced to the lowest possible speed (e.g. a Gigabit Ethernet NIC maintains only a 10 Mbit/s link). Disabling Wake-on-LAN, when not needed, can slightly reduce power consumption on computers that are switched off but still plugged into a power socket. The power drain becomes a consideration on battery-powered devices such as laptops as this can deplete the battery even when the device is completely shut down.

KVM Hypervisor on CentOS7

Installing KVM on CentOS


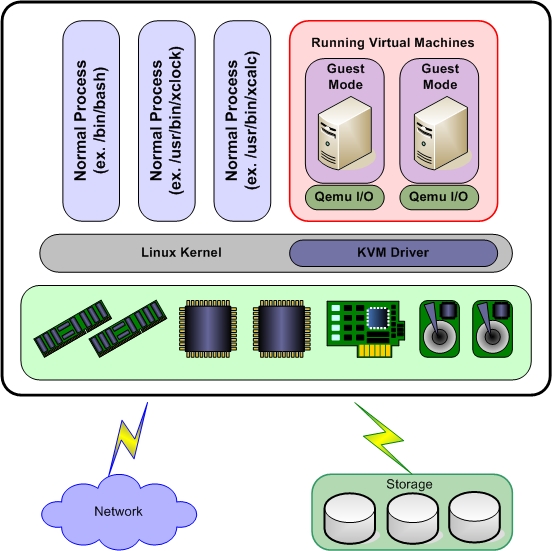
KVM is an open source hardware virtualization software that allows Linux-based and Windows-based virtual machines to run simultaneously. Called a Kernel-based Virtual Machine, KVM is an alternative to VMware ESXi and Xen, where by installing the KVM package, loading the KVM module into the current kernel and forming a hypervisor from a Linux machine.

KVM Hypervisor on CentOS7

This article shows how to install a KVM hypervisor on CentOS 7.x and RHEL 7.x to install virtual machines afterwards.

KVM Hypervisor Installation

Before proceeding with the KVM installation, check whether the CPU of the system supports hardware virtualization. To do this, perform the following command in the root shell

grep -E '(vmx|svm)' /proc/cpuinfo

The word vmx or svm should appear in the output, otherwise the CPU does not support virtualization. It may be worth going into the BIOS system to activate the VT-x boot setting.

The KVM packages and their modules are installed.

yum install -y qemu-kvm qemu-img virt-manager libvirt libvirt-python libvirt-client virt-install virt-viewer bridge-utils

The KVM service can now be activated and started.

systemctl enable libvirtd
systemctl start libvirtd

We check if the KVM modules have actually been started.

lsmod | grep kvm
kvm_intel 162153 0
kvm 525409 1 kvm_intel

If there is a Minimal CentOS 7 or RHEL 7 installation, the virt-manager does not start, so we still have to install X-Window.

yum install -y "@X Window System" xorg-x11-xauth xorg-x11-fonts-* xorg-x11-utils

Restart the server and then try to start the virtual manager.

virt-manager
KVM on CentOS7

Before we start deploying VMs, let’s first create a bridge interface. The bridge interface is required if you want to access virtual machines from outside the network to the hypervisor. In our example, the Ethernet interface is called ifcfg-eth0.

cd /etc/sysconfig/network-scripts/
cp ifcfg-eth0 ifcfg-br0

Now edit the interface file ifcfg-eth0 and enter the following:

vi ifcfg-eth0

TYPE=Ethernet
NM_CONTROLLED="no"
BOOTPROTO=static
DEVICE=eth0
ONBOOT=yes
BRIDGE=br0

Edit the ifcfg-br0 bridge file and specify the following:

vi ifcfg-br0

TYPE=Bridge
NM_CONTROLLED="no"
BOOTPROTO=static
DEVICE=br0
ONBOOT=yes
IPADDR=192.168.91.40
NETMASK=255.255.255.0
GATEWAY=192.168.91.1
DNS1=192.168.91.50

Restart the network service to activate the bridge.

systemctl restart network

Check the bridge interface with the following command:

ip addr show br0

If you prefer to make the Network Manager, you can create the bridge interface as follows:

nmcli c add type bridge autoconnect yes con-name br0 ifname br0
nmcli c modify br0 ipv4.addresses 192.168.91.40/24 ipv4.method manual
nmcli c modify br0 ipv4.gateway 192.168.91.1
nmcli c modify br0 ipv4.dns 192.168.91.50
nmcli c delete eth0
nmcli c add type bridge-slave autoconnect yes con-name eth0 ifname eth0 master br0
reboot
ip a

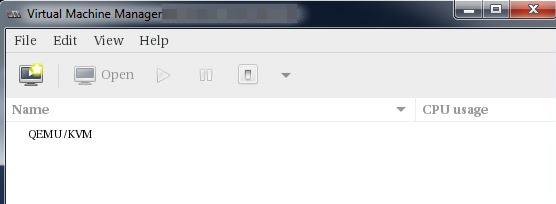
Virtual machines can now be created either from the command line with the virt-install command or from the GUI virt-manager.

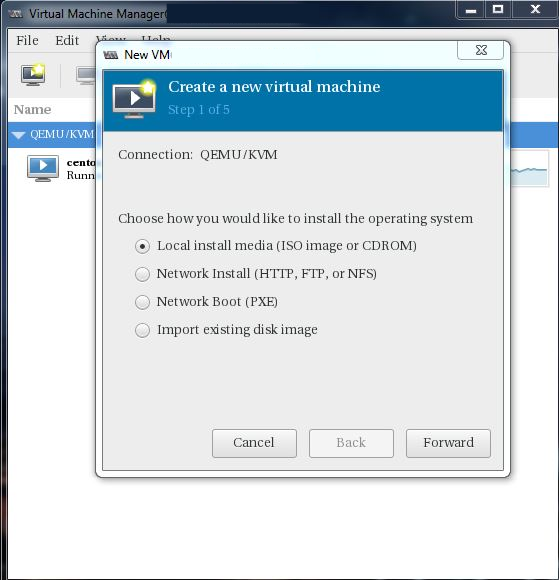
In the GUI, go to the File option and click New virtual Machine.

virtual_machine_manager, KVM on CentOS7

The virtual machine is now created with the help of the wizard.

Create virtual machine

Create virtual machines from the command line:

virt-install --name=Ubuntu-16-04 --file=/var/lib/libvirt/images/ubuntu16-04.dsk --file-size=20 --nonsparse --graphics spice --vcpus=2 --ram=2048 --cdrom=ubuntu-16.04-server-amd64.iso --network bridge=br0 --os-type=linux --os-variant=generic
Starting install...
Allocating 'ubuntu16-04.dsk' | 20 GB 00:00:00
Creating domain...

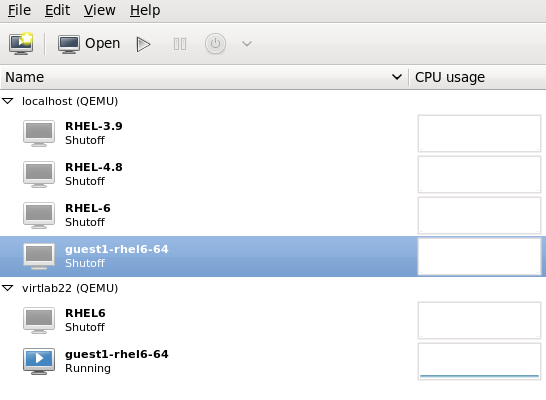
From the virtual manager, the VMs are booted up and managed, the status and system load is displayed, similar to what you know from vSphere.

kvm_virtual_manager. KVM Hypervisor on CentOS.
Illustration: KVM virtual Manager

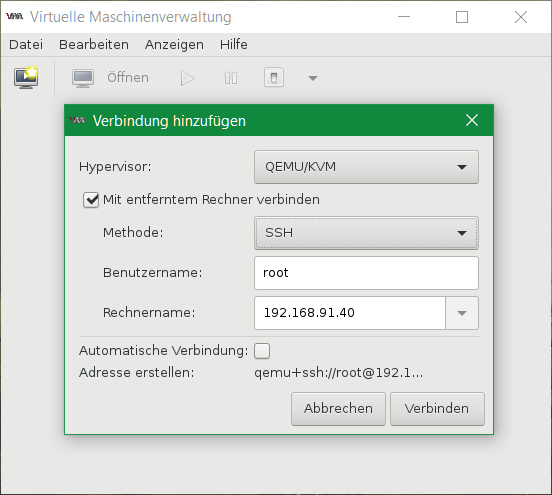
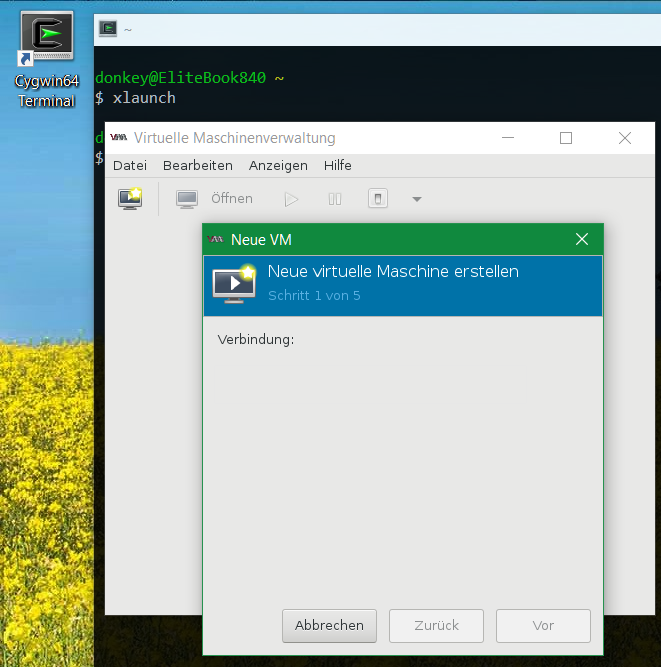
Furthermore, virt-manager from Cygwin is executable in Windows 10, for this Cygwin64 must be installed with the Xorg server and virt-manager, with the virt-manager one connects to the KVM hypervisor.

virt-manager KVM on CentOS
Illustration: Cygwin virt-manager Inindung
virt-manager-new
Illustration: Cygwin virt-manager