Grandstream UCM LDAP Phonebook

This article descries the central phonebook provisioning using LDAP on a UCM IP PBX, allowing users to save, retrieve and make calls from their own contacts.

GRANDSTREAM UCM6202 UCM6208 central phonebook for contacts

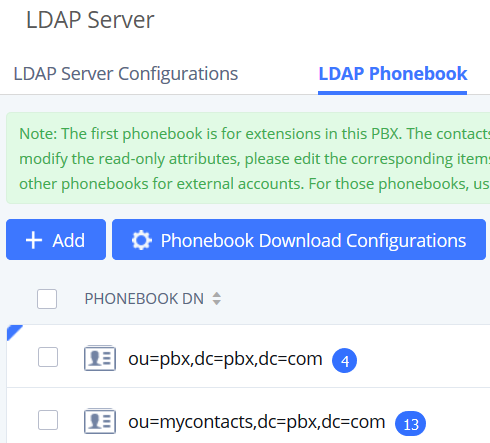
The existing Phonebook of the UCM is intended for PBX, these contacts cannot be added or deleted directly. To change contacts, go to “Extensions” in the WebUI of the UCM. The read-only attributes of the corresponding elements can be edited in the extensions. The phone book is automatically updated when changes are made to the extensions. To add external contacts, users can use additional phonebooks. For these phone books, LDAP attributes can be edited and contacts can be added or deleted directly.

For the LDAP Phonebook already pre-installed on the UCM. You create an additional phone book, here in this example it is mycontacts, the X.500 Context looks like this:

ou=mycontacts,dc=pbx,dc=com

The configuration for phone books can be found in the WebUI of the UCM under System Settings – LDAP Server – LDAP Phonebook:

Click on +Add and create a new phonebook:

UCM LDAP add phonebook

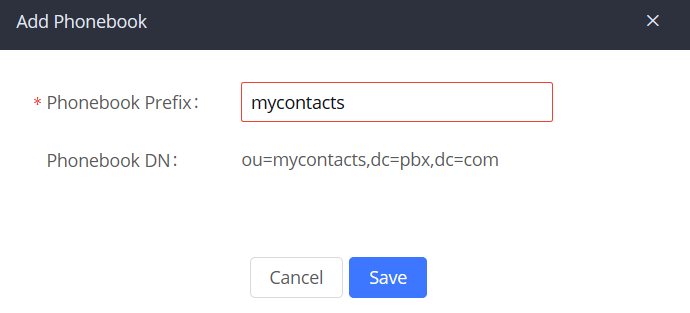
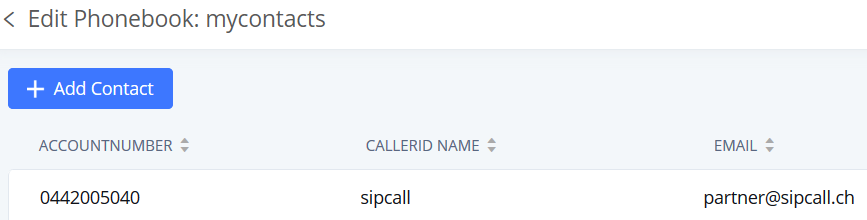
After saving, the newly created phonebook appears as follows. The prefix denotes the X.500 Distinguished Name (DN) as an object OU=mycontacts:

UCM phonebook ldap server

On the right you click on the editor icon to add new contacts:

add contact phonebook

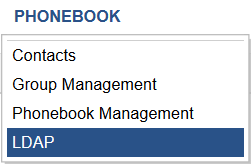
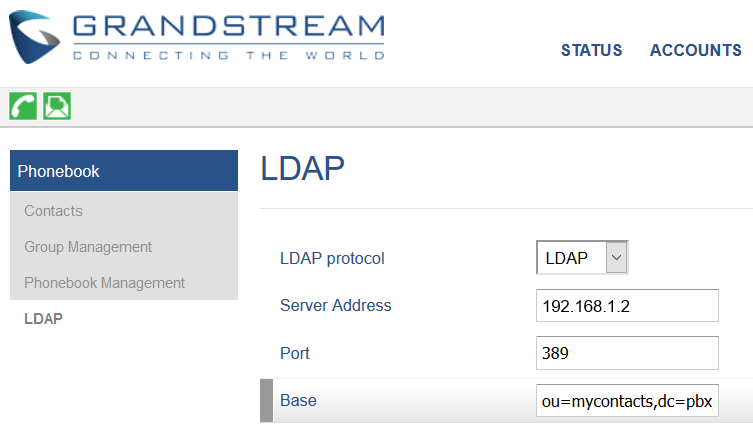
With the phone GXP21xx you go to PHONEBOOK and LDAP:

phonebook

In the Server Address field you enter the IP of the UCM. In the Field Base the context, under Phonebook – LDAP: (ou=mycontacts,dc=pbx,dc=com)

UCM LDAP phonebook

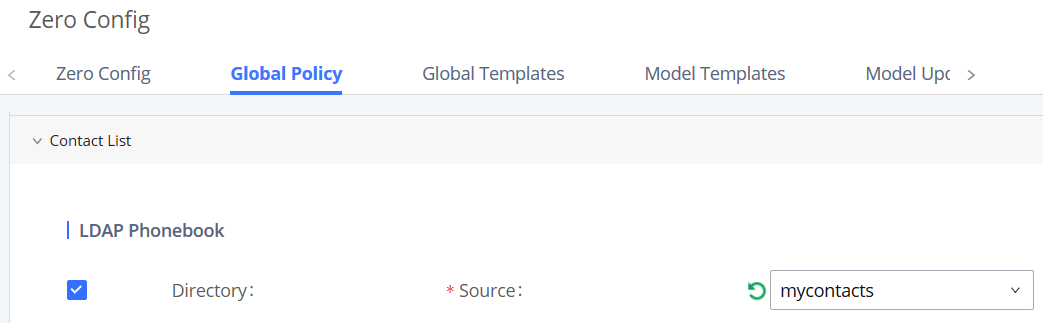
For the provisioning of the LDAP Phonebook mycontacts you go to Value-added-Features – Zero Config – Global Policy and open Contact List and activate Directory under LDAP Phonebook. Then you select the previously created Phonebook at Source, here mycontacts:

UCM LDAP phonebook zero config

Now Zero Config will make the change for the phones by clicking update.

On the phone GXP21xx you press the directory button and select LDAP directory, you have to enter a character at min. before pressing the softkey search, e.B. with an A all contacts containing an A are listed.

Users switching by Windows Task Manager

Switch users from Windows TaskManager without need the admin password.

In order for administrators to understand a user’s problem, they need to log on as the user, who usually need their password, but if the user is not at their workplace, the admin can reset his password to get his user profile afterwards. This article shows how to do it without a user password.

Users switching by Windows TaskManager and PsExec

This will be done using the PsExec tool, which we copied to the download folder before.

PsExec by Mark Russinovich is part of the Sysinternals Suite, which is now part of Microsoft, Sysinternals are system tools developed as freeware, PsExec can be downloaded here.

 Command Prompt admin password

The help desk employee opens a Command Prompt with raised right and performs the following command:

%USERPROFILE%\Downloads\PsExec -SID cmd.exe

From the second command prompt, which is now open, the task manager (taskmgr) is started:

Switch users from Windows Task Manager without need the admin password.
Figure: Task manager run from Command Prompt.

Now in the task manager with the mouse go over the corresponding user, and with the right mouse button click on Connect, the switch to the user now happens without entering a password.

Especially on a terminal server, this solution is very effective for admins, where several users are logged in, wherethe admin can switch to its session without a user password. It should also be mentioned here that this is not a security vulnerability, otherwise the admin can also do and leave what he wants, for users with normal rights this procedure is not possible.

Since Windows 8, Task Manager has two views. The first time Task Manager is invoked by a user, it shows in a simplified summary mode (described in the user experience as Fewer Details). It can be switched to a more detailed mode by clicking More Details. This setting is remembered for that user on that machine.

Since at least Windows 2000, the CPU usage can be displayed as a tray icon in the task bar for quick glance.