
SSH Tunnel with PuTTY

PuTTY can produce more than just terminal sessions, with the option SSH port forwarding can be initialized in simple ways.
After PuTTY is started, you enter the IP of the target host under host name, or the server name, which is usually a firewall, a router or a host with a global IP address.
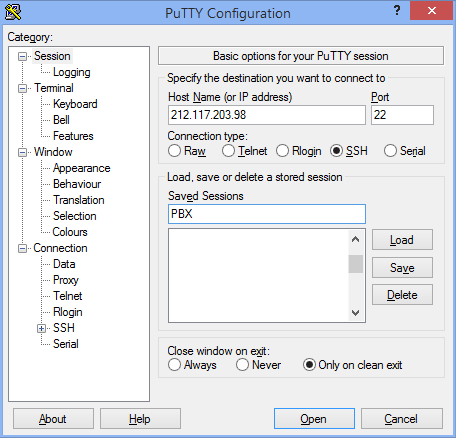
Here in our example, on the host 212.117.203.98, our PBX is made with the port forwarding to a SIP phone, and then configured via the web browser, the host can also be an FQDN of a DNS resolvable host.
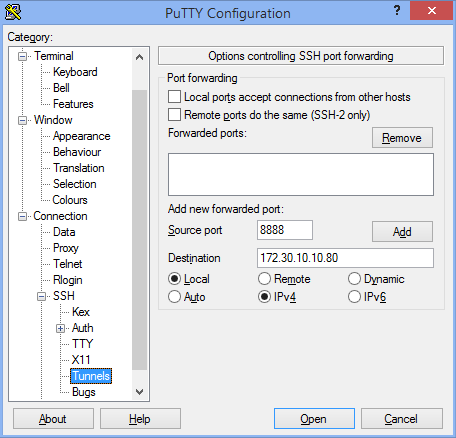
In the lower part of SSH, the tunnel point is selected. After that, the starting point and the end point of the tunnel are entered:
Source port: 8888
Destination: 172.30.10.10
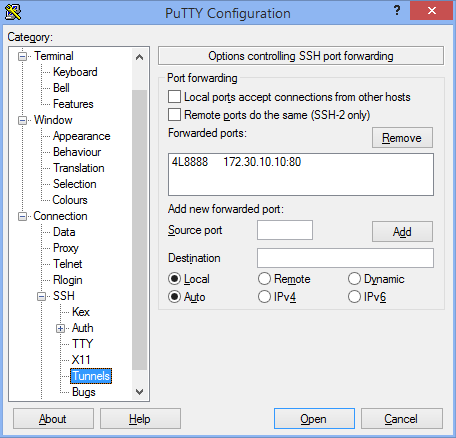
The action is completed with a click on Add. The data from the tunnel has now been adopted. The settings are saved above under Session by clicking on Save Permanent.
Clicking on Load and Open will establish the connection. The well-known terminal console opens with the prompt to log in. There you log in as a normal user, so the tunnel is established.
Now you open the web browser and enter the following localhost address https://127.0.0.1:8888/. After that, as here in our example, the login dialog of the SIP-Phone WebGUI begins, which we can now configure. Other ways to use SSH tunnels are available for Synology DS, SAN Memory, Unix/Linux Hosts, or Mac OS X.
Note. The SSH option AllowTcpForwarding yes must be enabled on the server, default is yes entered in the server configuration file /etc/ssh/sshd_config.
For the host behind a firewall, it must be accessible via port 22 Static NAT forward.
PuTTY can be used by passing numerous parameters.
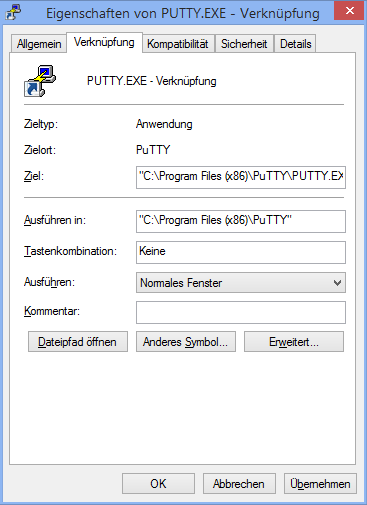
Insert the following line as the target for the link:
“C:\Program Files (x86)\PuTTY\PUTTY. EXE” -l jolly -pw password -4 -L 8888:172.30.10.10:80 -X :0 -load PBX
Wherethe parameters mean the following:
-l the login name
-pw the password
-4 it should be used IPv4
-L of the Destination Port and the IP
-X for X11 forwarding
-load open saved session

