Configuring OpenDKIM with Postfix using virtual domains can be confusing, especially for those unfamiliar with the topic. However, with the right approach, you can achieve this easily. This tutorial will walk you through the setup where OpenDKIM and Postfix is used for multiple email domains.

The OpenDKIM package consists of a library that implements the DKIM service and a milter-based filtering application that integrates a milter for Postfix to provide this service to an MTA that serve multiple virtual domains for email services.
OpenDKIM hosts a data collection facility for Postfix sites and virtual domain that wish to volunteer their data. These data are used as feedback to the Internet Engineering Task Force to develop new reputation standards.
DKIM provides a method to validate an email message with the associated domain name identity through cryptographic authentication. This procedure helps combat email spoofing and thus increases email security. In the context of Postfix, the integration of OpenDKIM offers several key advantages:
- Improved Email Deliverability: Emails signed with DKIM are less likely to be flagged as spam, ensuring your messages reach the intended recipients.
- Enhanced Sender Reputation: It boosts your domain’s credibility and reputation by demonstrating that your emails are legitimate and tamper-proof.
- Increased Trust: It verifies the sender’s identity, reassuring recipients that the emails they receive are authentic.
Step 1: Install OpenDKIM
Here we will deploy OpenDKIM in 5 steps on a Debian 12 server with Postfix already installed. I prefer to gain elevated privileges by running “su -” or “sudo su -“. Choose the preferred method, making sure that the following commands could be executed with sudo if necessary.
$ apt install opendkim -yStep 2: Configure OpenDKIM
Open the OpenDKIM main configuration file in editor of your choice.
$ vi /etc/opendkim.confBy default, OpenDKIM is set to verification mode (v), which verifies the DKIM signatures of receiving email messages. Changing the mode to “sv,” will let us activate the signing mode for outgoing emails.
Syslog                  yes
SyslogSuccess           yes
LogWhy                  yes
Canonicalization        relaxed/simple
Mode                    sv
OversignHeaders         From
UserID                  opendkim:opendkim
UMask                   022
Socket                  inet:8899@localhost
PidFile                 /run/opendkim/opendkim.pid
TrustAnchorFile         /usr/share/dns/root.key
AutoRestart             Yes
AutoRestartRate         10/1h
ExternalIgnoreList      refile:/etc/opendkim/TrustedHosts
InternalHosts           refile:/etc/opendkim/TrustedHosts
KeyTable                refile:/etc/opendkim/KeyTable
SigningTable            refile:/etc/opendkim/SigningTable
SignatureAlgorithm      rsa-sha256
TemporaryDirectory      /var/tmp
Uncomment the SigningTable and KeyTable option by removing the hash (#) and add the additional lines to /etc/opendkim.conf.
Save and close the OpenDKIM main configuration file.
Next make shure the SigningTable and KeyTable file and also the keys directory exists with the required rights under /etc/opendkim.
$ ls -Al /etc/opendkim
drwxr-x--- 17 opendkim opendkim 4096 Jan 30 keys
-rw-r-----  1 opendkim opendkim 1883 Jan 30 KeyTable
-rw-r-----  1 opendkim opendkim 1988 Jan 30 SigningTable
-rw-r-----  1 opendkim opendkim  460 Jan 30 TrustedHosts
The “/etc/opendkim/TrustedHosts” file contains the internal hosts and a list of addresses and/or hostnames they want to ignore from verification. The localhost IP (127.0.0.1) should always be the first entry in this file.
127.0.0.1
::1
*.example.tld
Step 3: Generate Private and Public Keys
Now let’s generate private and public keys. The command to generate a new key pair performs as follows.
$ opendkim-genkey -b 2048 -d example.tld -D /etc/opendkim/keys/example.tld -s mail -r -h sha256 -vA key pair with a size of 2048 bits is generated, for the domain “example.tld” and saved in to “/etc/opendkim/keys/example.tld” file with the selector “mail” using for mail with the -r option, with -h tells sha256 hash algorithm, the -v option is for verbose outbut.
Generate new Key for Postfix virtual domain
Save the next lines to a file, for example as /usr/bin/adddkim.
#!/bin/bash
if [ $# -lt 2 ]; then
    echo "No argument supplied"
    echo "use: selector domain"
    exit 1
fi
mkdir /etc/opendkim/keys/$2
opendkim-genkey -D /etc/opendkim/keys/$2/ -d $2 -h sha256 -s $1 -r
chown -R opendkim:opendkim /etc/opendkim/keys/$2
chmod 640 /etc/opendkim/keys/$2/*
mv /etc/opendkim/keys/$2/$1.private /etc/opendkim/keys/$2/$1
echo "$1._domainkey.$2 $2:$1:/etc/opendkim/keys/$2/$1" >> /etc/opendkim/KeyTable
echo "*@$2 $1._domainkey.$2" >> /etc/opendkim/SigningTable
cat /etc/opendkim/keys/$2/$1.txt
Save and close the file and make this script executable.
$ chmod 755 /usr/bin/adddkimFinish, now simply use the command to generate a new DKIM for each desired domain by running this command.
$ adddkim selector example.tldThe command generates a private and public key and adds the entries to the SigningTable and KeyTable file.
Note: “default” is the DKIM selector. A domain might have multiple DKIM Signatures. The DKIM selector allows you to choose a particular DKIM Key. You can use any name of your choice, but make sure you don’t have a DKIM Signature already implemented with the same selector name.
Step 4: Connect Postfix to OpenDKIM
Now that you’ve configured OpenDKIM, it’s time to implement Postfix DKIM. Let’s follow the Postfix OpenDKIM configuration process.
Edit Postfix main configuration file.
$ vi /etc/postfix/main.cfAdd the following lines to the end of the “main.cf” file.
smtpd_milters = inet:127.0.0.1:8899
non_smtpd_milters = $smtpd_milters
milter_default_action = accept
milter_protocol = 2
Finally, now restart the services to apply changes.
$ systemctl restart opendkim
$ systemctl restart postfix
Step 5: Publish the Public DKIM to DNS
Implement the public DKIM to the corresponding DNS zone.
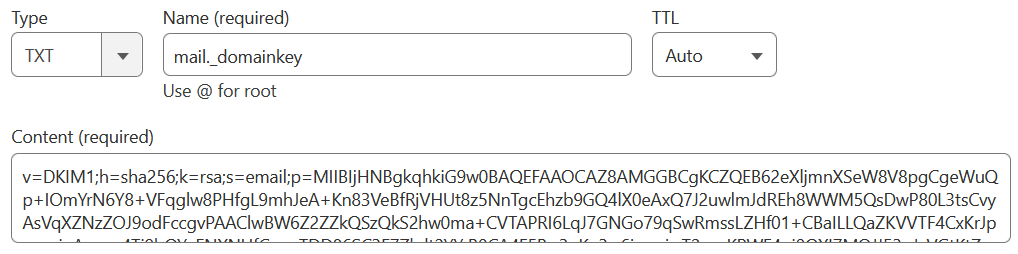
$ cat /etc/opendkim/keys/example.tld/mail.txtThe content of mail.txt is the public key that will add to the DNS zone.
mail._domainkey IN      TXT     ( "v=DKIM1; h=sha256; k=rsa; s=email;"
    "p=MIIBIjHNBgkqhkiG9w0BAQEFAAOCAZ8AMGGBCgKCZQEB62eXljmnXSeW8V8pgCgeWuQp+IOmYrN6Y8+VFqglw8PHfgL9mhJeA+Kn83VeBfRjVHUt8z5NnTgcEhzb9GQ4lX0eAxQ7J2uwlmJdREh8WWM5QsDwP80L3tsCvyAsVqXZNzZOJ9odFccgvPAAClwBW6Z2ZZkQSzQkS2hw0ma+CVTAPRI6LqJ7GNGo79qSwRmssLZHf01+CBaIL"
    "LQaZKVVTF4CxKrJpnsypjnAexpg4Ti9bQYnENXNHfCaogTDD86SC3E7Zkdt2YYrB0CA4F5B+3nKq3w6ioooiwT2yznKPWE4oi0QXI7MOJJ53oJyVGtKtZcq4ZLfn4KW0z5gpHgDvIDAQAA" )  ; ----- DKIM key mail for example.tld
Important Notes: Name/Target: mail._domainkey, Make sure to remove any spaces or double-quotes if your DNS provider using UI managed zone editor like Cloudflare.
Check OpenDKIM Record
You can test the DKIM TXT record with lookup using dig on linux.
$ dig TXT mail._domainkey.example.tld +shortWindows systems provide the command as follows.
$ nslookup -type=TXT mail._domainkey.example.tldYou can also try DKIM check by MxToolbox here. The DKIM Check tool will perform a DKIM record test against a domain name and selector for a valid published DKIM key record.
OpenDKIM help!
You can use the following commands for help!
$ man opendkim-genkey
and
$ opendkim-genkey --help
opendkim-genkey: usage: opendkim-genkey [options]
        --append-domain        include domain name in zone file stub
        --bits=n               use n bits to generate the key
        --directory=path       leave output in the named directory
        --domain=name          generate data for the named domain [localhost]
        --hash-algorithms=list limit to use of the named algorithm(s)
        --help                 print help and exit
        --note=string          include specified note in zone data
        --restrict             restrict key to email use only
        --selector=name        selector name [default]
        --subdomains           allow signing of subdomains
        --testmode             indicate key is in test mode
        --verbose              increased output
        --version              print version and exit