
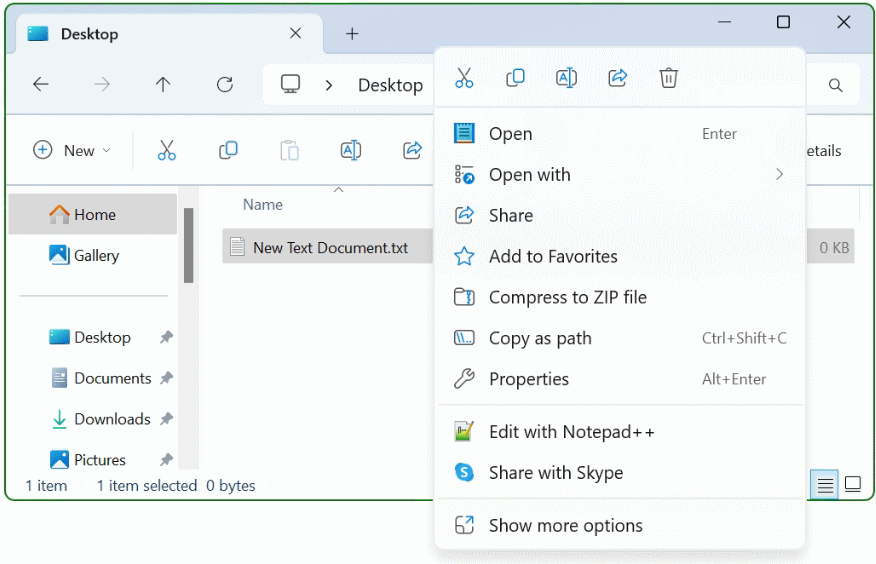
Windows 11 has entirely refreshed the right-click context menu in Windows 11 and has add a completely new menu style. While this new redesign has removed some unnecessary shortcuts and options, the new look can be a bit daunting at first.
Thankfully, it can be easily customized to suit your needs.
There are two ways to go about it. You can either revert to the old Windows 10 style context menu and add your favorite app list. Or, you can add the new apps directly in Windows 11.
Either way, you can add and remove apps to context menu in Windows 11 as per your preference.
How to change and customize the right-click context menu in Windows 11
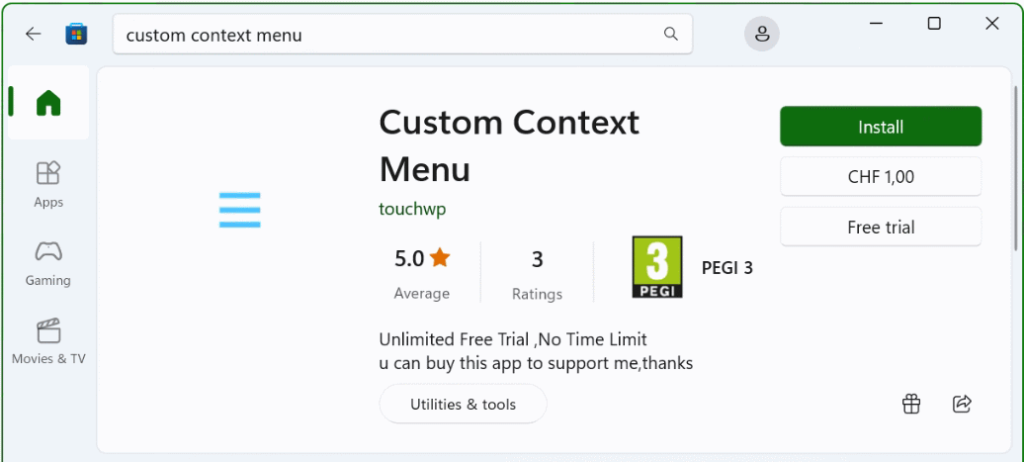
Here’s how to do it, use the tweak app “Custom Context Menu”, the app can be found in the Microsoft Store, search for “custom context menu”.
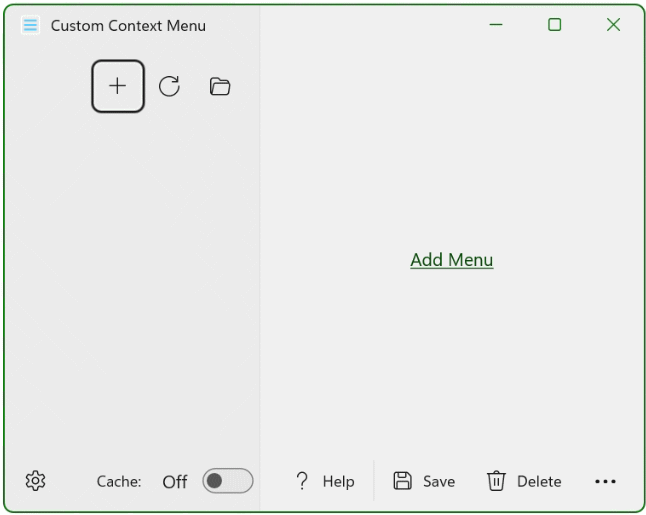
after you have installed the app offered by touchwp, open it and click Add Menu or choose + to create a new context menu item in Windows 11.
As the developer of the app describes, the app is unlimited free trial, but I think it’s definitely worth a dollar.
Enter the App you want to add to context menu in Windows 11.

Restart the computer and that’s it.
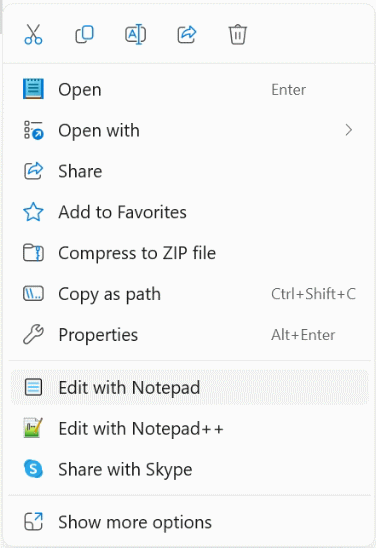
And this is what the new Item looks like in the Windows 11 file explorer context menu.
Back to classic context menu in Windows 11
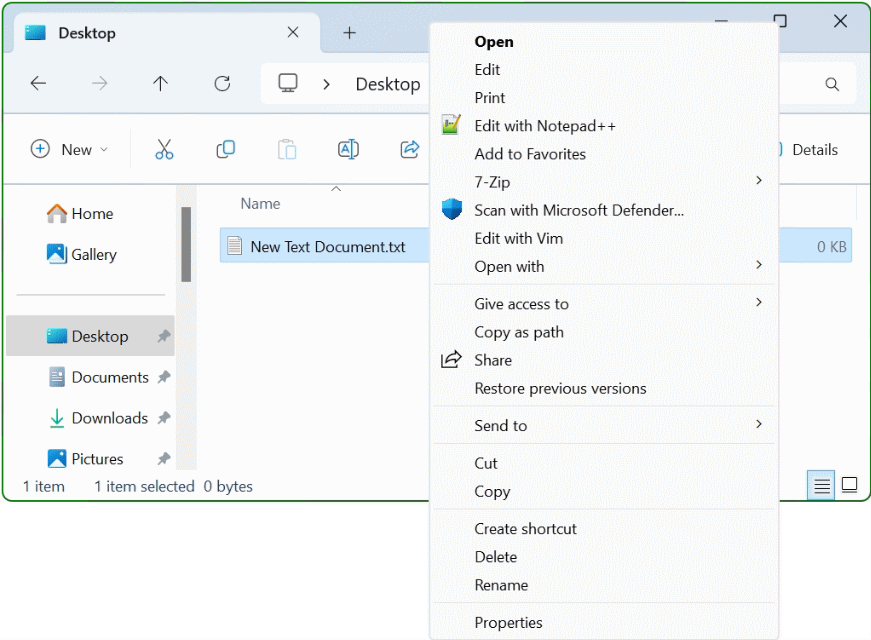
The “Show more options” option can be annoying. For example, I have to click multiple times to send a file to my mobile device. And when this happens a dozen times a day, it can get annoying.
There are a ways to bring back the old classic Windows 10 context menu. You can either edit the Registry Editor entries. Or the easy way, you can tweak the Registry keys directly via Command Prompt.
Open Command Prompt by hit the ![]() + R keys and typing cmd and paste the following command:
+ R keys and typing cmd and paste the following command:
REG ADD "HKCU\Software\Classes\CLSID\{86ca1aa0-34aa-4e8b-a509-50c905bae2a2}\InprocServer32" /ve /t REG_SZ /d "" /fThis simple action will add the keys in the correct sequence.
Restart the computer and enjoy the success!
The Windows Registry Editor is the hub of all Windows settings. And if you know the right key and value, you can customize some parts of your Windows system as per your preference.
Note. the “Custom Context Menu” app from touchwp under Windows 11 use a different approach for deployment, the JSON file created in this way is stored under these path:
%LOCALAPPDATA%\Packages\7061touchwp.CustomContextMenu_m9vp3t2f55f5t\LocalState\custom_commands
![]() However, editing in the Registry Editor is not a simple game, and playing with the wrong key and value may ruin your computer.
However, editing in the Registry Editor is not a simple game, and playing with the wrong key and value may ruin your computer.
Conclusion
That’s how you can customize and add items in the right-click context menu in Windows 11 file explorer. The default context menu looks fine but restrictive. It takes time in getting used to. You can customize it and put the frequently used apps and options over there.

