Identify SSL/TLS Cipher used by an Browser HTTPS Secure Connection
When making a connection using HTTPS, either SSL or TLS will be used to encrypt the information being sent to and from the server. This connection are encrypted by Cipher algorithm and makes it very difficult for a third party to read the data packets between you received in the browser. The information is encrypted using a Cipher or encryption key, the type of Cipher used depends on the Cipher Suite installed and the preferences of the server.
This post describes how to find the Cipher used by an HTTPS browser connection, by using Microsoft Edge, Google Chrome or Mozilla Firefox, to show the current cipher suite and certificate information.
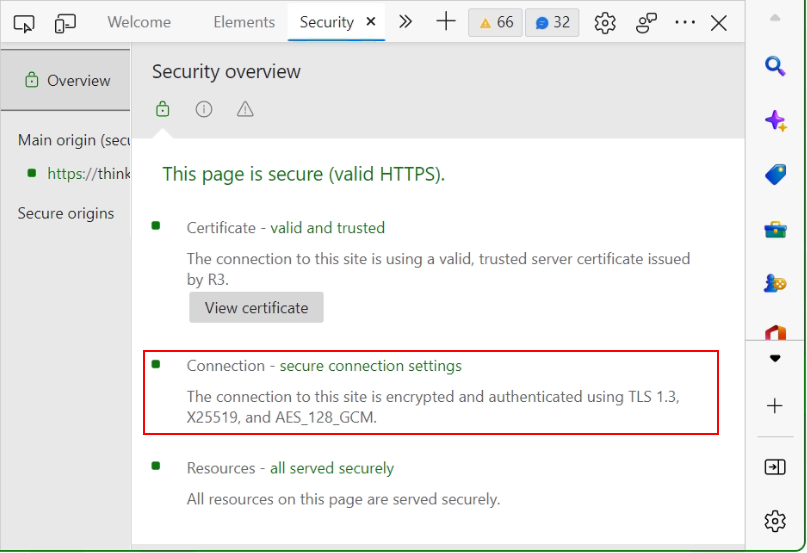
Find the Cipher in Microsoft Edge Browser
Launch Microsoft Edge.
Enter the URL you wish to check in the browser.
Click on the three-dots on the top-right (Alt+F) in the browser.
Select More tools > Developer tools > Security (Ctrl+Shift+I).
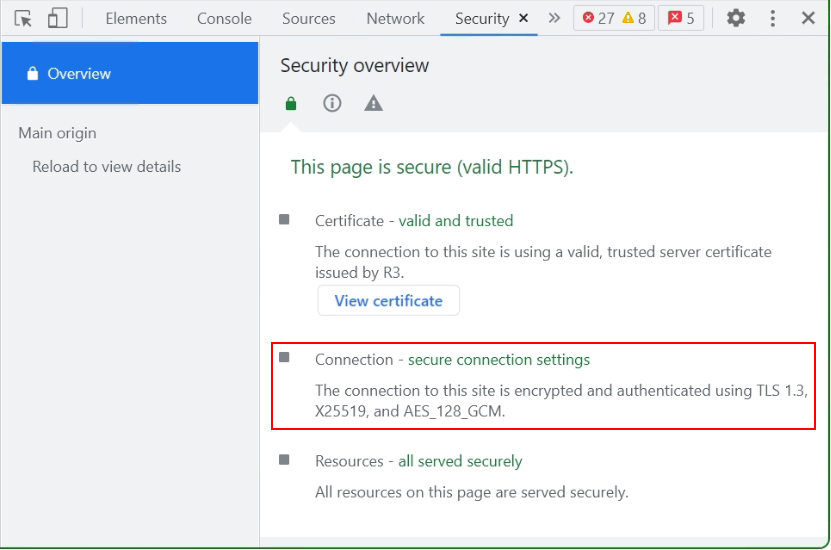
Find the Cipher in Google Chrome Browser
Launch Google Chrome.
Enter the URL you wish to check in the browser.
Click on the three-dots on the top-right (Alt+F) in the browser.
Select More tools > Developer tools > Security (Ctrl+Shift+I).
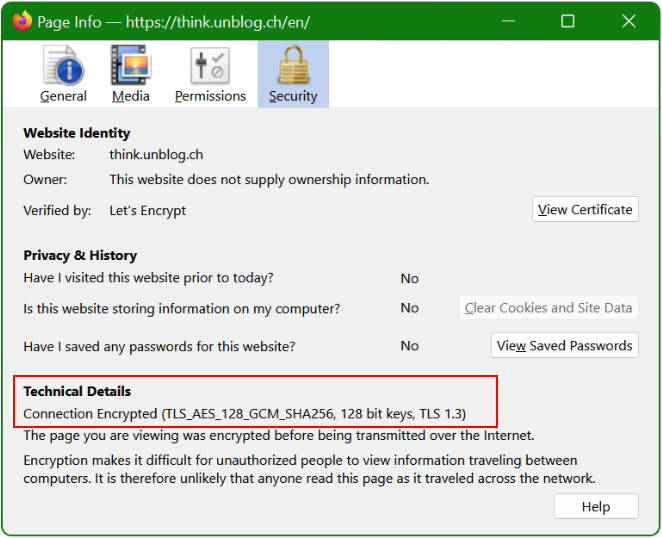
How to find the Cipher in Firefox Browser
Launch Firefox.
Enter the URL you wish to check in the browser.
In the address bar, click the icon to the left of the URL.
Now click on Connection secure > More Information.
Now see the Cipher connection in the Browser.
How to find Cipher using OpenSSL
If you are using a Linux machine and the OpenSSL library is available on the preferred system, you can run the command in the example below.
The next command causes openssl to produce the Cipher connection without using a browser.
$ openssl s_client -verify_quiet -brief think.unblog.ch:443
depth=2 C = US, O = Internet Security Research Group, CN = ISRG Root X1
CONNECTION ESTABLISHED
Cipher Protocol version: TLSv1.3
Ciphersuite: TLS_AES_256_GCM_SHA384
Peer certificate: CN = unblog.ch
Hash used: SHA256
Signature type: RSA-PSS
Server Temp Key: X25519, 253 bits
What is Cipher Suite?
SSL is standard technology for securing an internet connection by encrypting data sent between a website and a browser (or between two servers). It prevents hackers from seeing or stealing any information transferred, including personal or financial data.
A cipher suite is a set of cryptographic algorithms. The schannel SSP implementation of the TLS/SSL protocols use algorithms from a cipher suite to create keys and encrypt information. A cipher suite specifies one algorithm for each of the following tasks: Key exchange. Cipher Browser connection.
Let’s understand Transport Layer Security TLS 1.2 and TLS 1.3 Windows TLS Protocols
Cyber attacks forces systems to more secured communication protocols to protect their assets and network from attacks. TLS plays a vital role in the implementation stack. With TLS is a critical security protocol that is used to encrypt communications between clients and servers. TLS 1.2 and TLS 1.3 are the two latest versions of the Transport Layer Security (TLS) protocol and offer many advantages over their previous versions. TLS 1.2 is the most widely used version of the TLS protocol, but TLS 1.3 is gaining popularity. System administrator should enable TLS 1.2 and TLS 1.3 on Windows Server to enhance the security of infrastructure.
Let’s understand Windows Transport Layer Security, TLS 1.2 and TLS 1.3 and what these TLS protocols offer more than their previous releases. Both TLS 1.2 and TLS 1.3 introduces new cryptographic suites that provide encreased security than the suites used in older TLS and SSL protocols. TLS 1.0 from 1999 and TLS 1.1 from 2006 have both been deprecated since March 2021. Both TLS 1.2 and TLS 1.3 are more resistant to man-in-the-middle attacks and simplify the handshake process, which makes it more difficult for attackers to eavesdrop on communications.
How to Enable TLS 1.2 on Windows Server
Microsoft provide TLS 1.3 protocol support only in Windows 11 and Windows Server 2022 and newer. No support will be provided for TLS 1.3 for Windows 10 and Windows Server 2019 and older. You can refer to the table below that shows the Microsoft Schannel Provider support of TLS protocol versions.
Windows Operating System Supported TLS Protocols:
Windows OS
TLS 1.2 Client
TLS 1.2 Server
TLS 1.3 Client
TLS 1.3 Server
Windows Server 2008 with Service Pack 2
Disabled
Disabled
Unsupported
Unsupported
Windows 7/Windows Server 2008 R2
Disabled
Disabled
Unsupported
Unsupported
Windows 8/Windows Server 2012
Enabled
Enabled
Unsupported
Unsupported
Windows 8.1/Windows Server 2012 R2
Enabled
Enabled
Unsupported
Unsupported
Windows 10, version 1507
Enabled
Enabled
Unsupported
Unsupported
Windows 10, version 1607/Windows Server 2016 Standard
Enabled
Enabled
Unsupported
Unsupported
Windows 10, version 1703
Enabled
Enabled
Unsupported
Unsupported
Windows 10, version 1909/Windows Server 2019
Enabled
Enabled
Experimental
Unsupported
Windows 10, version 2004
Enabled
Enabled
Experimental
Unsupported
Windows 10, version 20H2-21H1-21H2
Enabled
Enabled
Experimental
Unsupported
Windows Server 2022
Enabled
Enabled
Enabled
Enabled
Windows 11
Enabled
Enabled
Enabled
Enabled
*Disabled means support is given but not enabled by default
Enable TLS 1.2 Protocol using Windows Registry
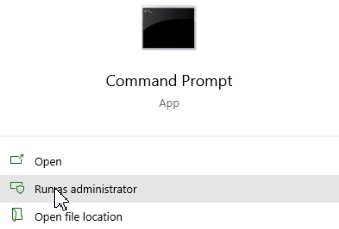
Open up an command prompt as Administrator with hit the Windows+R keys and enter cmd and choose Run as administrator.
Now run the following commands to create the registry entries without to open the registry editor and do not having navigate to the key path.
When an application specifies WINHTTP_OPTION_SECURE_PROTOCOLS, the system checks for the DefaultSecureProtocols registry entry and, if present, overrides the default protocols with the protocols specified in the registry entry. If the registry entry does not exist, WinHTTP uses the existing operating system settings for WINHTTP_OPTION_SECURE_PROTOCOLS HTTP. These WinHTTP defaults follow existing rules of precedence and are overridden by SCHANNEL disabled protocols and protocols set per application by WinHttpSetOption.
The DefaultSecureProtocols registry entry can be added as following :
Note. the value 0x00000800 (hex 2048) means TLSv1.2.
Enable TLS 1.3 Protocol on Windows Server
Similar to above steps, on Windows 11 and newer, Windows Server 2022 and newer, create a DWORD (32-bit) set Enabled keys in the way below to enable TLS 1.3 with add the EnableHTTP3 key.
Internet Explorer and many other web browsers can be configured by changing Internet Options settings. Although Internet Explorer uses all of these settings, other browsers, including Edge, don’t wholly rely on Internet Options for configuration. Microsoft Edge Chromium rendered browser settings can find under edge://settings
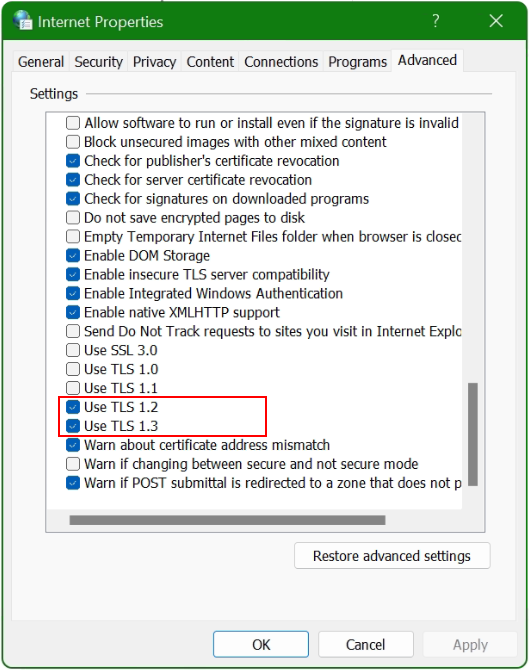
In Windows 10 and Windows 11 there is still the MMC-console module for Internet Properties, which can be opened directly with hit the Windows+R keys and raninetcpl.cpl
1 Windows 112 Windows 10
Windows 11 users can enable TLS v1.3 protocol in the advanced section of the internet options. By default, TLS v1.3 is system-wide enabled. Microsoft Edge start TLS 1.3 support from version 79.
Note. Windows 10 included an experimental implementation of TLS v1.3 with Windows 10 version 1909. By default TLS v1.3 is disabled system-wide, TLS 1.3 can by enabled for testing purposes.
if you want to know what are the cipher preferences of a established HTTPS connection, then the post here gives further assistance.
Conclusion
This post will learn you how to enable Windows TLS Protocols, TLS 1.2 and TLS 1.3 on your Windows operating systems to enhance the security of your infrastructure in a quick and simple way.
UNBLOG verwendet Cookies, um Dein Online-Erlebnis zu verbessern. Mit "ACCEPT" gibst Du Deine Zustimmung zur Nutzung dieser Website und unseren Datenschutzbestimmungen, oder wähle Cookie settings.
Diese Website verwendet Cookies, um Ihre Erfahrung zu verbessern, während Sie durch die Website navigieren. Von diesen werden die Cookies, die nach Bedarf kategorisiert werden, in Ihrem Browser gespeichert, da sie für das Funktionieren der grundlegenden Funktionen der Website wesentlich sind. Wir verwenden auch Cookies von Drittanbietern, mit denen wir analysieren und verstehen können, wie Sie diese Website nutzen. Diese Cookies werden nur mit Ihrer Zustimmung in Ihrem Browser gespeichert. Sie haben auch die Möglichkeit, diese Cookies zu deaktivieren. Das Deaktivieren einiger dieser Cookies kann sich jedoch auf Ihre Browser-Erfahrung auswirken.
Notwendige Cookies sind unbedingt erforderlich, damit die Website ordnungsgemäß funktioniert. Diese Kategorie enthält nur Cookies, die grundlegende Funktionen und Sicherheitsmerkmale der Website gewährleisten. Diese Cookies speichern keine persönlichen Informationen.
Alle Cookies, die für die Funktion der Website möglicherweise nicht besonders erforderlich sind und speziell zur Erfassung personenbezogener Daten des Benutzers über Analysen, Anzeigen und andere eingebettete Inhalte verwendet werden, werden als nicht erforderliche Cookies bezeichnet. Es ist obligatorisch, die Zustimmung des Benutzers einzuholen, bevor diese Cookies auf Ihrer Website ausgeführt werden.