Tag Archives: Synology DiskStation RackStation

Synology Inc. is a Taiwanese corporation that specializes in network-attached storage (NAS) appliances. Synology’s line of NAS is known as the DiskStation for desktop models, and RackStation for rack-mount models. Synology’s products are distributed worldwide and localized in several languages.

How to Install Nano Editor on Synology NAS

Apply Nano Editor on Synology DSM Terminal Shell

This article shows how to deploy Nano editor on a Synology NAS for editing in the Synology Shell via SSH. For users who are not empowered by the VIM Editor, there is a remedy by installing the often preferred editor Nano, since Nano is easier to use than VIM. Fortunately, you can easily add additional software repositories to the Synology NAS to install Nano and many other tools.

Nano is not provided or managed by Synology itself, but can be get from the SynoCommunity repository. The SynoCommunity offers free packages for Synology NAS devices.

How to add the SynoCommunity repository

Synology Main Menu

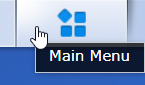
From DSM you open the main menu with the icon at the top left, there you will find the Package Center.

By clicking on the icon Package Center to open this, then click the Settings button.

Synology Package Center
Nano Editor in Synology, Synology DSM Package Center

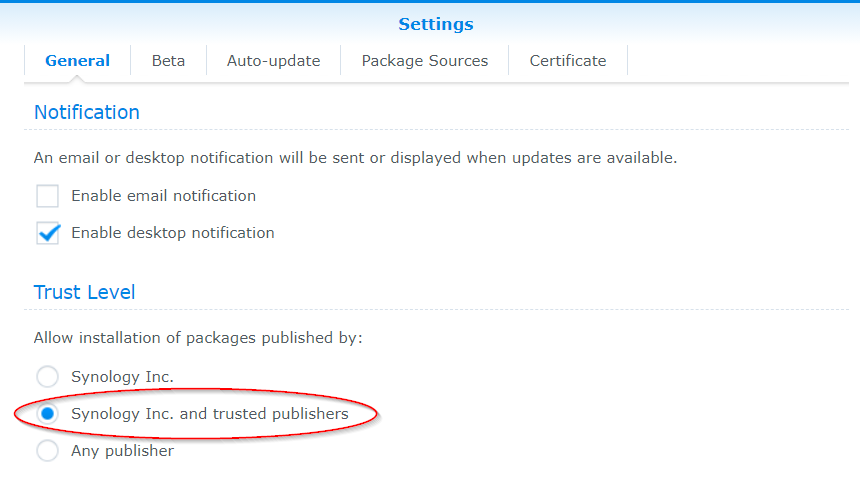
In the now open General under Trust Level, enable the Synology Inc. and trusted publishers option.

Nano Editor in Synology, Synology Settings Trust Level

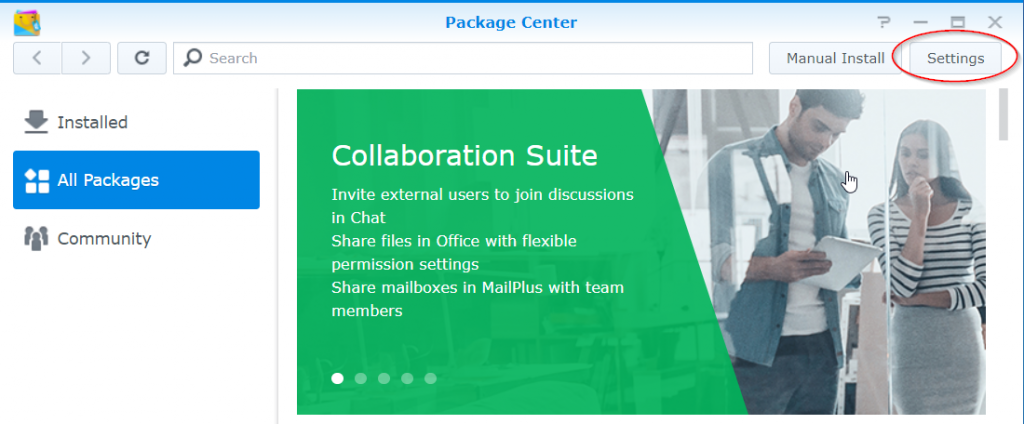
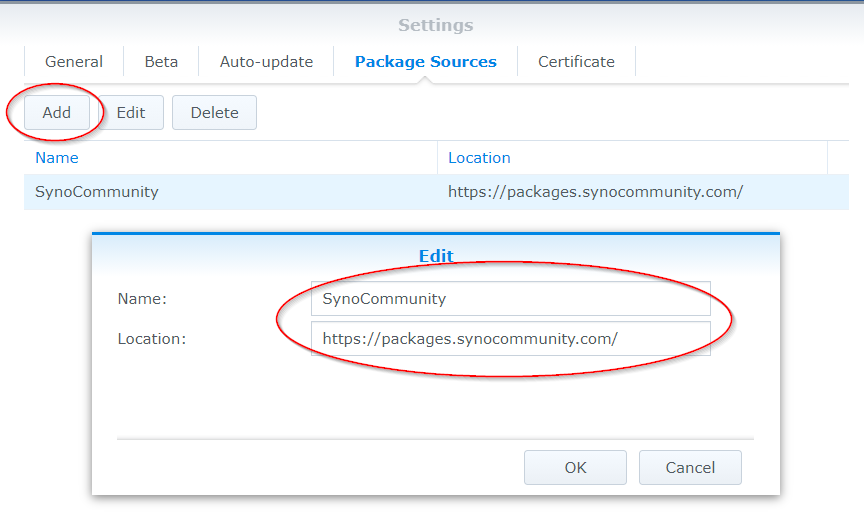
Then go to the Package Sources section.

Synology DSM Package Sources

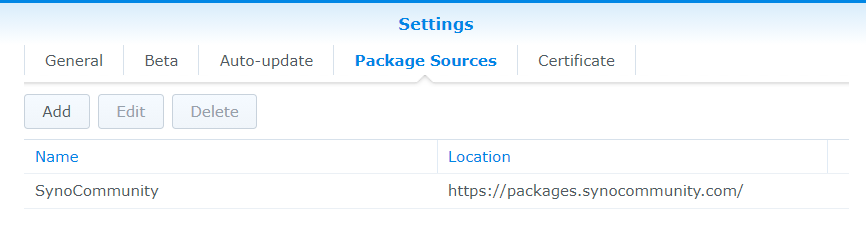
Click the Add button and add the package source. Enter SynoCommunity as the name, and insert the URL https://packages.synocommunity.com/ at location and click OK.

Synology Add Package Sources

Install Nano Editor on Synology

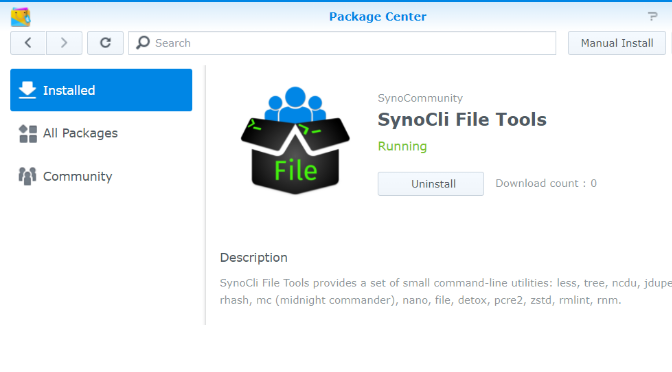
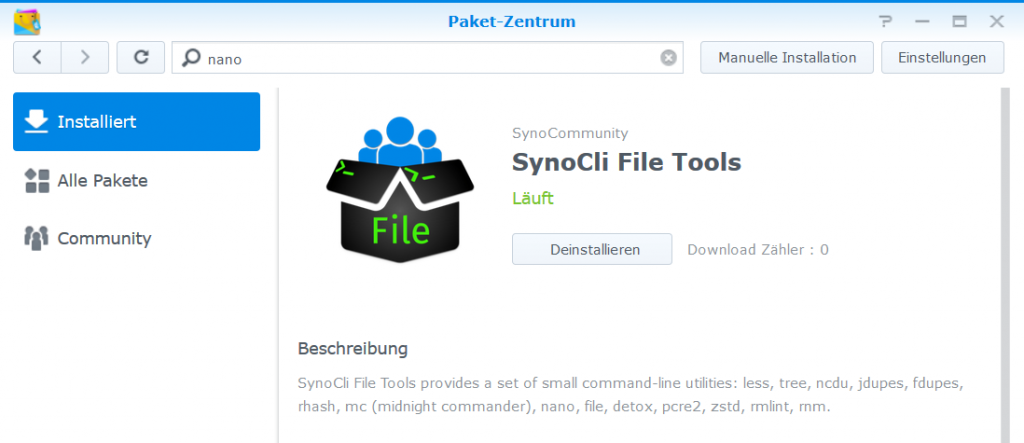
Packages can now be installed. The SynoCli File Tools package provides the following command-line utilities: less, tree, ncdu, jdupes, rhash, mc (midnight-commander), nano, file, detox, rmlint, rnm, pcre2, zstd. Nano used to be a separate package, but is now only available through the SynoCli File Tools package.

Install Synocli File Tools and Nano Edtor on Synology

Now you can connect to diskstation with use a terminal like PuTTY and editing in the shell using nano, for example the SSH server configuration file.

diskstation:/$ sudo nano /etc/ssh/sshd_config
 
We trust you have received the usual lecture from the local System
Administrator. It usually boils down to these three things:
 
    #1) Respect the privacy of others.
    #2) Think before you type.
    #3) With great power comes great responsibility.
 
Password:

With the admin password what sudo requires, the file sshd_config is loaded into the editor here.

Use nano in Synology DSM shell console

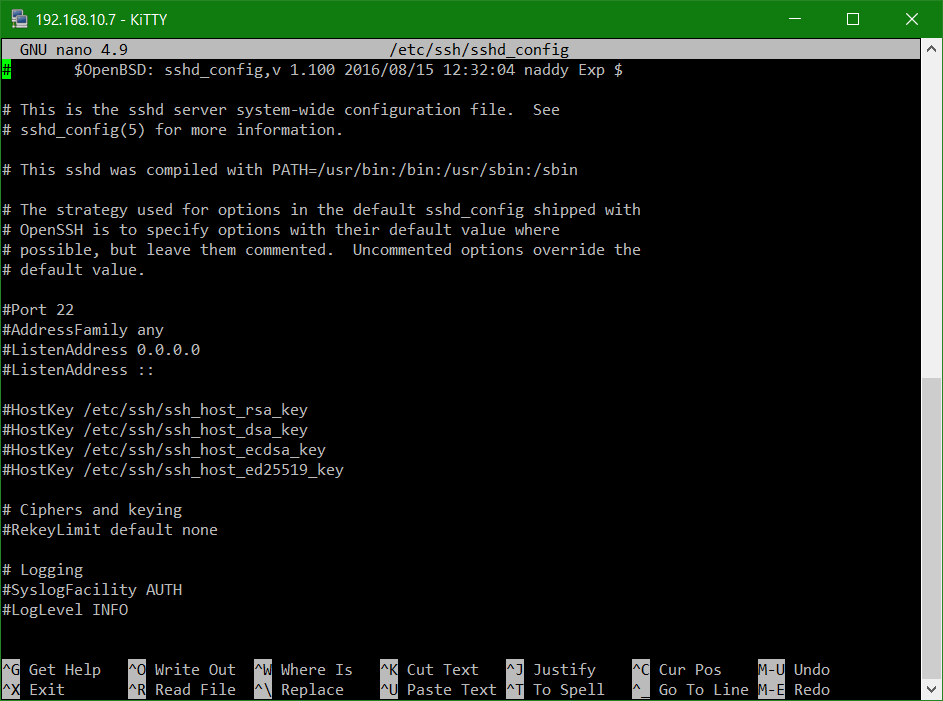
After editing, press the keys Ctrl + X, nano asks if the change should be saved, which can be confirmed with Y if necessary, otherwise N can be selected.

  Remember, changes to system files require knowledge of the function and its effects.

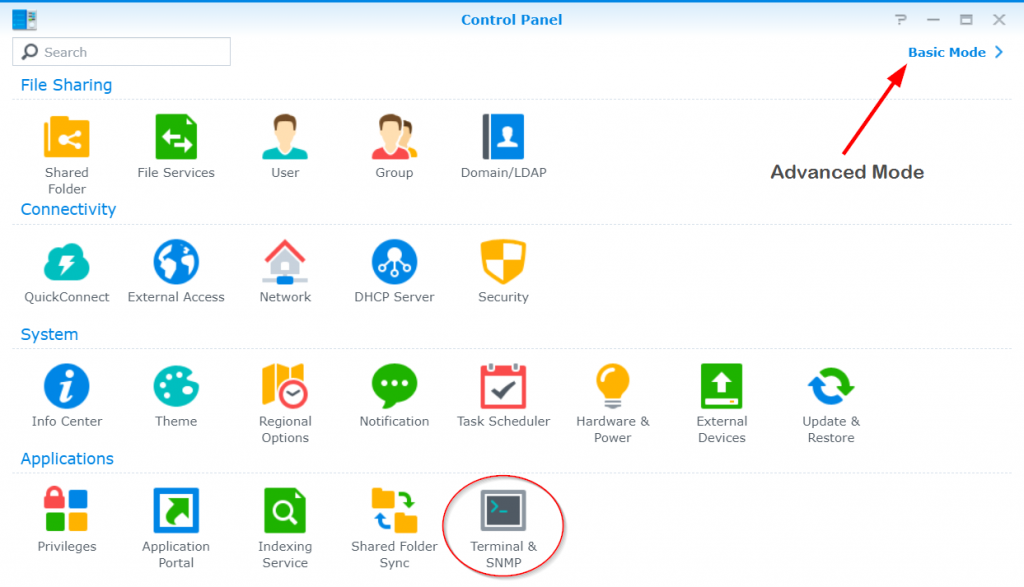
Enable Synology DSM SSH service

In order for the terminal to be accessible via SSH, the SSH service must be activated in the DSM Control Panel, under Terminal & SNMP. To make shure the Icon Terminal & SNMP is visible, Advanced Mode is selected at the top right.

Synology Control Panel

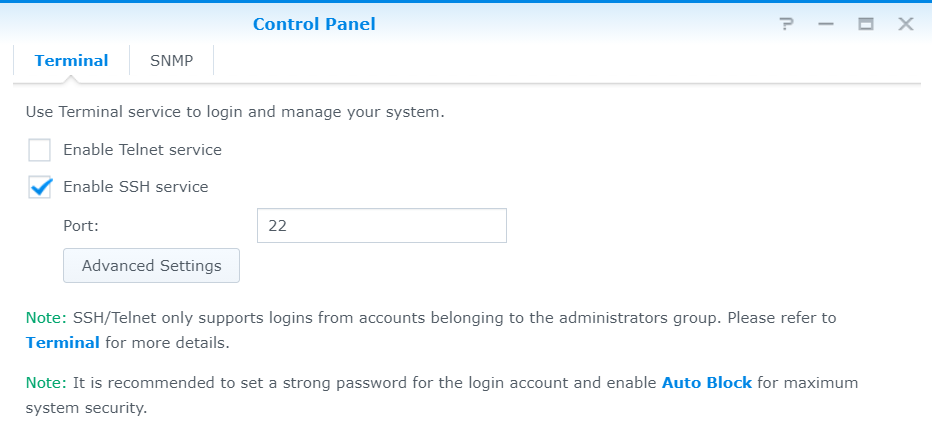
In the Terminal window, enable the SSH service option.

Synology Enable SSH service

Next post on the same topic might be helpful, see in How to Install Midnight Commander on Synology NAS

Synology Hyper Backup Replication

Backup replication with Hyper Backup and rsync

Synology Hyper Backup enables versatile use in data backup applications. In case of requests in these, the secured data should also be stored on another NAS, for example for the worst-case scenario, in case of fire or water damage in the server room, precautions are taken. There is the possibility to synchronize the backup storage with a second NAS, preferably in another building, or if there is the possibility to be located in a different location.

This article shows the structure of data synchronization between two NAS. The data backed up with Hyper Backup on the RackStation is synchronized with a DiskStation that is on the same network but is installed in another building.

To start, rsync is enabled on the external DiskStation, under Enable data services – rsync – rsync service.

To start, rsync is enabled on the external DiskStation, under Enable data services - rsync - rsync service.

For rsync account enable the Edit rsync account button and add a user.

Edit rsync account

Now with the RackStation, which runs the Hyper Backup backup, open the Hyper Backup app and create a new backup task by clicking on (+) Plus.

The Hyper Backup Backup Wizard is opened, as a backup destination under File Server you select rsync and click on next.

File Server you select rsync and click on next.

Create a backup task with a server name or IP address as the backup destination, enter user name and password, choose the shared folder and a directory.

synology choose the shared folder and a directory.

Shares can be selected to be saved.

Synology Shares can be selected to be saved.

If you want to back up applications, they can be selected, this is not required for synchronization.

If you want to back up applications, they can be selected, this is not required for synchronization.

Backup settings define the task notification and backup schedule.

Backup settings define the task notification and backup schedule.

Rotation settings can define backup rotation, with backup schedule and rotation scheme for a desired number of retained versions.

From the DSM on the RackStation, the first backup to the second NAS can now be made. The backup task can be added to an existing task, or a new backup task can be created, and it is recommended that you allow sufficient time between the two jobs to ensure that the second job is not started until the first backup is complete.

synology_datensicherung

When DiskStation receives the synchronized data, the Hyper Backup backup appears as an hbk folder, the folder can be opened with a deflator click, for which Hyper Backup must be installed.