Archiv der Kategorie: Linux Howto

THINK UNBLOG GNU/Linux Tutorials Howto Workaround DevOps Code.

Z-Push Installation

Lerne in diesem Tutorial wie Z-Push auf Debian bereitgestellt wird, mit Apache 2.4 und Kopano 8.7. Die Installation von Z-Push erfolgt aus dem Debian Repository.

Z-Push InstallationZ-Push ist eine Open-Source Anwendung zur Synchronisation ActiveSync-kompatibler Geräte wie Mobiltelefone, Tablets und Outlook 2013 und höher. Langjährige Erfahrung in der Synchronisation basierend auf ActiveSync machte Z-Push für viele Backends zur führenden Open-Source Push-Synchronisation.

Die wichtigsten Plattformen für die drahtlose Synchronisierung ist ActiveSync für die Kommunikation mit Exchange Server. Beide Lösungen erfordern proprietäre serverseitige Software vom Hersteller. Wodurch die Verwendung von PIMs (Personal Information Manager) entweder auf die kabelgebundene Synchronisierung oder auf die Synchronisation von Drittanbietern beschränkt ist, die eine Installation von Client-Software auf dem PDA erfordert.

Hier kommt Open Source Z-Push ins Spiel. Es handelt sich um eine Implementierung des ActiveSync-Protokolls von Microsoft. Das drahtlos für ActiveSync-fähige Geräte mit mehreren Plattformen verwendet, darunter Apple iPhone und iPad, Android- und Blackberry 10-Geräte. Mit Open Source Z-Push kann jedes PHP-basierte Groupware-Paket vollständig mit jedem ActiveSync-kompatiblen Gerät synchronisiert werden.

Installation von Z-Push

Die in dieser Anleitung verwendete distribution ist Debian 10 (buster) mit Apache 2.4 und Kopano 8.7. Die Installation von Z-Push erfolgt aus dem Repository als root:

$ wget -qO - https://download.kopano.io/zhub/z-push:/final/Debian_10/Release.key | apt-key add -
$ echo "deb https://download.kopano.io/zhub/z-push:/final/Debian_10/ /" | tee /etc/apt/sources.list.d/z-push.list
$ apt update
$ apt install -y z-push-kopano z-push-config-apache

Nach der Installation ist das Hauptverzeichnis unter dem Pfad /usr/share/z-push zu finden.

Hinweis: Ist der Kopano Server auf einem anderen Host muss MAPI_SERVER in /etc/z-push/kopano.conf.php an die Umgebung anpassen werden.

Die Z-Push Protokollierung ist in der Standardkonfiguration nicht aktiviert, kann aber sehr nützlich sein. Für die Log-Datei erstellt man ein Verzeichnis mit mkdir /var/log/z-push. Dann die Protokollierung ca. bei Zeile 116 aktivieren, mit nano oder vi /etc/z-push/z-push.conf.php

// Filelog settings
define('LOGFILEDIR', '/var/log/z-push/');
define('LOGFILE', LOGFILEDIR . 'z-push.log');
define('LOGERRORFILE', LOGFILEDIR . 'z-push-error.log');

Mit dem neustart des Apache Webserver werden die änderungen aktiviert, mit dem Command.

$ systemctl restart apache2.service

Z-Push auf CentOS 7

Für CentOS 7 ist das Repository in der Datei /etc/yum.repos.d/z-push.repo wie folgt anzulegen.

Die folgenden Zeilen im Terminal mit Copy & Paste einfügen:

cat <<EOF> /etc/yum.repos.d/z-push.repo
[z-push]
name=Z-Push noarch Enterprise Linux 7 - $basearch
baseurl=http://repo.z-hub.io/z-push:/final/RHEL_7
failovermethod=priority
enabled=1
gpgcheck=0
EOF

Das Z-Push Repository ist hinzugefügt und bereit für die Installation.

  Wenn das Repository RHEL_6_PHP_56 oder RHEL_7_PHP_56 verwendet wird, und die Kommunikation zwischen Prozessen zwischengespeichert werden, stelle sicher dass das Remis-Repository aktiviert ist.

$ yum update

Auch hier kommt der Apache Webserver als Kopano-Backend zum Einsatz, führe zur Installation von Z-Push folgendes Command aus:

$ yum install z-push-common z-push-config-apache z-push-backend-kopano z-push-ipc-sharedmemory

Bei CentOS wird der Apache Webserver wie folgt neu gestartet:

$ systemctl restart httpd.service
Kopano Fail2ban Filter

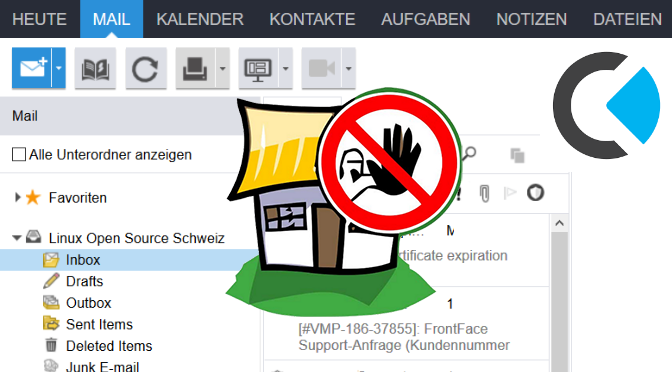
Kopano Server Attacken Schutz mit Fail2ban Filter

Dieses Howto beschreibt die Installation und Konfiguration von Fail2ban für die Kopano Groupware auf Ubuntu. Fail2ban bietet effektiven schutz gegen Brute-Force Attacken, in dem aus Syslog und Apache Protokoll fehlgeschlagene Versuche von Authentifizierungen herausgefiltert werden, um anschliessend den Host für eine bestimmte Zeit mittels Kernel Firewall zu blockieren.

Installation Fail2ban auf Kopano Server

Das Paket Fail2ban wird auf Ubuntu als root wie folgt installiert. Fail2ban ist auf Python entwickelt, weshalb die erforderlichen Bibliotheken nachgeladen werden.

$ apt-get update
$ apt-get install fail2ban -y

Nach der Installation wird Fail2ban ausgeführt und in systemd für den autostart aktiviert.

$ systemctl start fail2ban
$ systemctl enable fail2ban

Fail2ban Filter für Kopano bereitstellen

Ein Filter für Kopano bereitstellen, wir erstellen die Datei kopano-webapp-auth.conf

$ vi /etc/fail2ban/filter.d/kopano-webapp-auth.conf

Den Inhalt mit folgenden Zeilen in die Filter Datei einfügen:

# Fail2Ban kopano-webbapp-auth filter
# /etc/fail2ban/filter.d/kopano-webapp-auth.conf

[INCLUDES]
before = apache-common.conf

[Definition]
failregex = ^%(_apache_error_client)s Kopano WebApp user:.* authentication failure at MAPI

ignoreregex =

Fail2ban Filter in jail.conf aktivieren

Aktiviere den Fail2ban Filter für Kopano, mit erstellen der Konfigurationsdatei jail.local.

$ vi /etc/fail2ban/jail.local

Und den folgenden Inhalt einfügen:

[sshd]
port    = ssh
logpath = %(sshd_log)s

[kopano-webapp]
enabled = true
port    = https
filter  = kopano-webapp-auth
logpath = %(apache_error_log)s

[apache-auth]
enabled = true
port    = http,https
logpath = %(apache_error_log)s

Hier wird error.log ausgelesen mit der Variable %(apache_error_log), /var/log/apache2/error.log

Fail2ban erneut starten um die änderungen zu aktivieren.

$ systemctl restart fail2ban

Fail2ban Client Status überprüfen

Den Status von Fail2ban kann wie folgt überprüft werden.

$ fail2ban-client status
Status
|- Number of jail:      3
`- Jail list:   apache-auth, kopano-webapp, sshd
 
root@kopano:~# fail2ban-client status kopano-webapp
Status for the jail: kopano-webapp
|- Filter
|  |- Currently failed: 0
|  |- Total failed:     7
|  `- File list:        /var/log/apache2/mattermost-error.log /var/log/apache2/error.log
`- Actions
   |- Currently banned: 4
   |- Total banned:     52
   `- Banned IP list: 10.10.10.101 172.17.88.91 172.31.16.3 10.32.57.98

Die Firewall gibt Aufschluss über den Status der aktuell durch Fail2ban geblockten Quellen, mit einer iptables Abfrage:

$ iptables -vnL | egrep "f2b-kopano-webapp|apache-auth|sshd"
Kopano Fail2ban Filter

Fail2ban intrusion prevention software framework

Fail2ban is an intrusion prevention software framework. Written in the Python programming language, it is designed to prevent brute-force attacks. It is able to run on POSIX systems that have an interface to a packet-control system or firewall installed locally, such as iptables or TCP Wrapper.

Fail2ban operates by monitoring log files (e.g. /var/log/auth.log, /var/log/apache/access.log, etc.) for selected entries and running scripts based on them. Most commonly this is used to block selected IP addresses that may belong to hosts that are trying to breach the system’s security. It can ban any host IP address that makes too many login attempts or performs any other unwanted action within a time frame defined by the administrator.

It includes support for both IPv4 and IPv6. Optionally longer bans can be custom-configured for „recidivist“ abusers that keep coming back. Fail2ban is typically set up to unban a blocked host within a certain period, so as to not „lock out“ any genuine connections that may have been temporarily misconfigured. However, an unban time of several minutes is usually enough to stop a network connection being flooded by malicious connections, as well as reducing the likelihood of a successful dictionary attack.